Introduzione
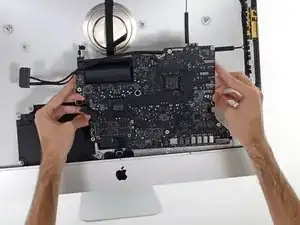
Guida solo prerequisita per sostituire il gruppo della scheda madre in un iMac da 27" del 2017.
-
-
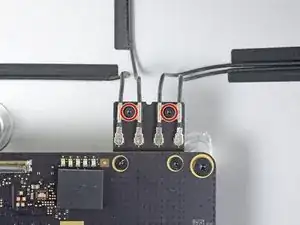
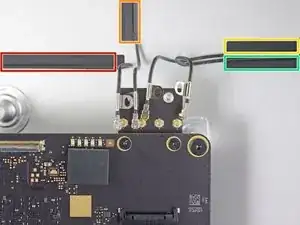
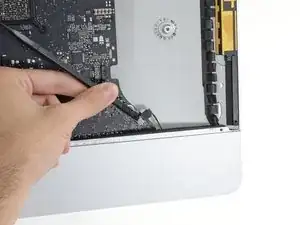
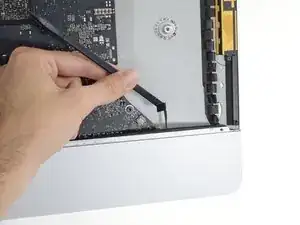
Usa un cacciavite Torx T5 per rimuovere le due viti da 4 mm che tengono fermi i cavi delle antenne AirPort/Bluetooth.
-
-
-
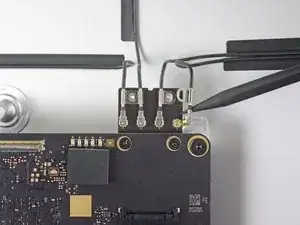
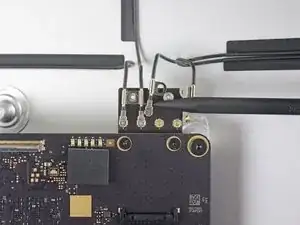
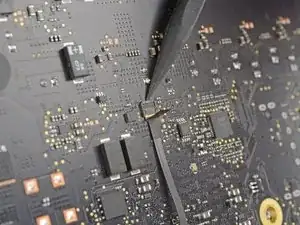
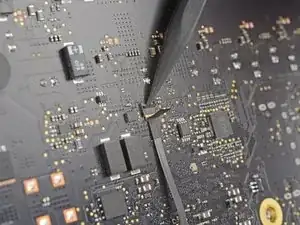
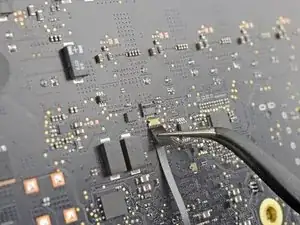
Usa la parte piatta di uno spudger per scollegare tutti i quattro connettori delle antenne dalla scheda AirPort/Bluetooth.
-
Il più a sinistra
-
Quello in alto
-
Quello sopra a destra
-
Quello sotto a destra
-
-
-
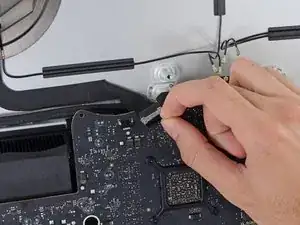
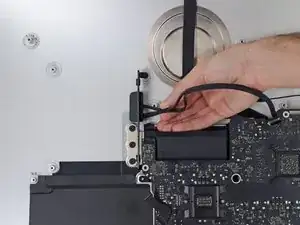
Ruota verso l'alto la staffa di bloccaggio in metallo sul cavo della fotocamera iSight.
-
Sfila il connettore del cavo della fotocamera dalla sua presa, tirandolo verso la parte superiore dell'iMac.
-
-
-
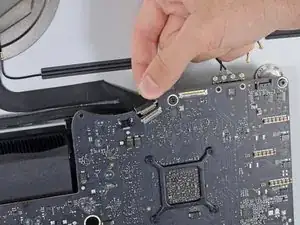
Usa la parte piatta di uno spudger per scollegare il connettore del cavo della presa jack dalla sua presa sulla scheda madre.
-
Sposta delicatamente da parte il cavo.
-
-
-
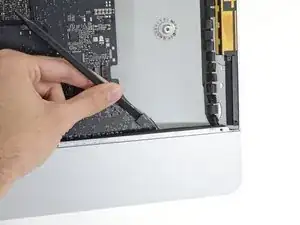
Usa la punta di uno spudger per aprire, ruotandola, l'aletta di bloccaggio sul connettore ZIF del cavo a nastro del microfono.
-
Usa delle pinzette per sfilare delicatamente il cavo a nastro del microfono dalla sua presa.
-
-
-
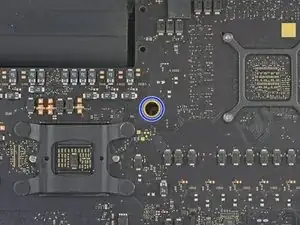
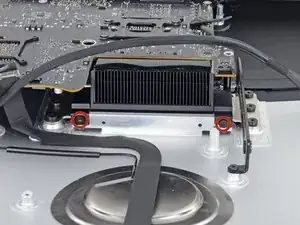
Svita le seguenti viti che tengono ferma la scheda madre:
-
Due viti Torx T8 da 23,7 mm
-
Una vite distanziale Torx T25 da 20,1 mm
-
Una vite Torx T8 da 17,6 mm
-
Una vite Torx T8 da 7,2 mm
-
Tre viti Torx T8 da 7,1 mm
-
Una vite imperdibile Torx T8
-
-
-
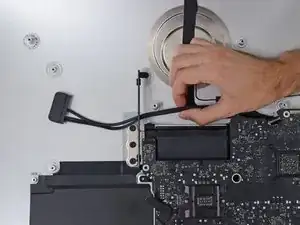
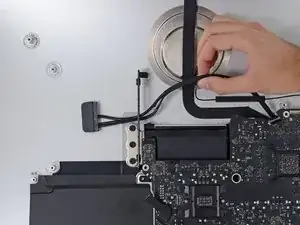
Tira il cavo SATA del disco rigido e il connettore attraverso la staffa destra del disco rigido. Sposta il cavo alla destra dell'iMac, lasciando libera la porta dello scarico.
-
-
-
Usa un cacciavite Torx T8 per svitare le due viti da 5,6 mm dalla parte superiore del condotto di scarico del dissipatore.
-
-
-
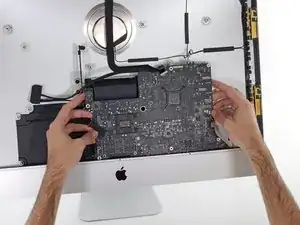
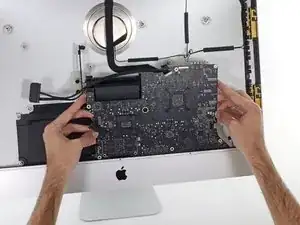
Inclina leggermente in avanti la scheda.
-
Solleva la scheda madre e rimuovila dall'iMac. Stai attento a non rompere nessuna delle prese per le viti fissate all'interno della copertura posteriore.
-
-
-
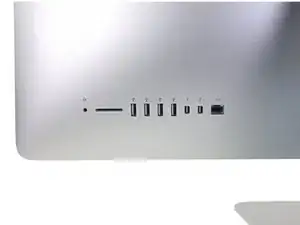
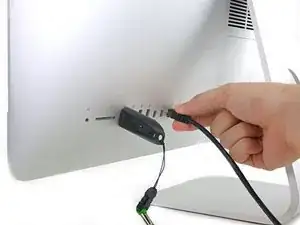
Mentre rimonti il tuo iMac, stai molto attento ad allineare correttamente le porte I/O esterne. La scheda può essere storta anche con tutte le sue viti avvitate.
-
Puoi usare una chiavetta USB o un cavo ethernet per assicurarti che la scheda madre sia posizionata correttamente mentre la avviti.
-


Per rimontare il tuo dispositivo, segui le istruzioni in ordine inverso.

Rather than unscrew the antenna cables, I usually unscrew the screws on the board and slide out the whole AirPort/Bluetooth module, which means I need not keep track of which antenna cable goes where.
johann beda -
Fully agree with comment of johann! I did it that way and was glad to not having to deal with the microscopic IPEX "coax" antenna connectors and order of them.
I'd like to add that after removing the 2 screws, the wifi/bt module is still holding into these 2 holes with 2 metal pieces.
Before pulling the module out of its socket, one has to slightly lift it away from the mainboard (maybe 1mm, so the metal pieces leave the holes).
Thomas Waldmann -
Confirmed. 2 T5 screws, and pull the board straight up out of its socket behind he motherboard. Leave all cables attached.
ebay -
Fully agree. It is not only handy for order of cables but especially eliminates risk of damaging the quite delicate IPEX connectors on the broadcomm wifi/bluetooth board when removing and reconnecting later. This happened to me. It is a huge hassle to replace / repair.
This should be main option!! Wish I read this comment first.
Starting Genius -
Does anyone know if this board can be upgraded to Bluetooth 5
Chris -