Introduzione

Aggiorna l'hard drive per avere più spazio di memorizzazione!

  1. YkoEfqbWbrNPgNSB
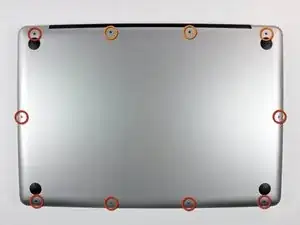
    • Rimuovi le dieci viti seguenti, che fissano il case inferiore a quello superiore:

    • Sette viti con testa a croce da 3 mm.

    • Tre viti con testa a croce da 13,5 mm.

  2. KmDGlwcxPu6ph3sm
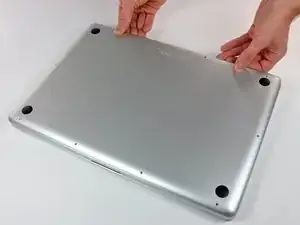
    • Solleva con entrambe le mani il case inferiore in prossimità della presa d'aria per estrarre le due levette di fissaggio al case superiore.

    • Rimuovi il case inferiore e mettilo da una parte.

  3. LHeE6iVx3STyDO3D
    • La batteria è fissata al case superiore mediante tre viti Pentalobe a cinque punte. È possibile rimuoverle mediante questo apposito cacciavite.

    • Se non haui un cacciavite Pentalobe, puoi usare un normale cacciavite a taglio da 1,5 mm. Verifica che la testa del cacciavite piatto si inserisca fermamente fra due delle cinque punte della testa della vite prima di iniziare a svitare, altrimenti rischi di spanare la testa della vite.

    • Se la punta del cacciavite si muove troppo nella testa della vite, prima di procedere prova punte più grandi finché non si inseriscono senza gioco.

    • Non occorre necessariamente seguire i passaggi da 3 a 7 per rimuovere la batteria per sostituire il disco rigido. Tuttavia, si consiglia di rimuovere tutte le fonti di alimentazione dai componenti elettronici prima di operare su di essi.

    It really depends on how thick the 1.5 mm flathead screwdriver is. I tried a low-cost tool and almost destroyed the screw. So be carefull

    Paul -

    Unfortunately, when I added a second hard drive via these instructions, all went well but Bluetooth is now MIA. Can anyone help?

    Peter Payne -

    I agree...

    I have bought a used MacBook Pro, when problems arise, opening Corps was trying to turn the screw, but with poor quality could not turn a screwdriver, only to ruin the screw. Try to buy ifixit Screwdriver set. Good luck to all and thank you ifixit team for such assistance as ifixit.com. Thank you.

    remjok -

  4. xGAhgZZyYYcDTHGa
    • Rimuovi le due viti di sicurezza Pentalobe esposte lungo il bordo superiore della batteria.

    The screws holding my battery were all worn out since an earlier removal. So instead of ruining them even more I put some saran wrap on the tip of my pentalobe driver and gently unscrewed them.

    magnus -

    I have a problem with these screw. They a completly warn and I need some new ones to fix the new Battery.

    Does anyone know which thread it is and which length?

    alexanderleith -

  5. Cu1rp51DpHW16GLl
    • Usa la punta di uno spudger per piegare all'indietro l'aletta dell'adesivo che avverte di non rimuovere la batteria "Warning: Do not remove the battery" mentre rimuovi le viti Pentalobe nascoste sotto.

  6. QphNb6fJqTBD2cYF
    QphNb6fJqTBD2cYF
    cdkwbvUvHl3QeCJg
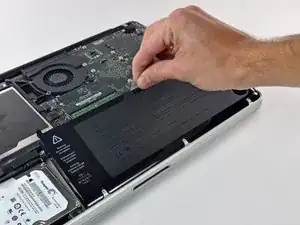
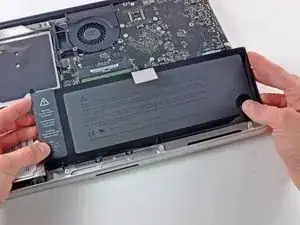
    • Solleva la batteria tirandola dalla linguetta di plastica e falla scorrere lontano dal bordo lungo del case superiore.

    • Non tentare ancora di rimuovere completamente la batteria.

  7. BQ1JtoRMPS3hs3VU
    • Inclina la batteria all'indietro quanto basta per rendere accessibile il connettore del cavo della batteria.

    • Tira via il connettore del cavo della batteria dallo zoccolo sulla scheda logica e rimuovi la batteria dal case superiore.

    • Se stai installando una nuova batteria, dovresti calibrarla non appena è possibile.

  8. i6RbaPgdvgYfiqIM
    i6RbaPgdvgYfiqIM
    PIFZXlvxZn4jNMlr
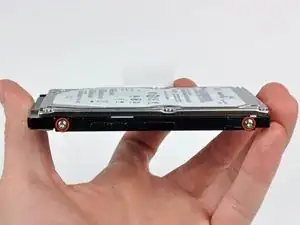
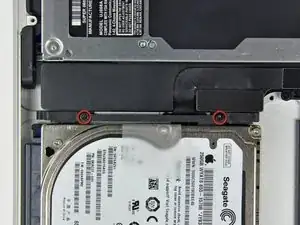
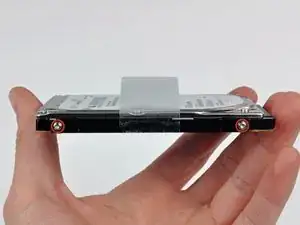
    • Rimuovere le due viti con testa a croce che fissano la staffa del disco rigido al case superiore.

    • Queste viti restano nella staffa del disco rigido.

    • Sollevare la staffa di fissaggio fuori dal case superiore.

  9. ZRiWkDhEOHhb12CQ
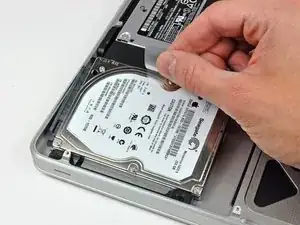
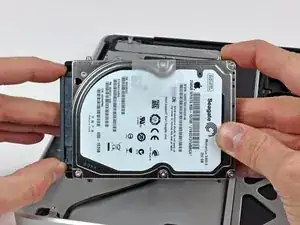
    • Sollevare il disco rigido dall'apposita linguetta ed estrarlo dal case, ricordando che è ancora collegato al computer tramite il cavo.

  10. 4DHpJYBUMB6MxFVJ
    4DHpJYBUMB6MxFVJ
    Q2QUK3dCpM2t3WP6
    • Scollegare il cavo del disco rigido estraendolo direttamente dall'unità stessa.

  11. QsSrUM45W5eoPbOU
    QsSrUM45W5eoPbOU
    FrJnyWuMPlJh61lp
    • Rimuovi le due viti Torx T6 da ciascun lato del disco fisso (quattro viti in totale).

    • Se stai cambiando disco, devi trasferire queste viti sulla nuova unità.

    • Se stai installando un nuovo disco fisso, abbiamo una guida di installazione OS X per aiutarti a tornare rapidamente al lavoro.

Conclusione

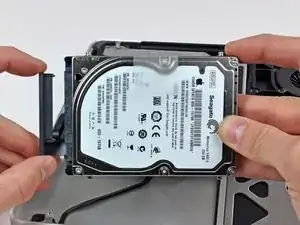
Per rimontare il tuo dispositivo, segui queste istruzioni in ordine inverso.

Walter Galan

693762 Reputazione

6 commenti

The guide states you must remove the battery in order to replace the hard drive. This is incorrect- it is merely a safety precaution. If you do not have the specific pentalobe screwdriver, DO NOT ATTEMPT THIS. I just replaced a hard-drive in one of these macs, that someone had already stripped the screw head. The screws are tapered too, so no getting it out once stripped.

The battery does not interfere with this repair, so simply remove the two screws on the hard-drive bracket (step 8), replace the drive then put the mac back together.

[deleted] -

Does replacing hard drive remove Moutan Lion OSX I did download update and don't have disk. Also how to transfer files to new larger GB hard drive

Brando -

If you have problems when installing Mavericks after the battery has been removed maybe your Mac has the wrong date and time.

In Mavericks installscreen, start the terminal, type "date" and enter...if the wrong date is displayed type:

date {month}{day}{hour}{minute}{year}

Every bracket should be replaced with a two-digit number. For example, March 18th 2013 12:50 would become the following command:

date 0318125013 + enter

Peter H -

Actually I could just lift the battery connector without removing the battery at all. Worked out fine for me.

hanshans -

Thanks for the guide. I honestly feel like I got a new Mac. I installed one of iFixit's hybrid 1TB SSD (SSD with backing HD). My Mac was unusable and painful to use it was so slow. Now it's like brand new.

Removing the battery connector was hard to do with finger force alone, I had to entice it with a flat head screw driver. Getting the full iFixIt toolkit gives you all of the tools except the spudger which really could be improvised with something else.

jmeredith -

As always, an excellent description and exact visualization of the work steps - Thank you!

Alexander Mac -