Introduzione
Se il tuo frullatore non gira o è molto rumoroso, segui questa guida su come sostituire l'ingranaggio a vite senza fine.
Ricambi
-
-
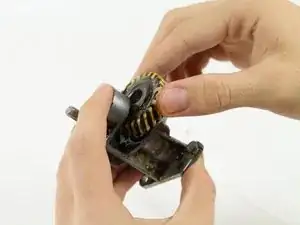
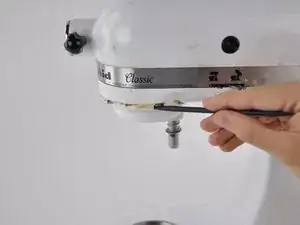
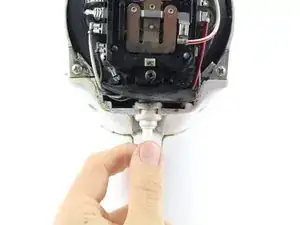
Usando un cacciaspine da 4 mm e un martello, colpisci il perno finché non è separato dalla copertura dell'ingranaggio a planetario.
-
-
-
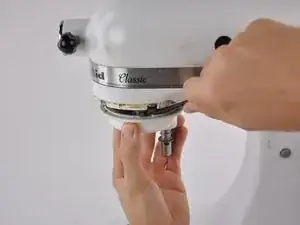
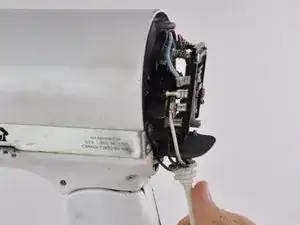
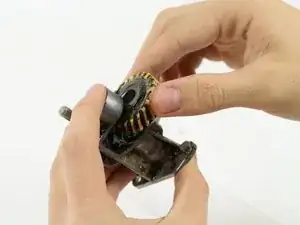
Usa uno spudger per fare leva e rimuovere la copertura dell'ingranaggio a planetario dall'albero del frullatore.
-
-
-
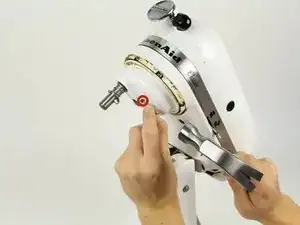
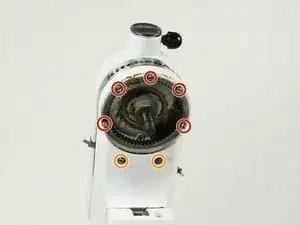
Usa un cacciavite a testa piatta per svitare le cinque viti da 28 mm nell'alloggio anteriore del motore.
-
Usa lo stesso cacciavite per svitare le due vidi di bloccaggio da 28 mm.
-
-
-
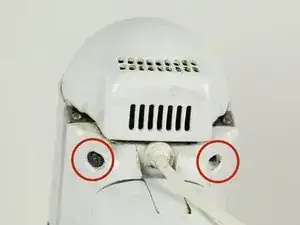
Ruota il tuo dispositivo. Usa lo stesso cacciavite per svitare le due viti di bloccaggio posteriori da 28 mm.
-
-
-
Usa un cacciavite a croce Phillips #2 per svitare la vite da 10 mm sopra lo copertura posteriore.
-
-
-
Rimuovi attentamente il cavo di alimentazione dalla sua rientranza sul retro del frullatore.
-
-
-
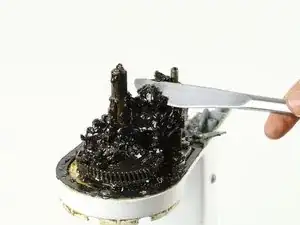
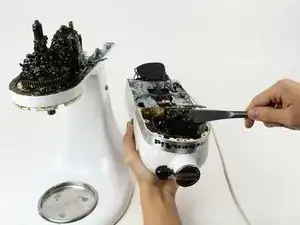
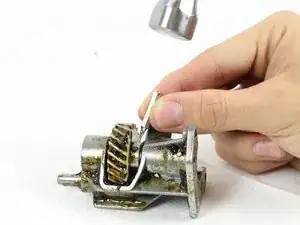
Usa un coltello per il burro o una spatola per rimuovere il grasso dagli ingranaggi.
-
Metti il grasso nella copertura dell'alloggio del motore.
-
-
-
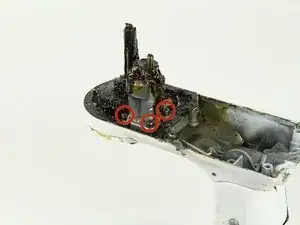
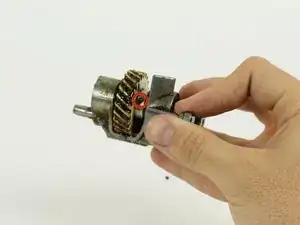
Usa un cacciavite a croce Phillips #2 per svitare le tre viti da 20 mm dalla torre dell'ingranaggio a vite senza fine.
-


Per rimontare il dispositivo, segui le istruzioni in ordine inverso.
28 commenti
Some corrections:
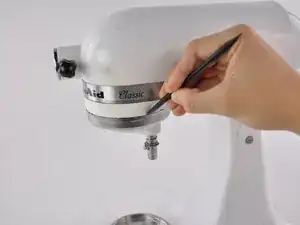
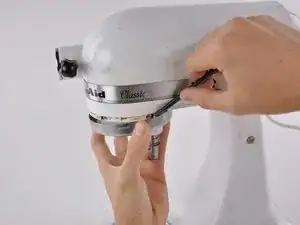
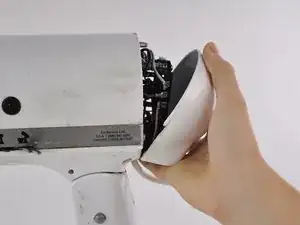
Step 1 -- Suggest (as the Service Manual does) using a flat-blade screwdriver and tap it with a light hammer to drive the drip ring off.
Step 2 -- the correct size pin punch is 5/32"
Step 3 -- Using two flat-blade screwdrivers, one on each side, pry off the planetary.
A plastic spudger is likely to break. Two points of leverage opposits each other distributes the load and prevents to the planetary and its shaft.
Step 11 -- The proper punch size is 3/32"
Steps 12 & 13 -- There is a washer on each side of the worm gear. Retain these and place one on each side off the grar when reassembling.
A link to the Service Manual:
Cheers Finkerbell,
Very helpful info, as was the main part of the guide.
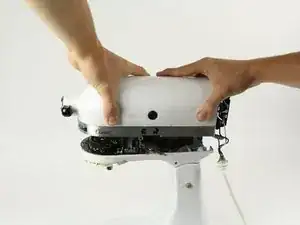
Not sure what model number I was working on, but when I l lifted off the motor housing, there was still wires connected to the base.
Just be careful at this stage in case you have the same...
my model K5SS WH is the same as yours until step 5. It doesnt have the two bolts as shown in the picture for step 5 so i wasnt able to complete the repair. any suggestions.
Unplug the Mixer.
Mike Reckner -
Good call! Nobody likes digital trauma
David Brand -