Introduzione
Segui questa guida per sostituire la presa jack del tuo Google Pixel 4a.
Il pannello del display non rinforzato del Pixel 4a è fragile. Se riutilizzerai lo schermo, presta particolare attenzione agli avvisi nella procedura di apertura.
-
-
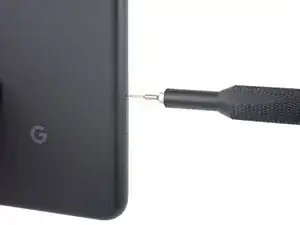
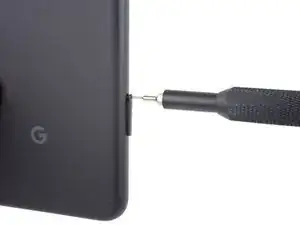
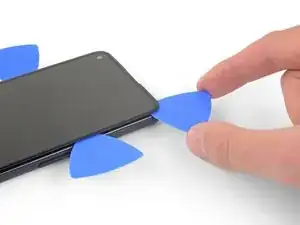
Infila uno strumento per l'estrazione delle schede SIM, una punta o l'estremità di una graffetta nel foro nel carrello della scheda SIM.
-
Premi direttamente nel foro per espellere il carrello della scheda SIM.
-
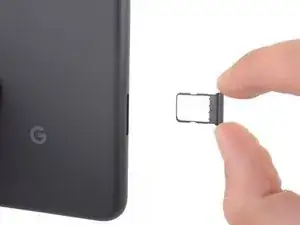
Rimuovi il carrello della scheda SIM.
-
-
-
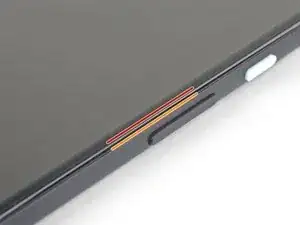
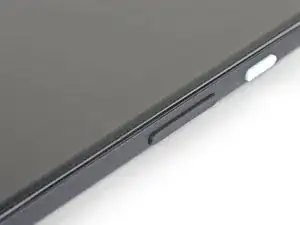
Nota i due livelli di giunzione sui bordi del telefono:
-
Giunzione dello schermo: un dislivello separa lo schermo dal resto del telefono. La sezione su cui far leva è questa
-
Giunzione del frame: qui un frame di plastica si congiunge con la cover posteriore: Non fare leva su questa giunzione
-
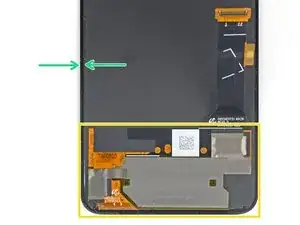
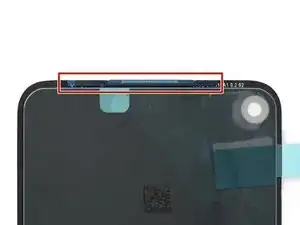
Prima di iniziare, nota le seguenti zone dello schermo:
-
Cavo flex del display: Non inserire il plettro più a fondo di quanto indicato per non rischiare di danneggiare questo cavo.
-
Perimetro dell’adesivo: far leva oltre questo stretto margine senza angolare il plettro rischia di danneggiare il pannello OLED.
-
-
-
Posiziona un iOpener riscaldato sul lato destro del display, per un minuto, in modo da ammorbidire l’adesivo.
-
-
-
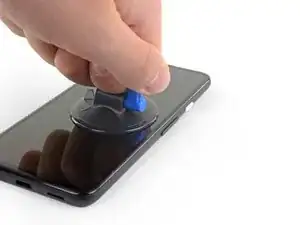
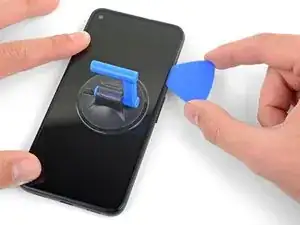
Posiziona una ventosa il più possibile vicino al bordo destro dello schermo.
-
Solleva la ventosa, applicando una forza costante.
-
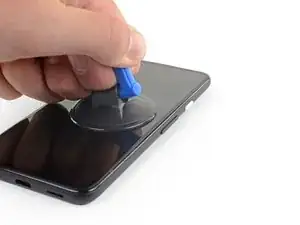
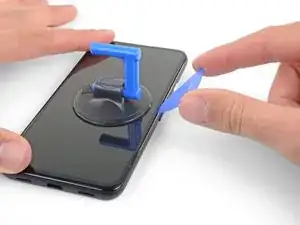
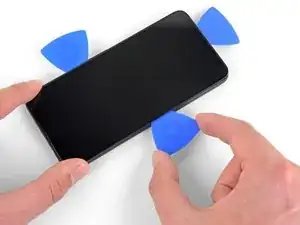
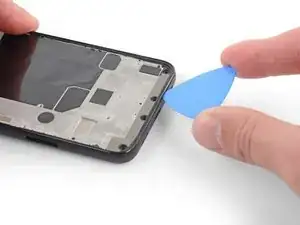
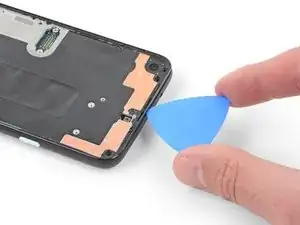
Inserisci la punta di un plettro all’interno della giunzione dello schermo per non più di 1mm.
-
-
-
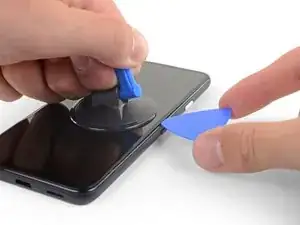
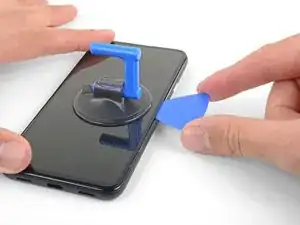
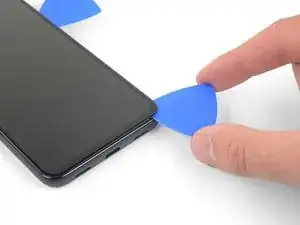
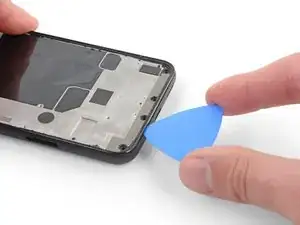
Mentre il plettro si trova 1 mm all’interno della fessura, sollevalo verso l’alto in modo da formare un angolazione abbastanza elevato.
-
Raggiunta l'angolazione elevata, spingi attentamente il plettro nella fessura per circa 6 mm. Il plettro dovrebbe scivolare al di sotto del pannello OLED.
-
-
-
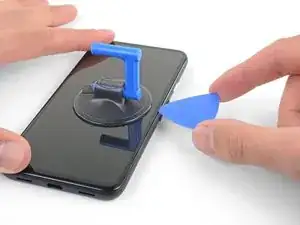
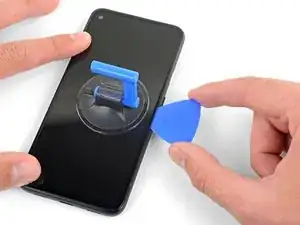
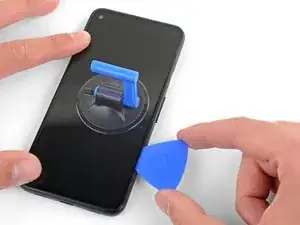
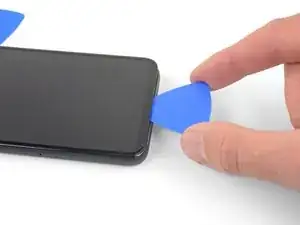
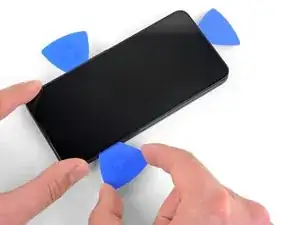
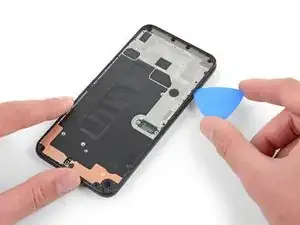
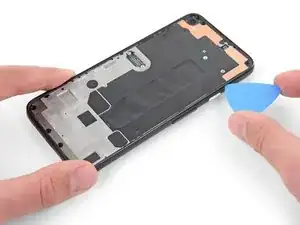
Fai scorrere il plettro lungo il lato destro dello schermo per rimuovere l’adesivo.
-
Lascia il plettro sull’angolo in alto a destra dello schermo per impedire che l’adesivo faccia presa di nuovo.
-
-
-
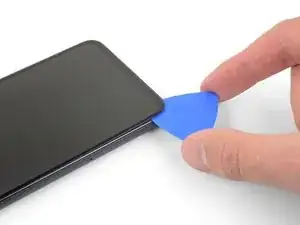
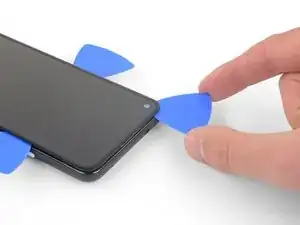
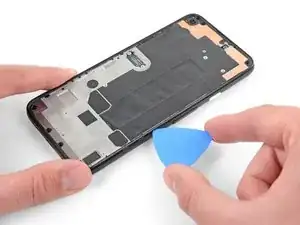
Inserisci un altro plettro di apertura in un angolo sul lato inferiore del telefono, dove si sarà formata un'altra fessura, in modo da evitare di danneggiare il pannello OLED.
-
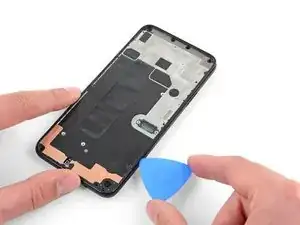
Fai scorrere il plettro lungo il lato inferiore del telefono per tagliare l’adesivo.
-
Lascia il plettro inserito lungo il lato inferiore per evitare che l’adesivo faccia nuovamente presa.
-
-
-
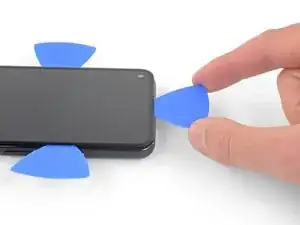
Inserisci un altro plettro di apertura in un angolo sul lato inferiore del telefono, dove si sarà formata un'altra fessura, in modo da evitare di danneggiare il pannello OLED.
-
Fai scorrere il plettro lungo il lato sinistro del telefono.
-
Lascia il plettro inserito lungo il lato sinistro del telefono, per evitare che l’adesivo faccia nuovamente presa.
-
-
-
C'è una griglia che copre la capsula auricolare sotto il bordo superiore dello schermo. Se non hai una griglia di ricambio, stai attento a non danneggiarla o perderla.
-
Inserisci un altro plettro in un angolo sul lato sinistro del telefono, dove si sarà formata un'altra fessura, in modo da evitare di danneggiare il pannello OLED.
-
Fai scorrere il plettro lungo il lato superiore del telefono per rimuovere l’adesivo.
-
-
-
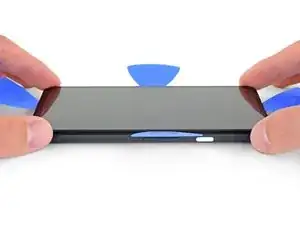
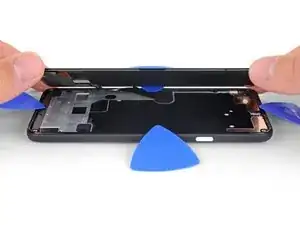
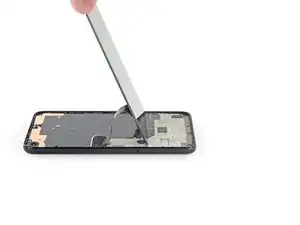
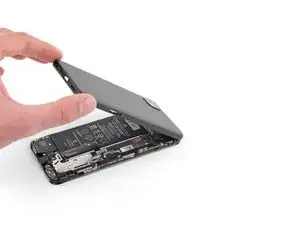
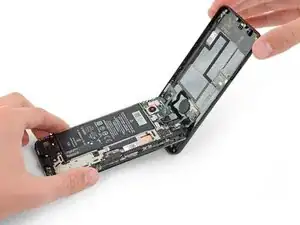
Una volta rimosso l’adesivo lungo tutto il perimetro del telefono, solleva attentamente il lato destro dello schermo, aprendo il telefono come se fosse un libro.
-
Fai scorrere un plettro delicatamente lungo eventuali parti adesive rimaste incollate, per rimuoverle.
-
-
-
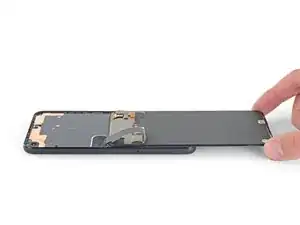
Solleva lo schermo dal lato superiore e fallo girare attorno al lato inferiore, finché non riesci a poggiarlo con il vetro rivolto verso il basso.
-
-
-
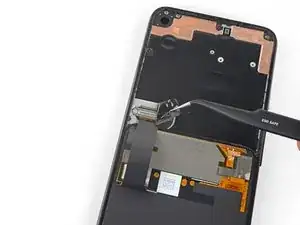
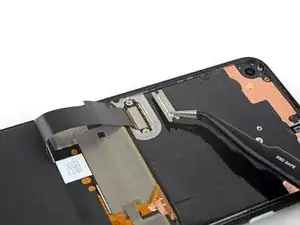
Con un paio di pinzette, rimuovi delicatamente il nastro isolante che copre la staffa sopra il connettore dello schermo.
-
-
-
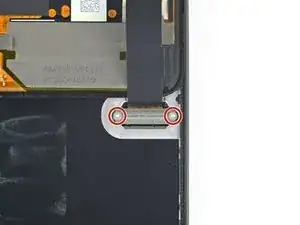
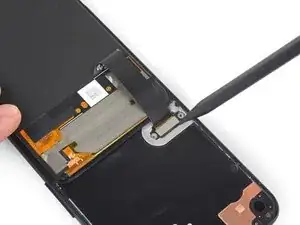
Usa un cacciavite Torx T3 per rimuovere le due viti da 2.1 mm che tengono in posizione la staffa sopra il connettore dello schermo.
-
-
-
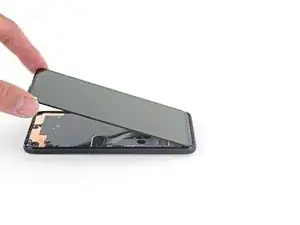
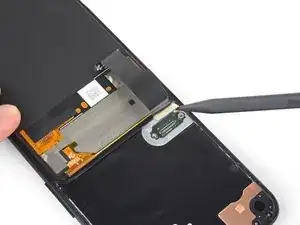
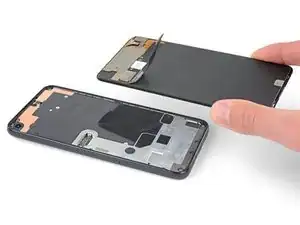
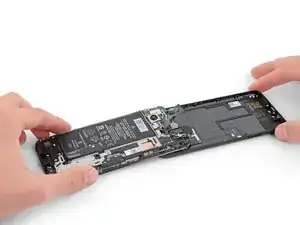
Rimuovi lo schermo.
-
Verifica se il tuo nuovo schermo di ricambio ha la griglia degli altoparlanti e l'adesivo sul bordo superiore preinstallati.
-
In tal caso, non avrai bisogno dell'adesivo sul bordo superiore.
-
Se non ce l'ha, rimuovi il rivestimento trasparente più grande dall'adesivo sul bordo superiore e applicalo allo schermo (non alla cornice). Assicurati che l'apertura più grande si allinei con la griglia degli altoparlanti.
-
Segui questa guida se stai usando adesivi ritagliati su misura.
-
-
-
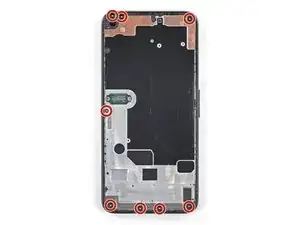
Usa un cacciavite Torx T3 per svitare le otto viti da 4,3 mm che fissano la copertura posteriore al telaio intermedio.
-
-
-
Infila un plettro nella fessura tra il telaio intermedio e la copertura posteriore.
-
Fai scorrere il plettro sotto il bordo inferiore del telefono per rilasciare i ganci in plastica che fissano la copertura posteriore al telaio intermedio.
-
-
-
Fai scorrere il plettro sotto il bordo sinistro del telefono per rilasciare i ganci in plastica che fissano la copertura posteriore al telaio intermedio.
-
-
-
Fai scorrere il plettro sotto i bordi superiore e destro del telefono per rilasciare i ganci rimasti.
-
-
-
Apri attentamente la copertura posteriore sollevando il bordo inferiore del telefono e usando quello superiore come perno.
-
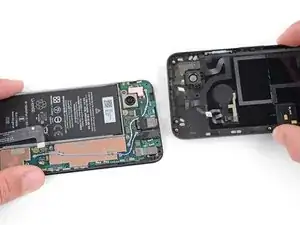
Appoggia la copertura posteriore sul piano di lavoro e appoggia delicatamente il telaio intermedio alla copertura stessa, stando attento a non tirare i cavi a nastro che li collegano.
-
-
-
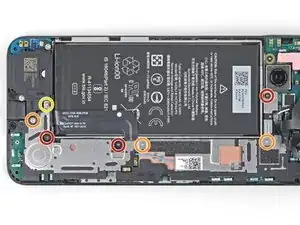
Usa un cacciavite Torx T3 per svitare le sette viti che tengono ferma la copertura della scheda madre:
-
Tre viti nere da 2,9 mm
-
Tre viti da 2 mm
-
Una vite da 4,1 mm
-
-
-
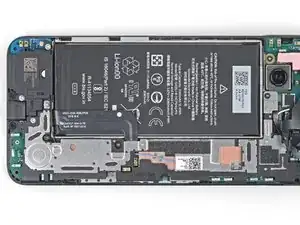
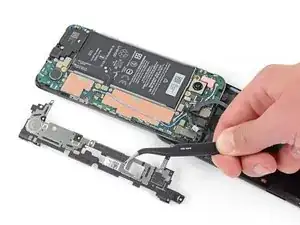
Usa la punta di uno spudger per sganciare la copertura della scheda madre dagli angoli in alto a destra e in basso a destra della scheda stessa.
-
-
-
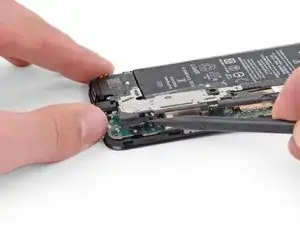
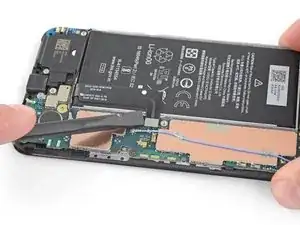
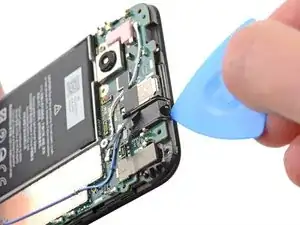
Usa la parte piatta di uno spudger per fare leva e scollegare il connettore della batteria.
-
-
-
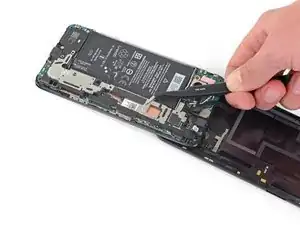
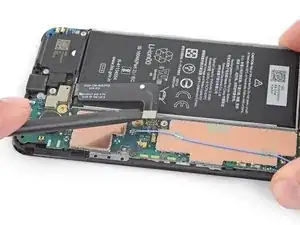
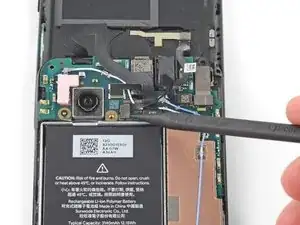
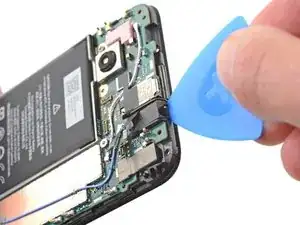
Usa la punta di uno spudger per scollegare i due cavi a nastro che collegano il sensore delle impronte e i tasti alla scheda madre.
-
-
-
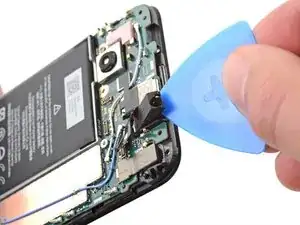
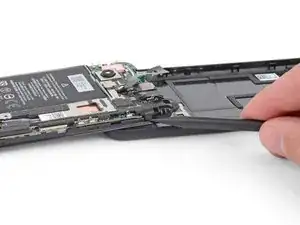
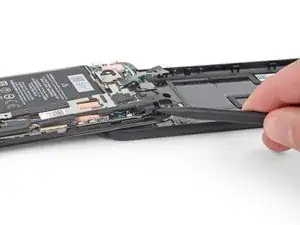
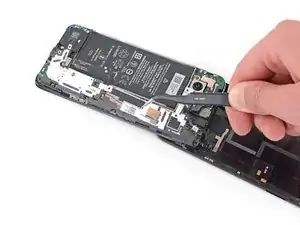
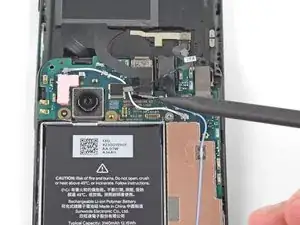
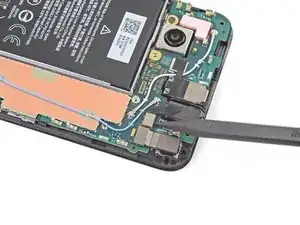
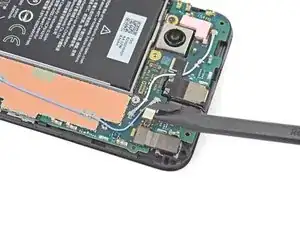
Infila un plettro sotto la presa jack e ruotalo per rilasciarla dall'adesivo che la fissa al telaio intermedio.
-
Rimuovi la presa jack.
-


Per rimontare il dispositivo, segui i passaggi precedenti in ordine inverso.
Porta i tuoi rifiuti elettronici in un riciclatore certificato R2 o e-Stewards.
La riparazione non è andata come previsto? Prova delle soluzioni ai problemi di base, oppure chiedi alla nostra comunità Risposte per trovare aiuto.

Un commento
Where can I purchase an actual replacement headphone jack? It's not listed in your "parts" section.