
Introduzione
È solo una guida prerequisita
Strumenti
-
-
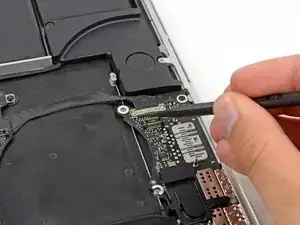
Usa la punta di uno spudger per alzare il blocco del cavo dati della scheda I/O e ruotalo verso il lato batteria del computer.
-
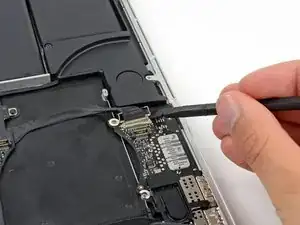
Usa l'estremità piatta di uno spudger per far scorrere il cavo dati della scheda I/O dal suo zoccolo sulla scheda logica.
-
-
-
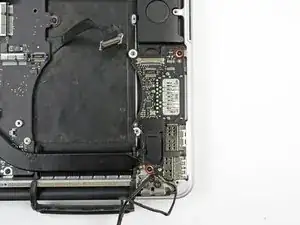
Rimuovi le due viti Torx T5 da 3,1 mm che fissano la scheda I/O alla scheda logica.
-
Su alcuni modelli può aiutare a rimuovere la scheda I/O svitare anche la vite argento Torx T5 da 3,5 mm dal dissipatore.
-
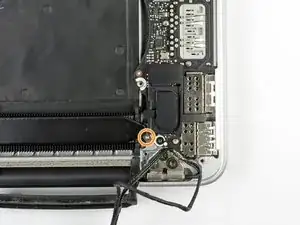
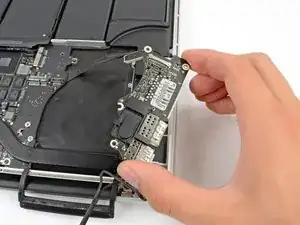
Solleva con cautela la scheda I/O e rimuovila dal case inferiore.
-
Conclusione
Per rimontare il tuo dispositivo, segui queste istruzioni in ordine inverso.

This is a difficult step. A few images for the removal of the cable would be good/better
Robert Jan Lebbink -
Yes, a few more detailed pics here would help. Indeed, general pics explaining HOW ALL the plugs and sockets fit would be VERY handy :-)
Simon Anthony -
Here is that guide!
Carsten Frauenheim -
I helped me to use the pliers both to get underneath the canble lock and then push on the wings of the cable.
Calvin Truong -
Used fingers on the cable lock.
Joseph Gorse -
gently use tips of tweezers at either side to walk it out
Christa -
It is much more easy to do step 21 before step 20 - this cable is more easy to remove
Also if you assemble then do step 20 before step 21 - it is more easy to place the cable into the connector
Muescha -
I found it easier to just use my finger nail to release the clamping lever. Then the spudger to ease it out.
billbonney -