
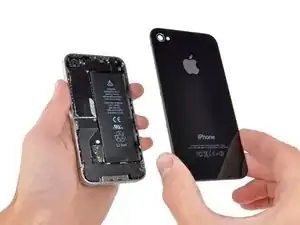
Introduzione
Usa questa guida per sostituire la scheda madre del tuo iPhone 4.
-
-
Spegni il tuo iPhone prima di iniziare lo smontaggio.
-
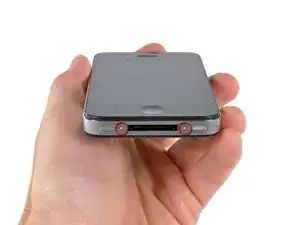
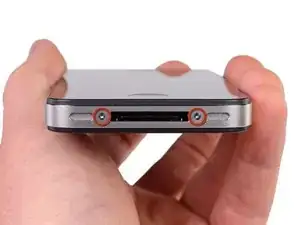
La cover posteriore del tuo iPhone 4 può avere due viti di tipo a croce Phillips #000 oppure tipo Apple "pentalobe" con testa a cinque intagli (seconda immagine). Verifica quali viti usa il tuo telefono e se hai il cacciavite adatto per poterle svitare.
-
Rimuovi le due viti pentalobe o a croce Phillips #000 da 3,6 mm posizionate vicino al connettore dock.
-
-
-
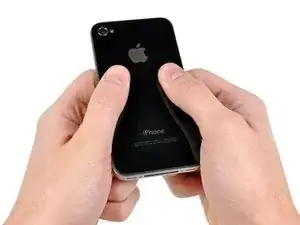
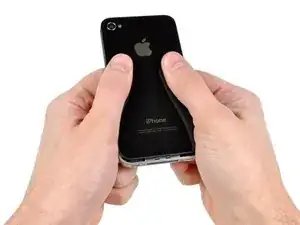
Afferra la cover con le dita e sollevala dall'iPhone. In alternativa, puoi usare una ventosa piccola.
-
-
-
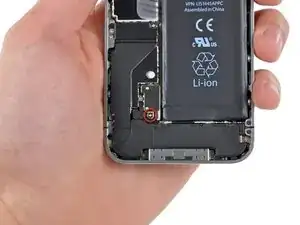
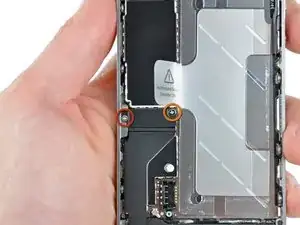
Rimuovi la singola vite a croce Phillips da 2,5 mm che fissa il connettore della batteria alla scheda logica.
-
-
-
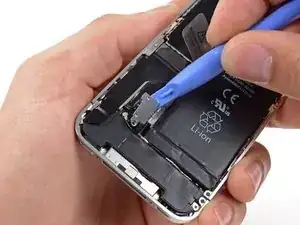
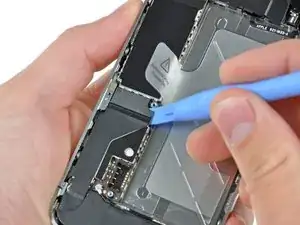
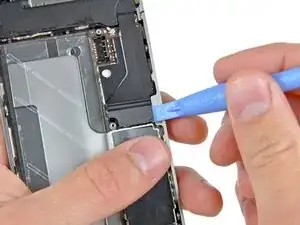
Usa uno strumento di apertura in plastica per sollevare delicatamente il connettore della batteria dal suo zoccolo sulla scheda logica.
-
Rimuovi la clip metallica che copre il connettore dell'antenna.
-
-
-
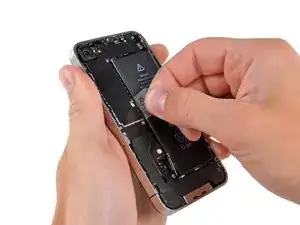
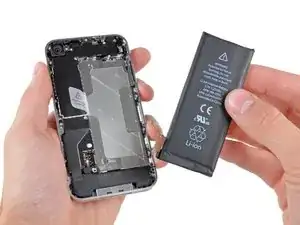
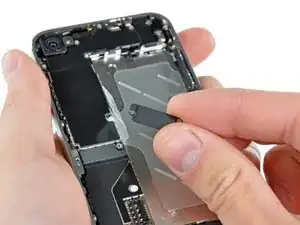
Usa la linguetta di plastica trasparente per sollevare delicatamente la batteria dall'iPhone.
-
Se è rimasto dell'alool nel telefono, puliscilo attentamente o lascialo asciugare prima di installare la nuova batteria.
-
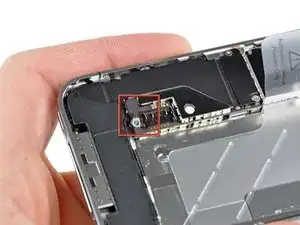
Prima di ricollegare il connettore della batteria, accertati che la clip di contatto (mostrata in rosso) sia posizionata in modo corretto vicino al connettore della batteria.
-
-
-
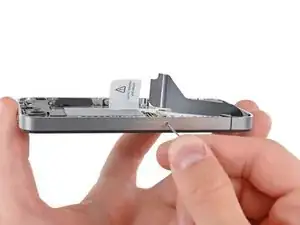
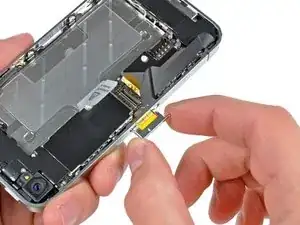
Usa uno strumento di espulsione per schede SIM o una graffetta per espellere la scheda SIM e il suo vassoio.
-
Rimuovi la scheda SIM il suo vassoio.
-
-
-
Rimuovi le seguenti due viti:
-
Una vite a croce Phillips da 1,2 mm
-
Una vite a croce Phillips da 1,6 mm
-
Rimuovila sottile cover in acciaio del cavo del connettore dock dall'iPhone.
-
-
-
Usa uno strumento di apertura iPod per sollevare con delicatezza dalla scheda logica il connettore del cavo dock da entrambe le estremità del connettore.
-
-
-
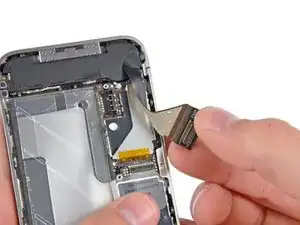
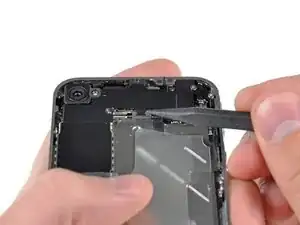
Stacca con delicatezza il cavo a nastro del dock dalla scheda logica e dall'involucro dell'altoparlante inferiore.
-
-
-
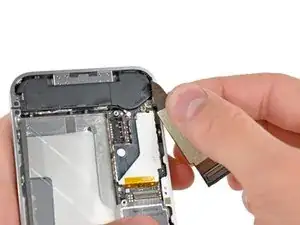
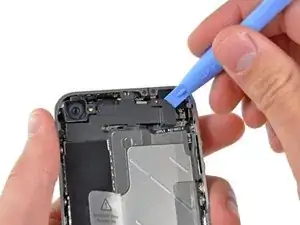
Usa uno strumento di apertura in plastica per sollevare dalla sua sede sulla scheda logica il connettore dell'antenna inferiore.
-
-
-
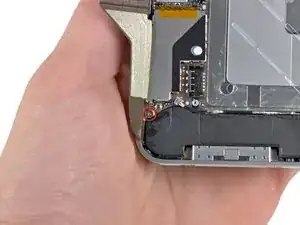
Rimuovi la vite a croce Phillips da 1,9 mm che fissa la parte inferiore della scheda logica al telaio interno.
-
-
-
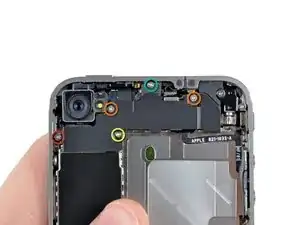
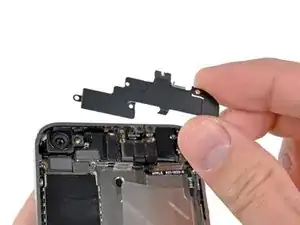
Rimuovi le seguenti cinque viti a croce Phillips che bloccano sulla scheda logica l'antenna Wi-Fi.
-
Una vite da 2,3 mm
-
Due viti da 1,6 mm
-
Una vite da 1,4 mm
-
Una vite da 4,8 mm
-
-
-
Usa uno strumento di apertura iPod per sollevare lievemente dalla scheda logica il bordo superiore dell'antenna Wi-Fi.
-
Usa la punta di uno spudger per spingere via dal telaio interno le clip di bloccaggio del Wi-Fi.
-
Rimuovila antenna Wi-Fi dall'iPhone. Stai attento a non perdere le clip metalliche sopra la cover dove si inserisce la vita de 4,8 mm. È proprio questa la più comune ragione principale di cattive prestazioni del Wi-Fi dopo il rimontaggio.
-
-
-
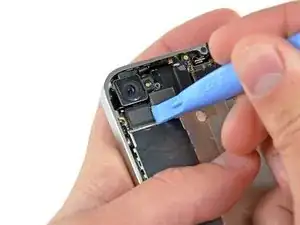
Usa uno strumento di apertura iPod per sollevare delicatamente il connettore della fotocamera posteriore dalla sua sede sulla scheda logica.
-
Togli la fotocamera posteriore.
-
-
-
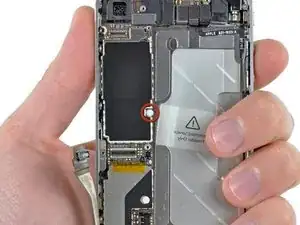
Rimuovi il piccolo sticker bianco circolare (sticker di garanzia e indicatore di acqua) che copre la vite vicino alla linguetta di estrazione della batteria.
-
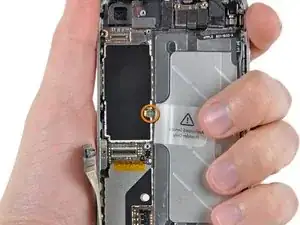
Svita la vite a croce Phillips da 2,4 mm che era nascosta sotto lo sticker.
-
-
-
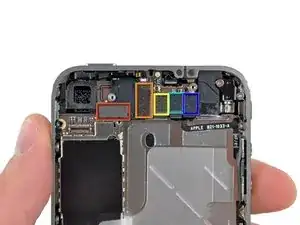
Usa il bordo di uno strumento di apertura in plastica per sollevare delicatamente e staccare dalle loro sedi sulla scheda logica i seguenti connettori:
-
Cavo del digitizer (sollevalo facendo leva dalla parte in basso)
-
Cavo dell'LCD (sollevalo dal basso)
-
Cavo del jack cuffie/pulsanti del volume (sollevalo dall'alto)
-
Cavo del microfono superiore/pulsante sleep (sollevalo dall'alto)
-
Cavo della fotocamera anteriore (sollevalo dall'alto)
-
-
-
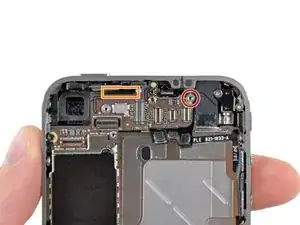
Rimuovi il distanziale vite da 4,8 mm disposto vicino al jack cuffie.
-
In assenza di questo elemento, la scheda madre potrebbe danneggiare i cavi a nastro attorno ad essa.
-
-
-
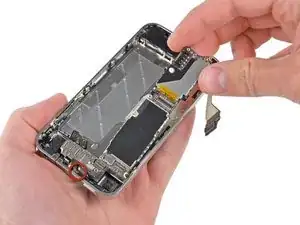
Rimuovi la scheda logica dall'iPhone prestando molta attenzione ai cavi che potrebbero impigliarsi.
-


Per rimontare il tuo dispositivo, segui queste istruzioni in ordine inverso.

15 commenti
I did a screenreplacement but i just can't fit the logicboard in to place :(. It doesn't slide down in to it's position.
I did a thorough surgery of mine today. Ppl couldn't hear me at all, so I had to get to the logic board.it was not challenging at all. One has to be careful with the antenna area so as not to apply to much force thereby damaging it. However,if u couldn't clip it back,just use a paper tape to hold it down b4 placing the battery plate on it. I recoupled the phone and everything work excellently. Ppl can hear me clearly now
akinlolu -
using something like the 18-compartment tray will GREATLY help with this one; there are over a dozen groups of parts. For re-assembly having a digital calipers to measure the 2.4 vs the 2.6mm screws also helps greatly.
awr -
My method for hardware management during delicate phone surgery is to take and print out on 8.5"x11' paper, one or more pictures of the open phone in various stages of disassembly, and then tape the screws to the appropriate spots on the pictures. Also write numbers on the pictures next the screws to indicate the order in which you removed them.
lens42 -
I use a plastic egg tray, I drop all the screws and small parts (like the camera) for each step into the same egg indentation. You can see that the screws are different lengths, so I don't put one screw into it's own spot. I used 5 egg indentations to replace my screen.
Mangled Jargon -
I did a successful surgery on my iPhone, be warned this is not for the faint of heart!
I've done iPod screen replacements, battery replacements, this is by far much more difficult and intricate.
Great write up! Thanks a million.
Jaysen Strange -
I've changed some iPod screens as well and that has been the least pleasant experience so far. Glue and the main connector that has to be unwrapped and connected from the rear where you have no feel or control where it belongs.
iPhone repair is complex, but doable and has very few "traps".
mcbohdo -
Couldn't even get both screws out of the bottom of the case. One was easy and other refuses to budge. Screws so small I can't see if it is turning or screw driver is properly seated. Sad I too have done screen replacements on other phones. Don't know any secrets to get the screw out
ckracht -
I also have a problem with seeing what is happening with some of those tiny little screws and parts. For other projects that I do, I use an Opti-Visor. It slips over your head and provides 10x magnification. ( You can find them on Amazon).
Yeah, it adds cost to the project and you would have to wait for delivery, but it sure makes a world of difference in seeing what you are working with / on.
jhow -
On an early iPhone 4 I found that the #000 Phillips bit included in the 54 Bit Driver Kit didn't actually fit the screws. However the JIS #000 also in the kit did fit quite well. This is due to the JIS bits "thinner" design to prevent camming out of the slot. Otherwise everything went well. Looking forward to replacing the battery in my other phone that has the pentalobe screws. Glad I got the 54 Bit kit!
etler -
Use a vacuum duster and a sharp tool to pry out the dust, this can increase the volume insanely!
Dpairs -
What does the park that is gold and next to the 4.8mm screw for the antenna? Looks like I am missing that part and almost positive that is why I can't pick up or connect to any wifi signals. I have the screw and the antenna from another phone that is working and tried it on the broken phone and still doesn't work. Only thing different is that gold metal piece to the left of that 4.8 mm screw. Can I buy that part? how do I attach it?
Jay Pennington -
great instructions did it the first time
Mr J -
For organisation of the parts and for a much easier process of rebuilding i use a big magnetic flat surface with a grid drawn on it. Then I use a dry erase marker to make any notes I need and to number the parts in order as i disassemble . Believe me it saves a lot of time and hassle especially if you drop one of those tiny screws good luck finding it but when your working over the magnet and drop a screw its going to be right where it fell. At first I tried the piece of paper to keep organised but all it takes is one small slip and you move the paper too quick and your left with a jumbled bunch of screws and parts and a painstaking task of putting it all back correctly, aka a big waist of time and effort.
case-yg -
I found it very useful to use a magnet sheet when doing these repairs. I use electrical tape or a sharpie to make a grid, and place each micro screw in a separate box on the grid.
I work directly over the magnet sheet, so that if something drops I have a better chance at not losing it.
If you do lose a screw, go over the work area with a fridge magnet. It will pick it up if it hasn’t popped too far away.
Megan Telliano -