Introduzione
Segui questa guida per rimuovere e sostituire la scheda madre de un iPhone 8.
Nota: Ogni scheda logica e ogni sensore di impronte digitali Touch ID sono accoppiati in fabbrica, quindi con la sostituzione della scheda logica si disabilita il Touch ID salvo installare un pulsante home sostitutivo che sia stato correttamente accoppiato alla tua nuova scheda logica.
-
-
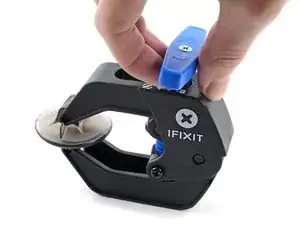
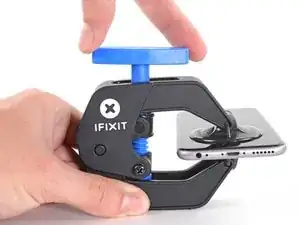
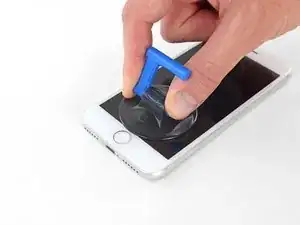
I prossimi tre passaggi ti spiegherano come utilizzare l'Anti-Clamp, uno strumento che abbiamo studiato per rendere la procedura di apertura più facile. Se non stai usando l'Anti-Clamp, salta questi tre passaggi e continua con un metodo alternativo.
-
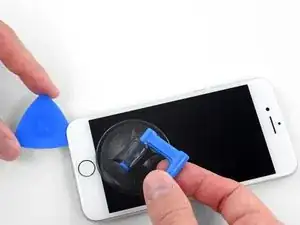
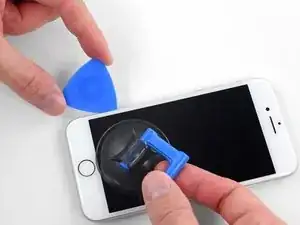
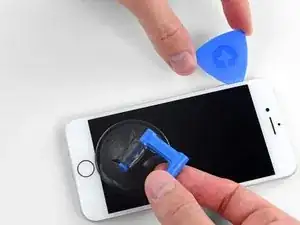
Tira la manopola blu verso la cerniera per disattivare la modalità di apertura.
-
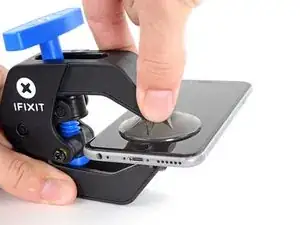
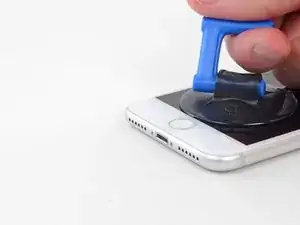
Posiziona la ventosa vicino al bordo inferiore dello schermo: una davanti e una dietro.
-
Spingi sulle ventose in modo tale che possano fare presa sull'area desiderata.
-
-
-
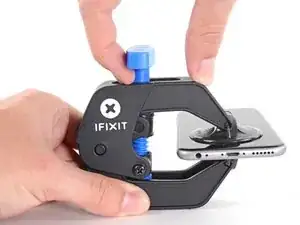
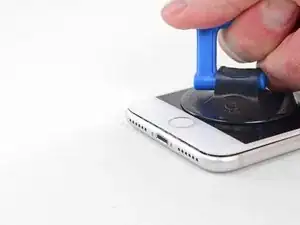
Tira la manopola blu in avanti per bloccare i bracci.
-
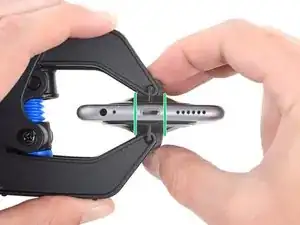
Gira la manopola in senso orario di 360 gradi o fino a quando le ventose iniziano ad allungarsi.
-
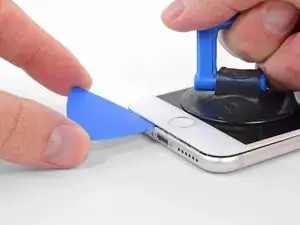
Assicurati che le ventose siano allineate fra loro. Se dovessero iniziare a scivolare, allenta leggermente le ventose e riallinea i braccetti.
-
-
-
Scalda un iOpener e infilalo tra i bracci dell'Anti-Clamp.
-
Piega l'iOpener in modo che poggi sul bordo inferiore dell'iPhone.
-
Attendi un minuto per dare all'adesivo una possibilità di staccarsi e formare una fessura di apertura.
-
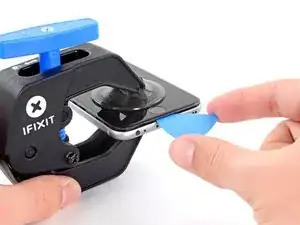
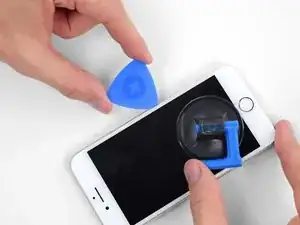
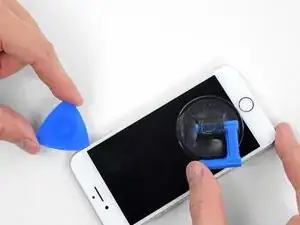
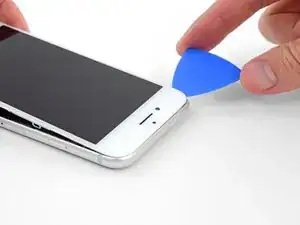
Inserisci il plettro di apertura nella fessura.
-
Salta i tre passaggi successivi.
-
-
-
Il riscaldamento del bordo inferiore dell'iPhone aiuta ad ammorbidire l'adesivo che blocca il display, semplificando l'apertura.
-
Usa un asciugacapelli oppure prepara un iOpener e applicalo per circa 90 secondi al bordo inferiore dell'iPhone per ammorbidire l'adesivo sottostante.
-
-
-
Applica una ventosa nella metà inferiore del pannello frontale, appena sopra il pulsante home.
-
-
-
Tira la ventosa applicando una tensione forte e costante fino a creare una piccola fessura tra il gruppo dello schermo e la scocca.
-
Inserisci nella fessura un plettro di apertura.
-
-
-
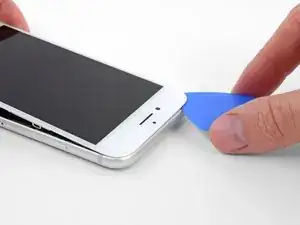
Fai scorrere il tuo attrezzo lungo il bordo sinistro del telefono, spostandoti verso i pulsanti del controllo volume e l'interruttore della modalità silenziosa, per rompere l'adesivo che tiene in posizione il display.
-
Fermati vicino all'angolo superiore sinistro del display.
-
-
-
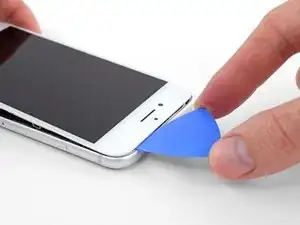
Inserisci nuovamente il tuo attrezzo nell'angolo inferiore destro dell'iPhone e fallo scorrere attorno all'angolo e lungo il lato destro del telefono per separare l'adesivo.
-
-
-
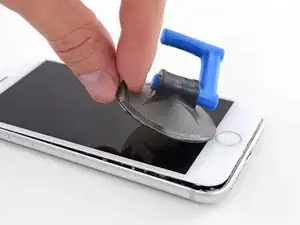
Tira dolcemente la ventosa per sollevare il lato inferiore del display.
-
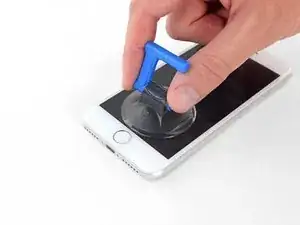
Tira la linguetta per staccare la ventosa dal pannello anteriore.
-
-
-
Fai scorrere uno strumento di apertura sotto il display attorno all'angolo superiore sinistro e lungo il bordo superiore del telefono per allentare l'adesivo rimasto.
-
-
-
Fai scorrere lievemente il gruppo display verso il basso (allontanandolo dal bordo superiore del telefono) per liberarlo dalle clip che lo collegano al case posteriore.
-
-
-
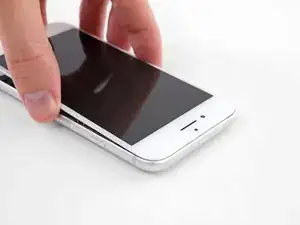
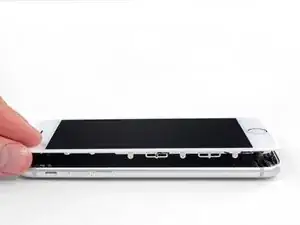
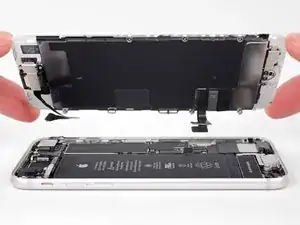
Apri l'iPhone sollevando il display dal lato sinistro, come per sollevare la copertina posteriore di un libro.
-
Appoggia il display contro qualche tipo di supporto per mantenerlo aperto mentre lavori sul telefono.
-
-
-
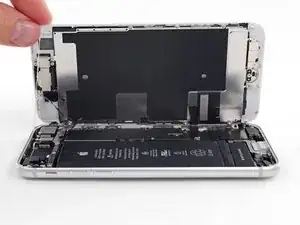
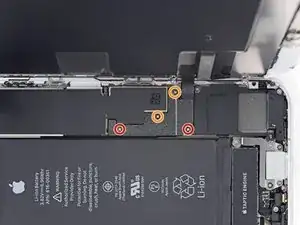
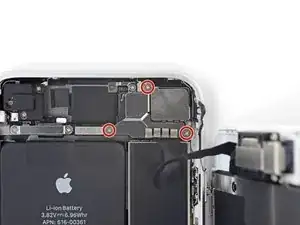
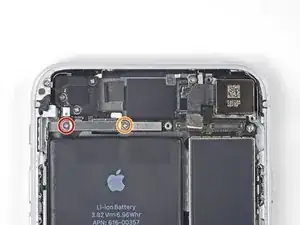
Rimuovi quattro viti a croce Phillips che fissano la staffa del cavo inferiore del display alla scheda logica, delle seguenti lunghezze:
-
Due viti da 1,3 mm
-
Due viti da 2,8 mm
-
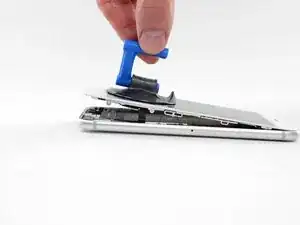
Rimuovi la staffa.
-
-
-
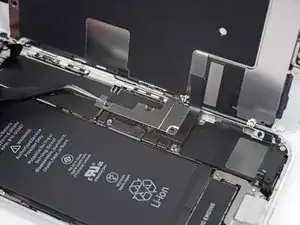
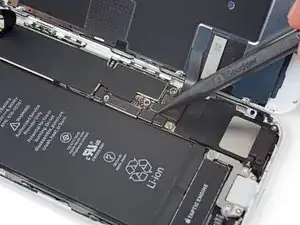
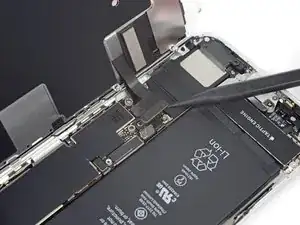
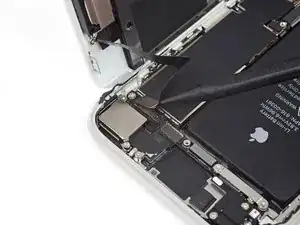
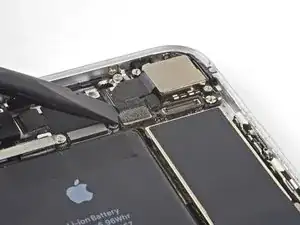
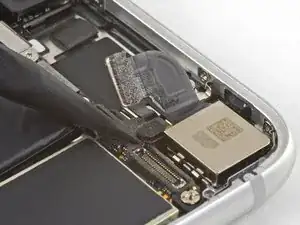
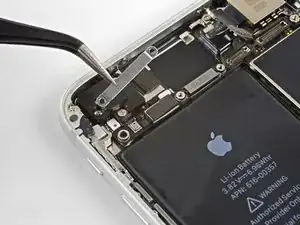
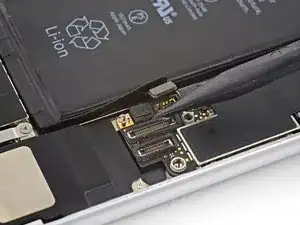
Usa la punta di uno spudger per staccare il connettore della batteria sollevandolo dal suo zoccolo sulla scheda logica.
-
Piega lievemente da un lato, per distanziarlo dalla scheda logica, il cavo del connettore per evitare che questo possa fare contatto con lo zoccolo e quindi alimentare il telefono nel corso della tua riparazione.
-
-
-
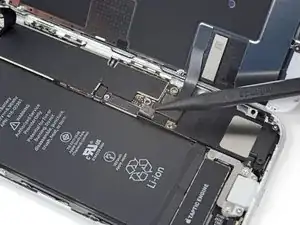
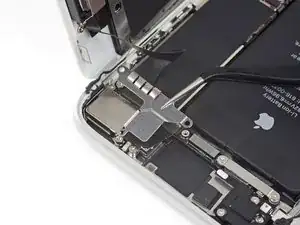
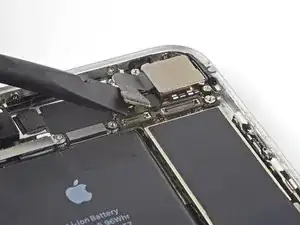
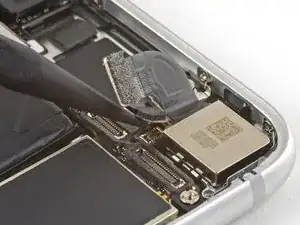
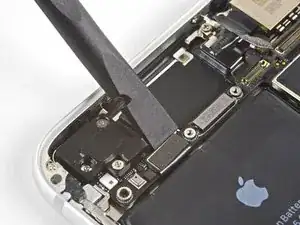
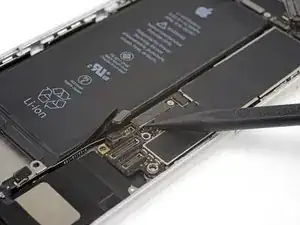
Usa la punta di uno spudger per staccare il connettore inferiore del display dal suo alloggiamento.
-
-
-
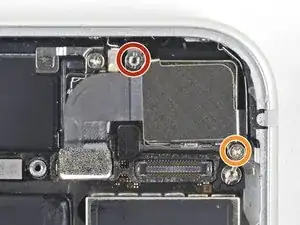
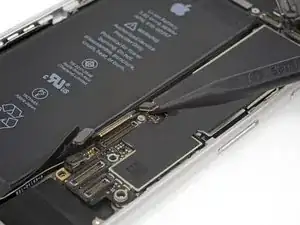
Rimuovi le tre viti Phillips da 1,3 mm che tengono in posizione la staffa sopra il connettore del gruppo sensore del pannello frontale.
-
Rimuovi la staffa.
-
-
-
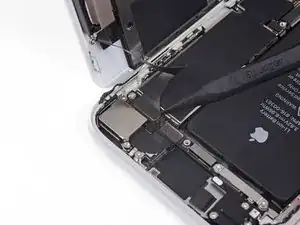
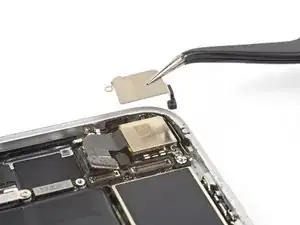
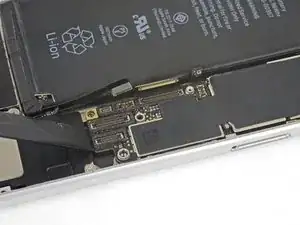
Usa la punta di uno spudger per staccare il connettore del gruppo sensore del pannello anteriore.
-
-
-
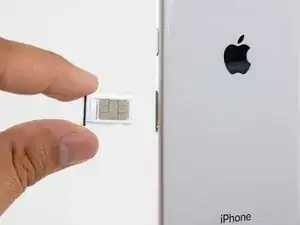
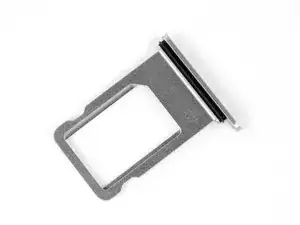
Inserisci uno strumento di estrazione SIM, una punta o una graffetta raddrizzata nel piccolo foro nel vassoio della scheda SIM.
-
Premi per espellere il vassoio.
-
-
-
Usa l'estremità piatta di uno spudger per scollegare il connettore del cavo della fotocamera sollevandolo verso l'alto dalla sua presa.
-
-
-
Svita le due viti che fissano la staffa della fotocamera posteriore:
-
Un distanziale a vite da 3,0 mm
-
Una vite a croce Phillips da 3,1 mm
-
-
-
Usa la punta di uno spudger per staccare il connettore del flash dalla sua presa sollevandolo verso l'alto.
-
-
-
Svita le due viti che tengono in posizione la staffa del cavo superiore:
-
Una vite a croce Phillips da 2,9 mm
-
Una vite a croce Phillips da 1,3 mm
-
-
-
Con l'estremità piatta di uno spudger solleva il connettore del cavo superiore dalla sua presa.
-
-
-
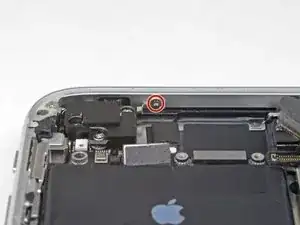
Svita le tre viti a croce Phillips da 1,3 mm che fissano il componente antenna superiore sinistro.
-
-
-
Rimuovi la vite a croce Phillips da 1,4 mm che fissa il componente antenna al bordo superiore del case.
-
-
-
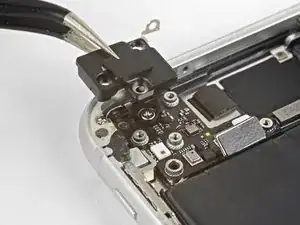
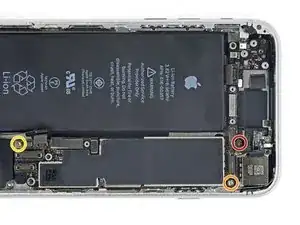
Svita le due viti a croce Phillips che fissano la clip di messa a terra al bordo superiore sinistro della scheda madre:
-
Una vite a croce Phillips da 1,5 mm
-
Una vite a croce Phillips da 2,6 mm
-
-
-
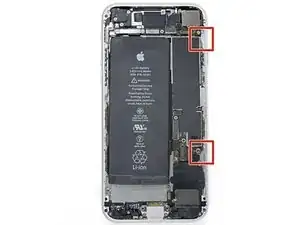
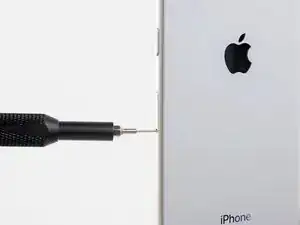
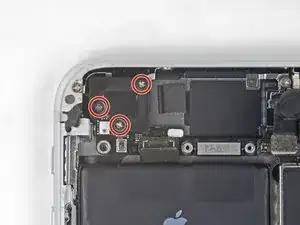
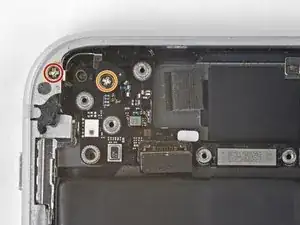
Svita le tre viti che tengono in posizione la scheda madre:
-
Una vite a croce Phillips da 1,8 mm
-
Un distanziale a vite da 2,5 mm
-
Un distanziale a vite da 2,2 mm
-
-
-
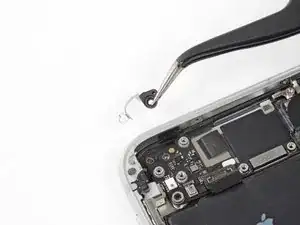
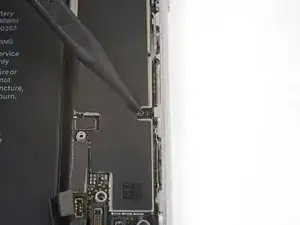
Usa la punta di uno spudger per allontanare il cursore di estrazione della scheda SIM dalla scheda madre.
-
-
-
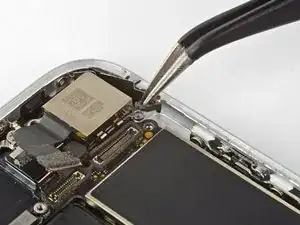
Usa la punta di uno spudger per sollevare e scollegare il cavo dell'antenna diversity del Wi-Fi.
-
-
-
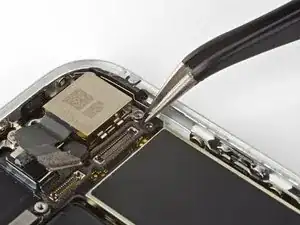
Solleva e disconnetti il connettore della bobina di ricarica wireless usando la punta di uno spudger.
-
-
-
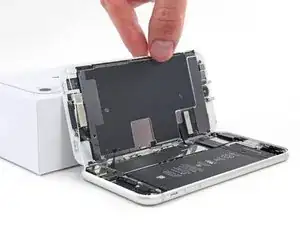
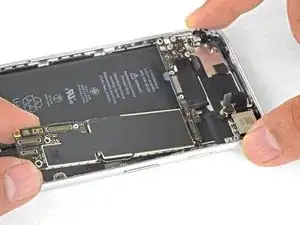
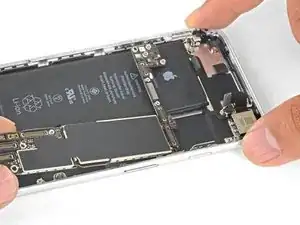
Adopera l'estremità piatta di uno spudger per sollevare con cautela la scheda madre dal lato del connettore della batteria.
-
-
-
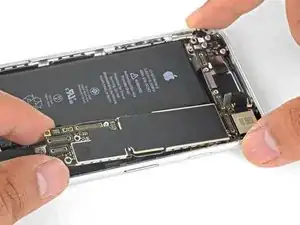
Afferrandola dai suoi lati, solleva la scheda madre vicino al connettore della batteria e toglila.
-


Per rimontare il tuo dispositivo, segui queste istruzioni in ordine inverso.
Porta i tuoi rifiuti elettronici a un riciclatore certificato R2 o e-Stewards.
La riparazione non è andata secondo i piani? Vai alla nostra Comunità Risposte iPhone 8 per trovare aiuto nella risoluzione dei problemi.

20 commenti
Hello evryone. Do I need a new touch ID that fits the motherboard or can I use my old touch ID?
The motherboards that are for sale, sell with touch ID and without. That`s why I am asking.
Hi Sebastian,
Yes, the Touch ID is paired with the motherboard. In order to keep Touch ID functionality, you have to use the fingerprint sensor that comes with the replacement.
can i use this process two switch a logic board from a working i phone to one that is icloud locked?
That’s why I’m here
Hi Kenneth,
The phone’s “identity” is based off of the logic board, so switching a logic board will remove the iCloud lock—if the replacement logic board is not locked. Note that the Touch ID hardware is paired each logic board.
It may work but the card to be replaced needs to be unlocked with iCloud.
i have an iphone 8 plus icloud locked ,is it possible that if i change the motherboard with a new one so moblie will again start and work as before .please brief me about this…
Hi Malik,
The phone’s “identity” is based off of the logic board, so switching a logic board will remove the iCloud lock—if the replacement logic board is not locked. Note that the Touch ID hardware is paired each logic board.
o novo também precisa ser desbloqueado para que tudo funcione
just how long are those screws- i turn and turn and turn and the lift off is soooo slight, seemingly insignificant…
An. Jahnke -
I would recommend, from the very beginning, dumping all tools out of the kit (if you got it) and using that white paper tool box as a tray to organize the screws and braces in. It’s nice to work over because it catches screws well and makes it easy to see them if you drop any.
Johnny Emrica -
That’s a great idea thank you
Mohamed Dekkiche -
Screw to the left of the charging port will not come out. Screw on the right came out no problem. Any ideas?
Bill Maher -
I already replaced my iPhone 8 battery with one from iFixit and honestly I wasn't impressed. It worked well for a few months, but then I started noticing the peak performance capability dropping significantly thereafter. I followed the initial charging instructions to a tee and only let it drop below 20% once a month. Normal everyday use for me... no intense apps like games, etc. I considered having Apple do it this time around, but for these older models they don't keep the batteries in-stock and you have to give them your phone for up to a week. So in the end, I opted to try another battery from iFixit instead. Hopefully this one will last longer.
tripmusic -