
Introduzione
Usa questa guida per sostituire il display di un MacBook Air 2019.
-
-
Se il tuo MacBook funziona con Big Sur v11.1 o successive, disattivare l'Auto Boot potrebbe non funzionare. Puoi procedere normalmente, ma assicurati di scollegare la batteria appena sei dentro.
-
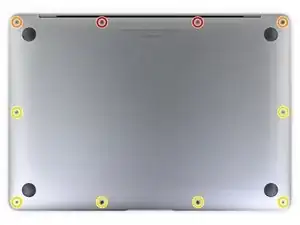
Usa un cacciavite pentalobe P5 per rimuovere le viti seguenti:
-
Due viti da 7,9 mm
-
Due viti da 7,1 mm
-
Sei viti da 2,6 mm
-
-
-
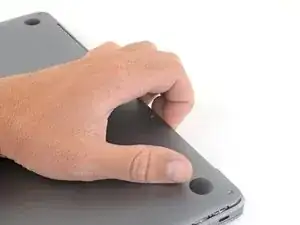
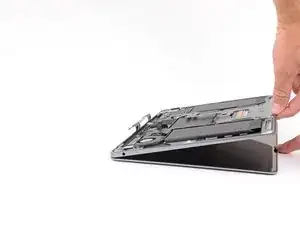
Infila le dita tra lo schermo e il case inferiore per sollevare dall'Air la cover stessa.
-
Rimuovi il case inferiore.
-
-
-
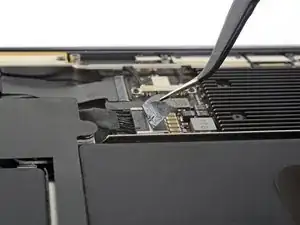
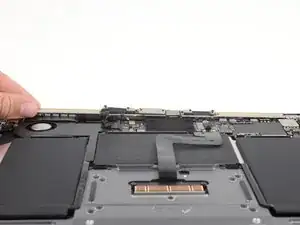
Stacca il nastro adesivo che copre il connettore della batteria quanto basta per scoprire lo stesso connettore.
-
-
-
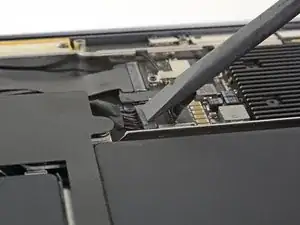
Usa uno spudger per far scorrere il connettore della batteria parallelamente alla scheda logica, tirandolo fuori dal suo zoccolo sulla scheda.
-
-
-
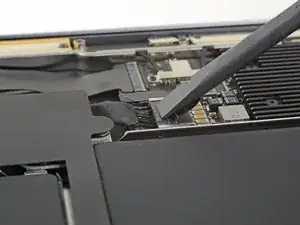
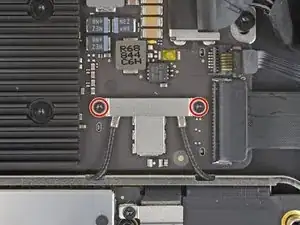
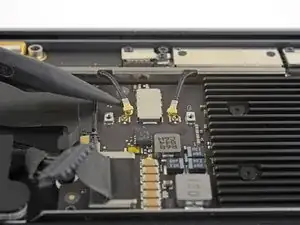
Usa un cacciavite Torx T3 per rimuovere le due viti da 1,4 mm che fissano la staffa del cavo dell'antenna.
-
Rimuovi la staffa del cavo dell'antenna.
-
-
-
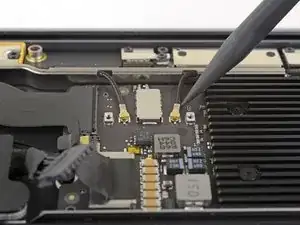
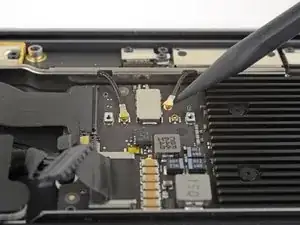
Inserisci l'estremità punta di uno spudger sotto uno dei cavi di antenna, vicino al connettore.
-
Fai leva verso l'altro per scollegare il cavo.
-
Ripeti l'operazione per l'altro cavo di antenna.
-
-
-
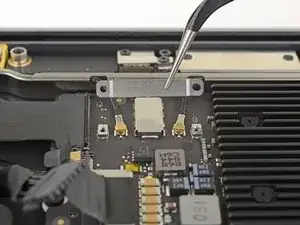
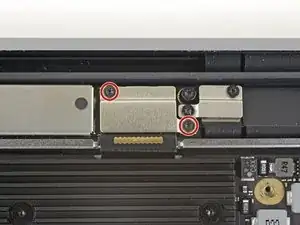
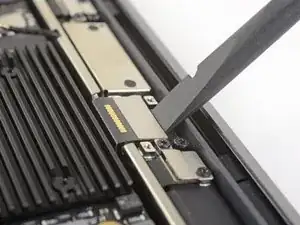
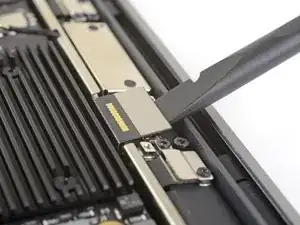
Usa un cacciavite Torx T3 per rimuovere le due viti da 1,5 mm che fissano la staffa del connettore del cavo dello schermo.
-
Rimuovi la staffa del connettore del cavo del display.
-
-
-
Usa un cacciavite Torx T5 per rimuovere le viti seguenti:
-
Quattro viti da 7,4 mm
-
Due viti da 4,5 mm
-
-
-
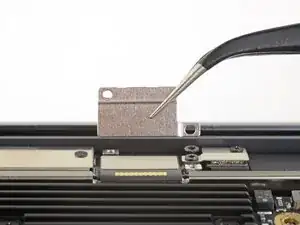
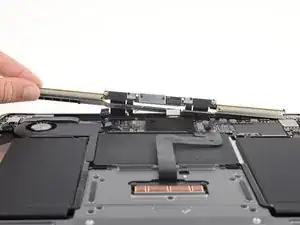
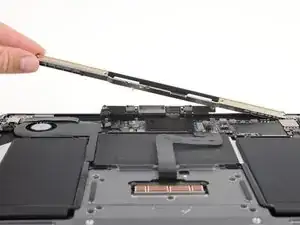
Solleva nella barra dell'antenna verso l'alto ed estraila dal case. Fai attenzione che non si impigli in cavi e connettori presenti sul case.
-
Rimuovi la barra dell'antenna.
-
-
-
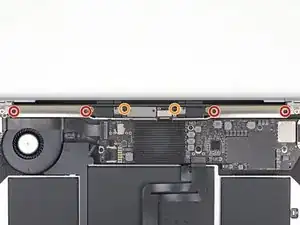
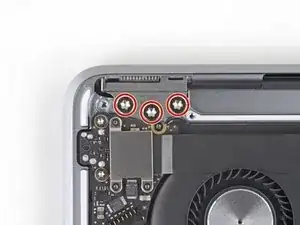
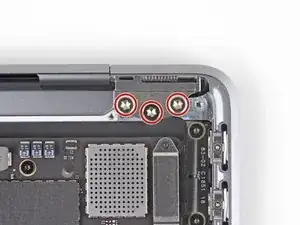
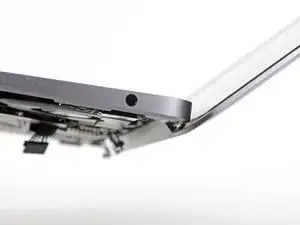
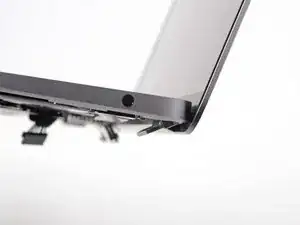
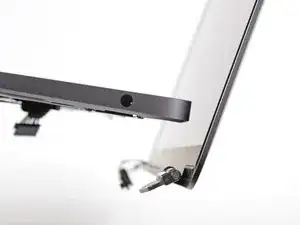
Usa un cacciavite Torx T9 per rimuovere le sei viti da 4,9 mm che fissano le cerniere dello schermo al case superiore.
-
-
-
Con il MacBook ancora disposto con lo schermo in basso, solleva con delicatezza il case superiore per aprire il MacBook al maggior angolo possibile.
-
-
-
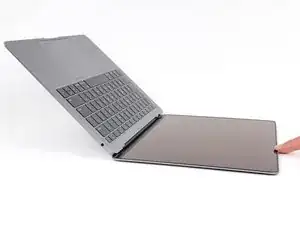
Solleva il MacBook Air e ruota con delicatezza lo schermo fino a un angolo di 90 gradi rispetto al case superiore.
-
Mantenendo lo schermo a un angolo di 90 gradi rispetto al case, spingi verso il basso lo schermo mentre tieni ferma la scocca, in modo che le cerniere possono scorrere fuori dal fondo del case.
-
Confronta la tua parte di ricambio con quella originale: potrebbe essere necessario il trasferimento di alcuni componenti o la rimozione di protezioni adesive dalla nuova parte prima di installarla.
Per riassemblare il tuo dispositivo, segui queste istruuzioni in ordine inverso.
Porta i tuoi rifiuti elettronici a un riciclatore certificato R2 o e-Stewards.
La riparazione non è andata secondo i piani? Vai sulla nostra comunità Risposte per trovare aiuto nella risoluzione dei problemi.

12 commenti
Thanks a lot for the useful guide! I have found some difficulties removing the antenna bar with this description, since there is no information to remove the 4 screws holding the antenna assembly in place. Additionally the force to remove the antenna is very high and may damage the complete antenna. I have used some angled tweezers to remove it and they came right our without any force.
Another question I have for the display replacement on a 2019 MacBook Air is how to get the true tone function and keyboard backlight working again. I have found no infos for the 2019 Air but some people had the same issue with 2018 and up MacBook Pros. Any suggestions on how I could fix this up? (Already made a SMC and PRAM reset)
Thanks in advance!
Josef G -
Thanks for the comments! We’ll fix the missing steps right up!
Those are good questions. I would like to know also.
May I know where to buy a replacement screen from a reliable supplier ?
Alan Li -
Hi Alan, we sell replacement screens in our store.
This repair guide was on point!! One thing I will point out is that once you install new screen and are ready to reconnect the battery cable, make sure it is in correctly. It should not be able to slide out without some pressure. I made this mistake and it caused several problems, the laptop was extremely slow and the fan kept running. Once it seated the battery cable correctly it worked perfectly.
If the first thing you do is disconnect the battery, is it really an issue if you don’t (or can’t) disable auto-boot?
maccentric -
I agree, why disable Auto-Boot when the lid is closed and the battery is disconnected immediately? – I've never had an issue since 2016 when the feature was introduced.
stevebsiegel -
On my machine, the longest two screws were in the corners, while the other two long screws were in the middle. Perhaps previous service in the past had them replaced into the wrong place? In any case, the longest screws do seem to fit in either place. I guess 0.8mm is not very much of a difference. Seems like poor design if they could have used one size of screw.
johann beda -
Just did one, and it also had longest screws in the corners.
maccentric -
Just did another, and the long ones were in the middle. Definitely poor design and quality control.
maccentric -