
Introduzione
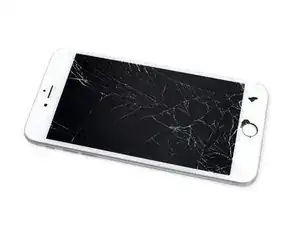
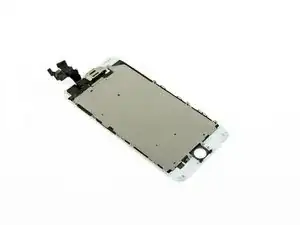
Impara come sostituire lo schermo del tuo iPhone 6 Plus. Questa parte è fornita con la fotocamera anteriore, l'altoparlante voce e il cavo sensori già installati, semplificando la riparazione.
Tutto quello che ti serve è rimuovere il vecchio schermo e trasferire il pulsante home originale sul nuovo display per consentire il funzionamento del Touch ID (scanner impronte digitali).
-
-
Spegni il tuo iPhone prima di cominciare a smontarlo.
-
Rimuovi le due viti Pentalobe P2 da 3,6 mm vicino al connettore Lightning.
-
-
-
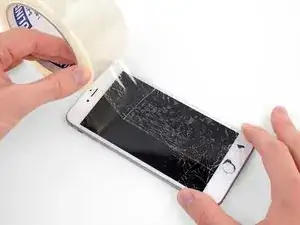
Se il vetro del tuo display è crepato, l'applicazione di nastro adesivo sullo schermo blocca ulteriori rotture e previene possibili infortuni.
-
Disponi strisce sovrapposte di nastro adesivo trasparente sul display dell'iPhone fino a coprire l'intera superficie.
-
Se, a causa della rottura, risulta difficile far attaccare una ventosa come è descritto nei passi successivi, puoi provare a ripiegare un pezzo di nastro molto tenace (come il nastro americano) per farne una maniglia e sollevare con questo il display.
-
-
-
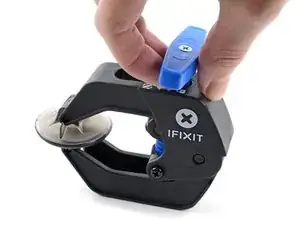
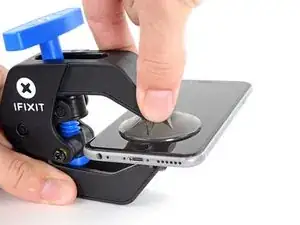
Tira la maniglia blu indietro per sbloccare i bracci dell'Anti-Clamp.
-
Fai scorrere i bracci oltre il bordo sinistro o destro del tuo iPhone.
-
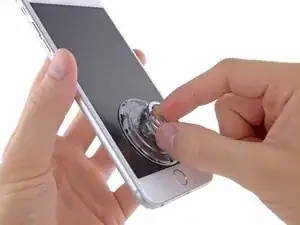
Posiziona le ventose vicino al bordo inferiore dell'iPhone, appena sopra il tasto Home, una di fronte e una sul retro.
-
Premi le ventose insieme per farle aderire sull'area desiderata.
-
-
-
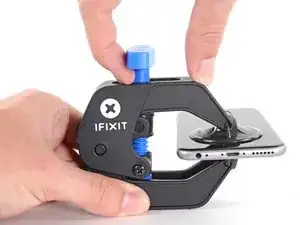
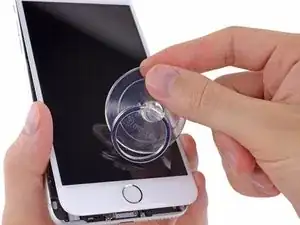
Tira la manopola blu in avanti per bloccare i bracci.
-
Gira la manopola in senso orario di 360° o finché le ventose cominciano ad allungarsi.
-
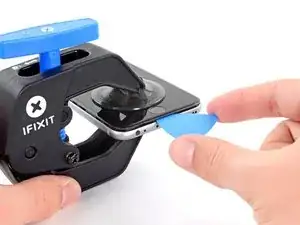
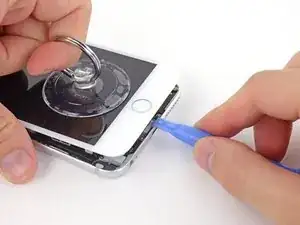
Inserisci un plettro di apertura o un altro strumento sotto lo schermo quando l'Anti-Clamp crea una fessura abbastanza grande.
-
Salta i prossimi tre passi.
-
-
-
Usa una singola ventosa per sollevare il pannello frontale:
-
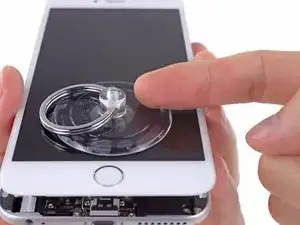
Premi una ventosa sullo schermo, appena sopra al tasto Home.
-
-
-
Mentre tieni fermo l'iPhone con una mano, tira la ventosa per separare lievemente il gruppo del pannello frontale dal case posteriore.
-
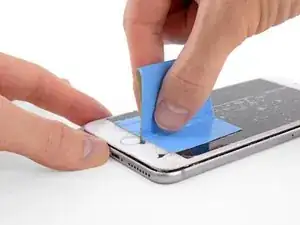
Usando uno strumento di apertura in plastica, inizia a staccare con delicatezza il case posteriore, allontanandolo dal gruppo display, mentre continui a tirare con la ventosa.
-
-
-
Tira la sporgenza in plastica per allentare la ventosa.
-
Rimuovi la ventosa dal gruppo display.
-
-
-
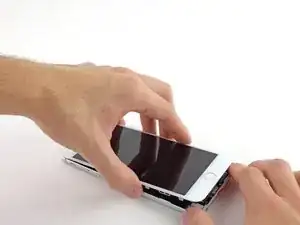
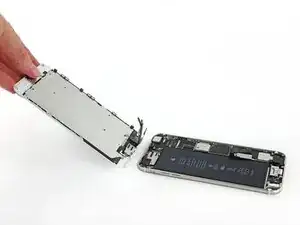
Solleva dal case posteriore il lato del pulsante home del gruppo del pannello frontale, usando il lato superiore del telefono come una cerniera.
-
Apri il display a un angolo di circa 90° e posalo contro qualcosa che lo tenga aperto mentre tu stai lavorando sul telefono.
-
Aggiungi un elastico per tenere il display al suo posto mentre lavori. In questo modo si eviteranno sforzi imprevisti sui cavi del display.
-
-
-
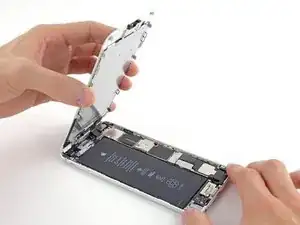
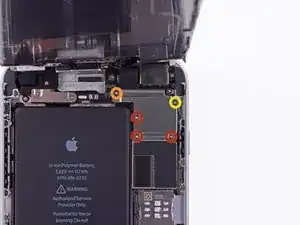
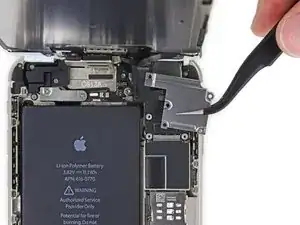
Rimuovi le seguenti viti a croce Phillips dalla staffa del connettore della batteria:
-
Una vite da 2,3 mm
-
Una vite da 3,1 mm
-
-
-
Usa un'unghia pulita o il bordo di uno strumento di apertura per sollevare con delicatezza il connettore della batteria dalla sua sede sulla scheda logica.
-
-
-
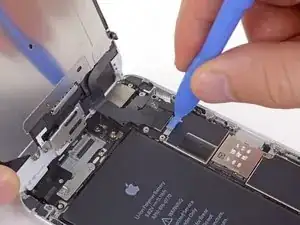
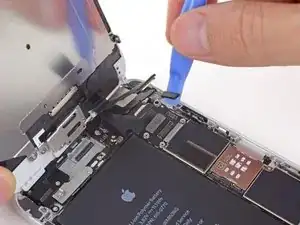
Rimuovi le seguenti cinque viti a croce Phillips che tengono in posizione la staffa del cavo del gruppo del pannello frontale:
-
Tre viti da 1,2 mm
-
Una vite da 1,5 mm
-
Una vite da 2,9 mm
-
-
-
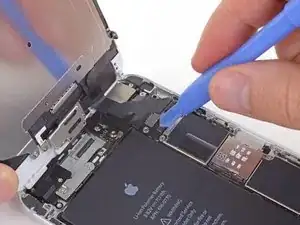
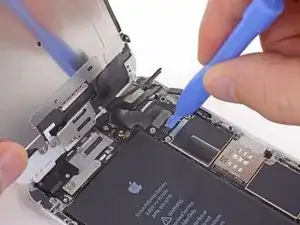
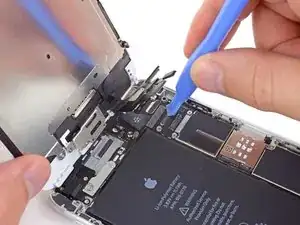
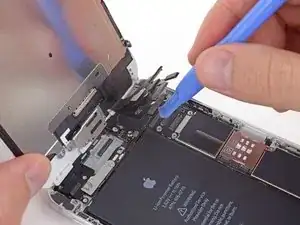
Mentre continui a tenere aperto il pannello frontale, usa un'unghia o uno strumento di apertura per staccare il connettore della fotocamera anteriore e dell'altoparlante voce.
-
-
-
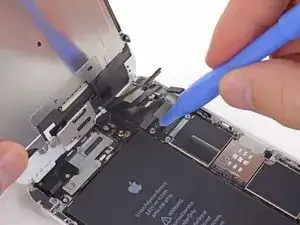
Usa uno strumento di apertura in plastica per staccare il connettore del cavo dati del display.
-
-
-
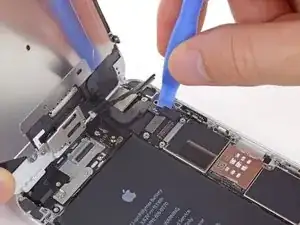
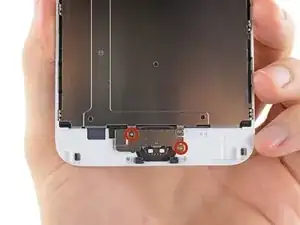
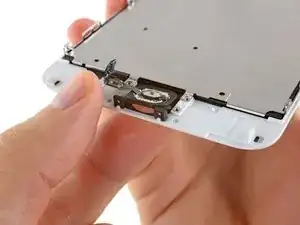
Rimuovi le due viti Phillips da 1,8 mm che fissano sul pannello anteriore la staffa del pulsante home.
-
-
-
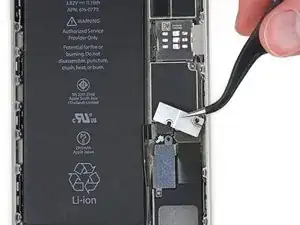
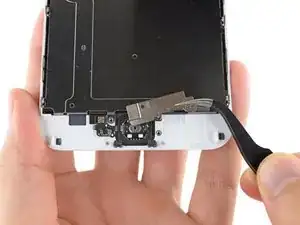
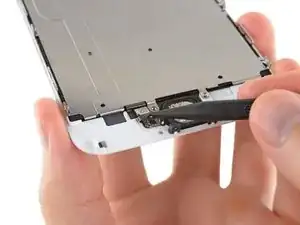
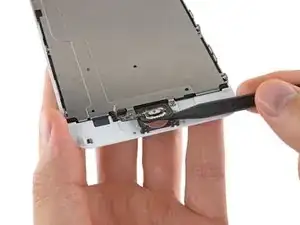
Usa la punta di uno spudger per staccare il connettore del pulsante home dal suo zoccolo sul cavo del pulsante home.
-
-
-
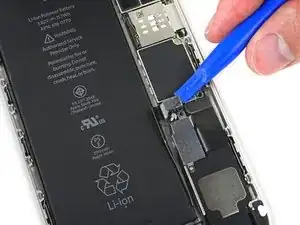
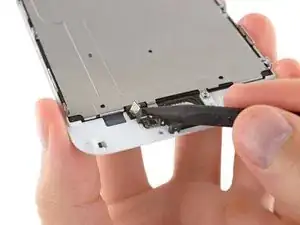
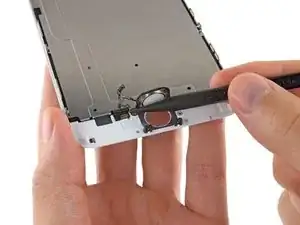
Incunea senza forzare la punta di uno spudger sotto il connettore del cavo del pulsante home.
-
Usa, muovendolo con delicatezza, lo spudger per separare il cavo del connettore del pulsante home dall'adesivo che lo fissa al gruppo del pannello anteriore.
-
-
-
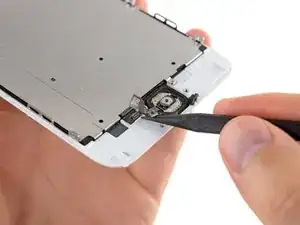
Scalda leggermente (con un iOpener, una pistola termica o un asciugacapelli) per ammorbidire l'adesivo che fissa la guarnizione del tasto home.
-
Usando la punta del dito, spingi gentilmente, ma non rimuovere, il pulsante home verso il lato opposto. Usa una pressione forte costante per separare lentamente la guarnizione in gomma del pulsante home dal pannello anteriore.
-
-
-
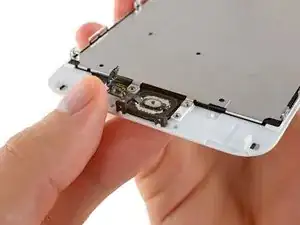
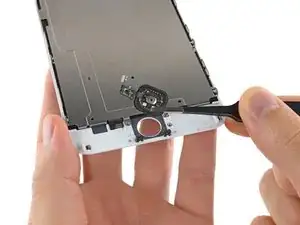
Usa con delicatezza la punta di uno spudger per finire di separare il pulsante home dal gruppo del pannello anteriore.
-
-
-
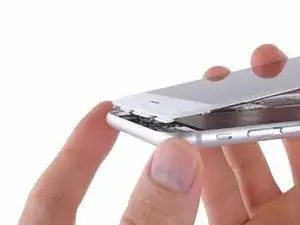
Resta solo lo schermo.
-
Confronta il ricambio con l'originale: potresti dover trasferire alcune componenti (come i due occhielli in gomma in fondo allo schermo) prima dell'installazione.
-


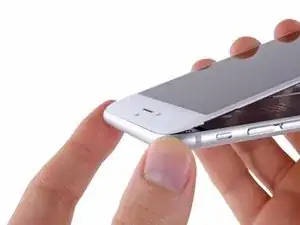
Per rimontare il tuo dispositivo, segui queste istruzioni in ordine inverso.

96 commenti
I have original home screen button, but the panel and home button cable was part of what was damaged on the phone. With that in mind will it still work with original home screen button, but replacement panel?
This is a tough one. I do not know that you'll be able to salvage the Touch ID functionality of the home button with the connector being damaged. You may need to purchase iPhone 6 and 6 Plus Home Button Assembly and iPhone 6 and 6 Plus Home Button Gasket. This will no longer retain the Touch ID functionality though.
I will be testing this out myself as soon a I get a new touchID cable/along with the LCD Panel. I did a screen replacement, all went well and works great, however I punctured the TouchID cable when prying it off of the old display.
I ordered a new cable with the panel, as I understand it as long as you have the ORIGINAL TouchID assembly which I do, after replacing the cable it should work!
Instructions are incomplete ! You also have to remove the aluminum plate and the rear camera/speaker assembly.
Also, my touch ID does not work anymore :/ nothing was damaged and plug is connected. Resetting the phone made no difference.
Why would it not work if I used the same Home Button and logic board?
hey having the same problem with my touch id.. did you ever find a solution?
did you make sure to put the metal bracket back on to the home button if forgotten to be put on it would cause the button to not make a clicking sound
I have the same problem. I replace the screen and reuse the original home bottom but the click don’t work the touch id yes
You have probably damaged the connector during disassembly or reassembly.
Pentalobe P2
Enea Del Lama -
I prefer to remove the SIM card as the very first step since it's safer to do so while the phone is fully assembled.
estebanfallasf -
I stripped one of the two screws - at a dead stop.
Margaret Patterson -
Before you even start: get the iOpener or hairdryer out. You’ll need it
GPZ -
If a lightning connector won’t provide a charge or needs to be wiggled carefully to provide a charge, power off the device, then try using precision tweezers to scrape the innermost wall of the lightning jack in a pinching motion to check for lint buildup. Pocket lint or other debris can accumulate inside the jack, compacting each time a cable is inserted. This can prevent a lightning cable from seating fully. Clearing the lint may restore functionality without replacing the part.
Andrew Dolan -
A few hints:
* heating up the phone works great. I used a heating pad that you put in the microwave to heat sports injuries.
* also, I made a sheet to help you keep track of the screws as you remove them. Print out the page, then place double sided tape below each color-coded listing of screws, and stick the screws to the tape as you disassemble. This helps prevent losing the screws and keeps track of what screws are what for easier reassembly. https://drive.google.com/file/d/1pLSvKvB...
Paul Faulstich -
Additional hints, for anyone who needs them:
* stick the screws to the tape in the same positions as they are shown in the guide. This will make it easier to identify them during reassembly.
* if the screws get mixed together, the ‘mm’ (millimetre, millimeter) measurements given in the guide can be used to identify them. Compare the lengths of the threaded shafts to each other to determine which screw is which.
Friendly Advice -