Introduzione
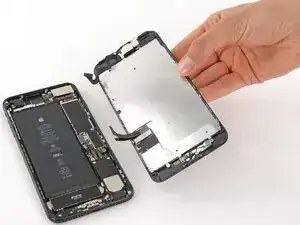
Scopri come sostituire lo schermo del tuo iPhone 7 Plus. Questa parte viene fornita con l'altoparlante frontale e la schermatura EMI già installati, rendendo più facile la riparazione.
Tutto quello che devi fare è rimuovere lo schermo vecchio e trasferire il pulsante Home sul nuovo schermo, affinché funzioni.
Strumenti
-
-
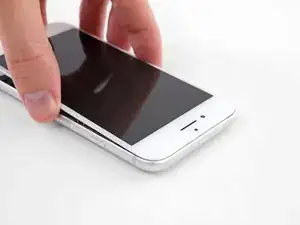
Spegni il tuo iPhone prima di iniziare lo smontaggio.
-
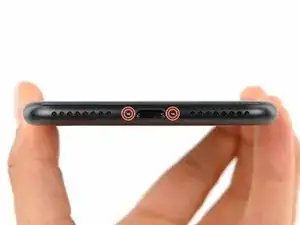
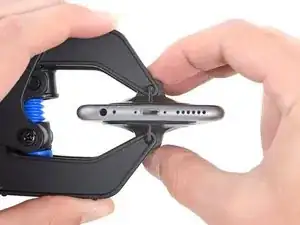
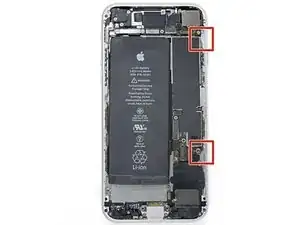
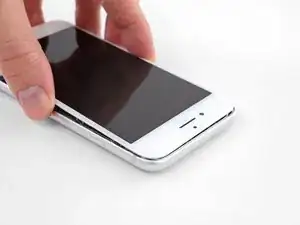
Rimuovi le due viti pentalobe da 3,4 mm sul lato inferiore dell'iPhone.
-
-
-
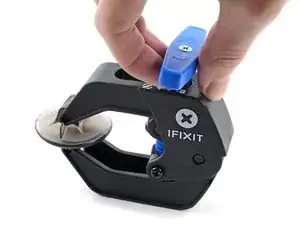
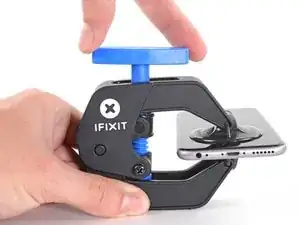
I prossimi tre passaggi ti spiegherano come utilizzare l'Anti-Clamp, uno strumento che abbiamo studiato per rendere la procedura di apertura più facile. Se non stai usando l'Anti-Clamp, salta questi tre passaggi e continua con un metodo alternativo.
-
Tira la manopola blu verso la cerniera per disattivare la modalità di apertura.
-
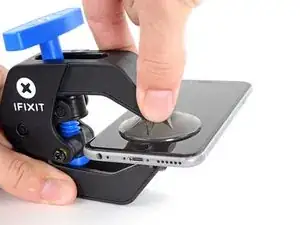
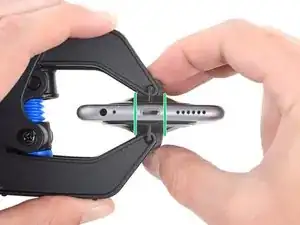
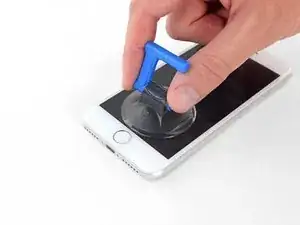
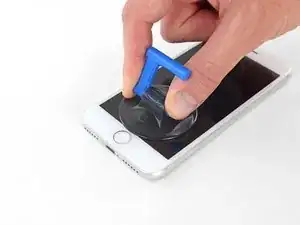
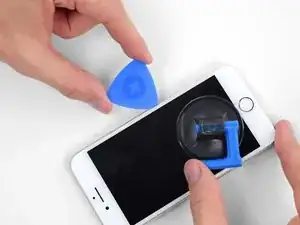
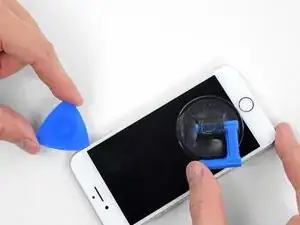
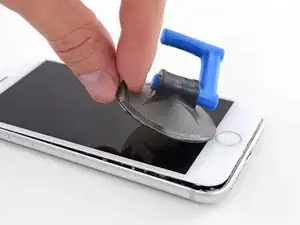
Posiziona la ventosa vicino al bordo inferiore dello schermo: una davanti e una dietro.
-
Spingi sulle ventose in modo tale che possano fare presa sull'area desiderata.
-
-
-
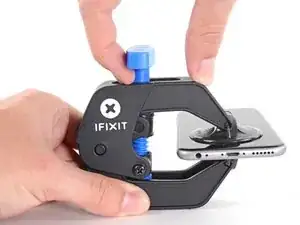
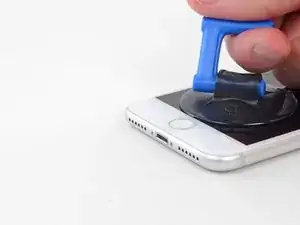
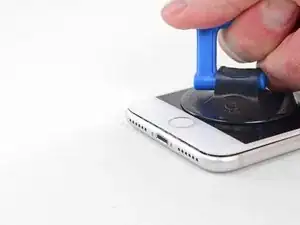
Tira la manopola blu in avanti per bloccare i bracci.
-
Gira la manopola in senso orario di 360 gradi o fino a quando le ventose iniziano ad allungarsi.
-
Assicurati che le ventose siano allineate fra loro. Se dovessero iniziare a scivolare, allenta leggermente le ventose e riallinea i braccetti.
-
-
-
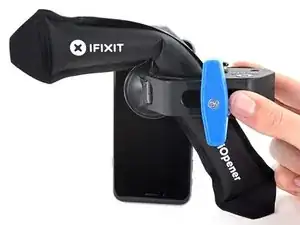
Scalda un iOpener e infilalo tra i bracci dell'Anti-Clamp.
-
Piega l'iOpener in modo che poggi sul bordo inferiore dell'iPhone.
-
Attendi un minuto per dare all'adesivo una possibilità di staccarsi e formare una fessura di apertura.
-
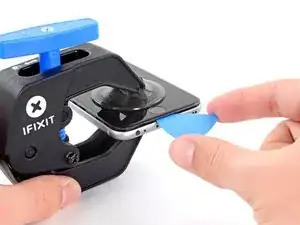
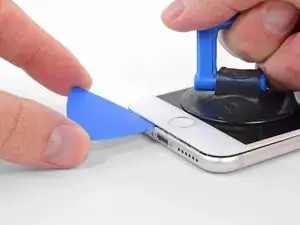
Inserisci il plettro di apertura nella fessura.
-
Salta i tre passaggi successivi.
-
-
-
Il riscaldamento del bordo inferiore dell'iPhone aiuta ad ammorbidire l'adesivo che blocca il display, semplificando l'apertura.
-
Usa un asciugacapelli oppure prepara un iOpener e applicalo per circa 90 secondi al bordo inferiore dell'iPhone per ammorbidire l'adesivo sottostante.
-
-
-
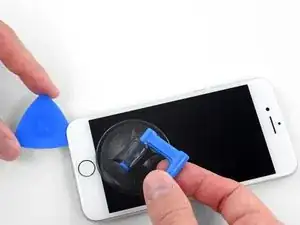
Applica una ventosa nella metà inferiore del pannello frontale, appena sopra il pulsante home.
-
-
-
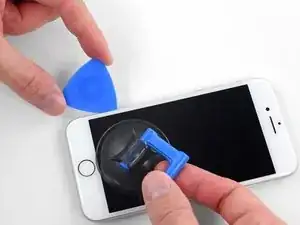
Tira la ventosa applicando una tensione forte e costante fino a creare una piccola fessura tra il gruppo dello schermo e la scocca.
-
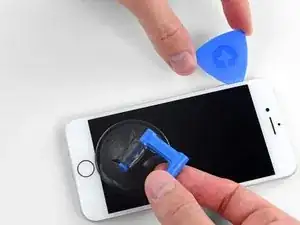
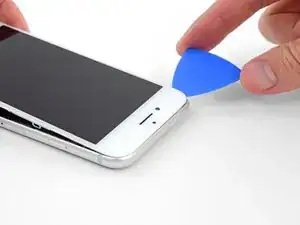
Inserisci nella fessura un plettro di apertura.
-
-
-
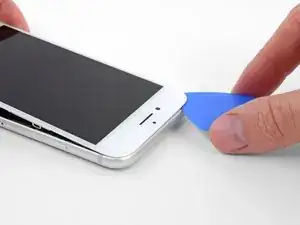
Fai scorrere il tuo attrezzo lungo il bordo sinistro del telefono, spostandoti verso i pulsanti del controllo volume e l'interruttore della modalità silenziosa, per rompere l'adesivo che tiene in posizione il display.
-
Fermati vicino all'angolo superiore sinistro del display.
-
-
-
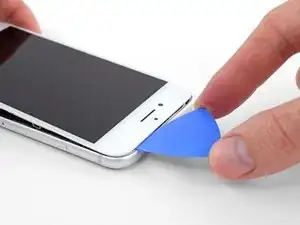
Inserisci nuovamente il tuo attrezzo nell'angolo inferiore destro dell'iPhone e fallo scorrere attorno all'angolo e lungo il lato destro del telefono per separare l'adesivo.
-
-
-
Tira dolcemente la ventosa per sollevare il lato inferiore del display.
-
Tira la linguetta per staccare la ventosa dal pannello anteriore.
-
-
-
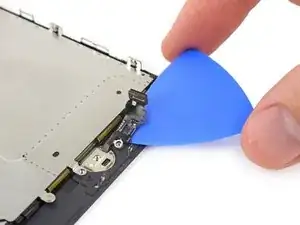
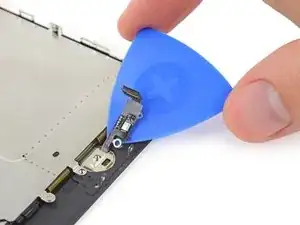
Fai scorrere uno strumento di apertura sotto il display attorno all'angolo superiore sinistro e lungo il bordo superiore del telefono per allentare l'adesivo rimasto.
-
-
-
Fai scorrere lievemente il gruppo display verso il basso (allontanandolo dal bordo superiore del telefono) per liberarlo dalle clip che lo collegano al case posteriore.
-
-
-
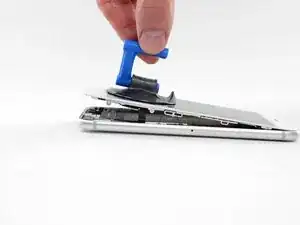
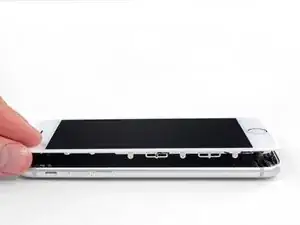
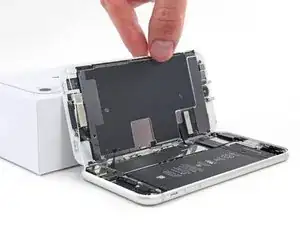
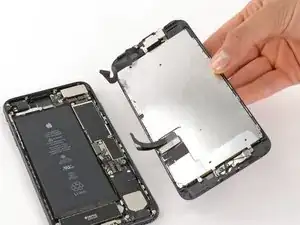
Apri l'iPhone sollevando il display dal lato sinistro, come per sollevare la copertina posteriore di un libro.
-
Appoggia il display contro qualche tipo di supporto per mantenerlo aperto mentre lavori sul telefono.
-
-
-
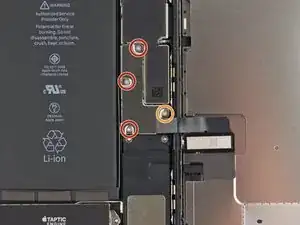
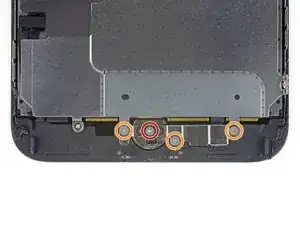
Rimuovi le seguenti quattro viti tri-wing Y000 che fissano la staffa inferiore del cavo del display alla scheda logica:
-
Tre viti da 1,2 mm
-
Una vite da 2,6 mm
-
-
-
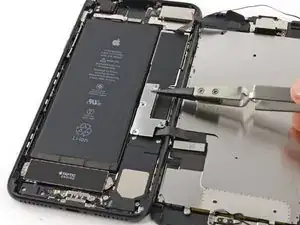
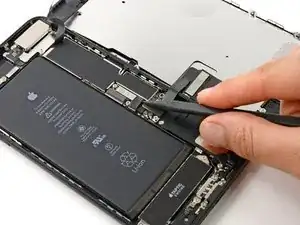
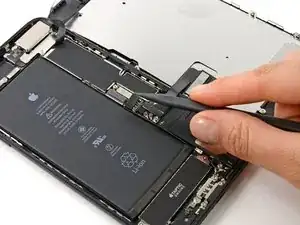
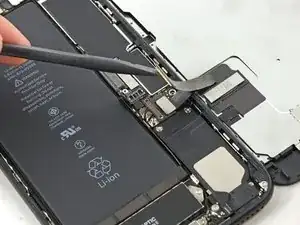
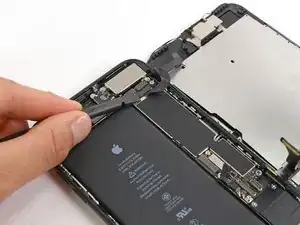
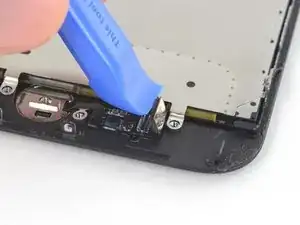
Usa l'estremità a punta di uno spudger per sollevare il connettore della batteria dal suo zoccolino sulla scheda logica.
-
-
-
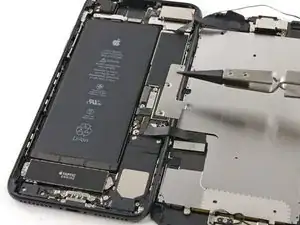
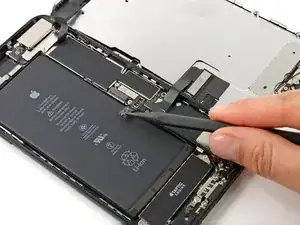
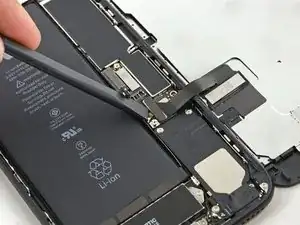
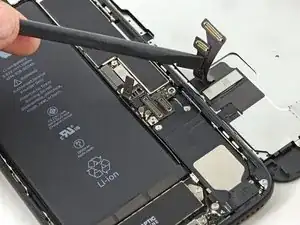
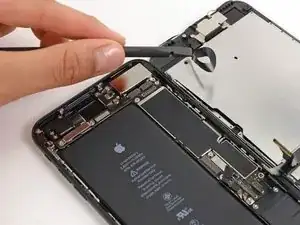
Usa l'estremità piatta di uno spudger oppure un'unghia per disconnettere i due connettori inferiori del display sollevandoli verso l'alto dai loro zoccolini sulla scheda logica.
-
-
-
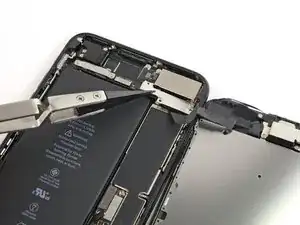
Rimuovi le tre viti tri-wing Y000 che fissano la staffa sopra il connettore del gruppo sensore del pannello anteriore:
-
Una vite da 1,3 mm
-
Due viti da 1,0 mm
-
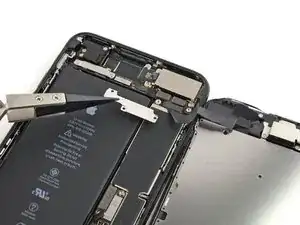
Rimuovi la staffa.
-
-
-
Disconnetti il connettore del gruppo sensore del pannello anteriore dal suo zoccolino sulla scheda logica.
-
-
-
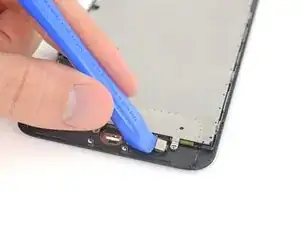
Rimuovi le quattro viti tri-wing Y000 che fissano la staffa sopra il sensore home/Touch ID:
-
Una vite da 1,1 mm
-
Tre viti da 1,3 mm
-
-
-
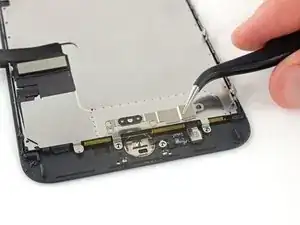
Stacca, spingendolo a destra, la spina del pulsante home per disconnetterlo dal suo zoccolino sul cavo di interconnessione.
-
-
-
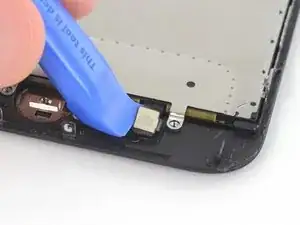
Fai leva delicatamente per alzare il cavo di interconnessione sottostante e spostalo lontano dal cavo del pulsante home.
-
Se il connettore non si stacca facilmente, usa un asciugacapelli o un iOpener per scaldare e ammorbidire l'adesivo che fissa il connettore, quindi prova di nuovo.
-
-
-
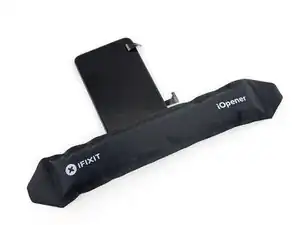
Capovolgi il gruppo display. Usa un asciugacapelli oppure prepara un iOpener e applica lo sul bordo retro del display per circa 90 secondi per ammorbidire l'adesivo sottostante.
-
-
-
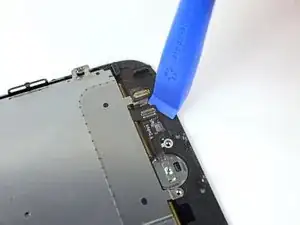
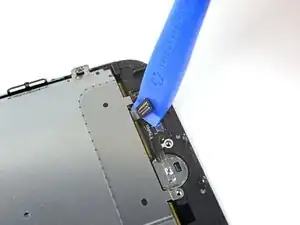
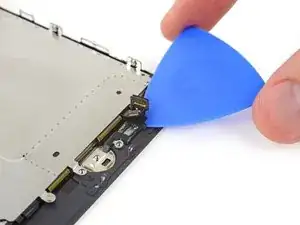
Usa con delicatezza una levetta di apertura per separare l'adesivo che fissa il cavo del sensore home/Touch ID al retro del pannello display.
-


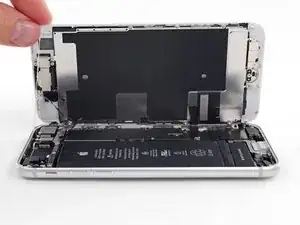

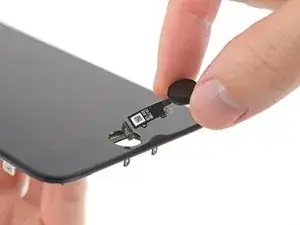
Confronta la tua nuova parte di ricambio con la parte originale: potrebbe essere necessario trasferire i componenti rimanenti o rimuovere le protezioni adesive dalla nuova parte prima dell'installazione.
Per riassemblare il tuo dispositivo, segui i passaggi precedenti in ordine inverso.
Porta i tuoi rifiuti elettronici a un riciclatore certificato R2 o e-Stewards.
La riparazione non è andata come previsto? Prova con la risoluzione dei problemi di base o cerca nel nostro Forum Risposte per trovare aiuto.

60 commenti
Only the glass is broken on my screen. I don't need a new digitizer. Is there a way to just replace the glass? Seems like that would be much cheaper. Thanks!
Unfortunately, by the nature of the technology, cracked glass likely means your digitizer is out of commission (does touch still register on the cracked screen?). Below that is the LCD, and that might not be broken (if the image is fine, then the LCD is likely fine). The problem is that these components are VERY VERY difficult to separate. This makes the individual replacements a nightmare. I hate to say anything is impossible, but separating these components will feel impossible without expensive tools and extensive knowledge. It will also likely end in a mess of broken components. When there is a will, there is a way. But the separation project will demand a lot of will.
Our store is having trouble with the earpiece speaker working after screen repair on just the 7 Plus, not with the 7. We have tried different techniques and still get figure what we are doing wrong. Has anyone else had this problem and know the solution?
Joe Cox -
My earpiece speaker also won't work with new screen... this is frustrating. Any solution
Ben -
There are some connections for the earpiece speaker that can be a little tricky to get properly connected during reassembly. If you look at the third photo in step 22 of the iPhone 7 Plus teardown you can see four copper pads on the cable, and four protruding copper connections on the speaker. For starters, make sure that these are all clean. When reassembling, make sure that the metal pads on the cable firmly touch the metal pins on the speaker. These are actually electrical connections, and are a little tougher to seat properly because they don't snap in like press or ZIF connectors. If the metal is all lined up and pressed against each other, then electricity should be flowing and sound should result! If the earpiece speaker was not removed and this guide was followed as is, it is most likely an issue with the connectors in step 19 of this guide.
I am an amateur and have successfully transferred all components to a replacement screen earphone and home button as well as the large metal bracket on the back without a problem. During the process though the flex cable for the ear piece gave me some issue because the flex cable is actually 2 separate pieces that are held together by some adhesive. Underneath it there are some connectors that have to line up perfectly. If you are doing repairs on a hot surface that adhesive will become more likely to separate when you try to relieve it from the broken screen. Keep that in mind. If it does come separated like mine did during replacement simply line the connectors up and give it a squeeze for a few seconds to get the adhesive to take then let it cool down before re installation.
Make sure when you are connecting the earpiece ribbon cable you attach it the correct way. It seems like it should be connected with the excess of the ribbon cable going upwards but that is incorrect and will render the speaker useless. You have to make sure when you connect it the the excess is going downwards. This will make the ribbon cable appear as though it is twisted tangled but that is how it has to be connected. I wish I could upload pictures
why do you need to change the touch ID sensor? if your replacement screen comes with a touch ID, do you still need to swap it?
kjding -
For security reasons, each iPhone's Touch ID sensor is uniquely paired to the logic board at the factory. If you replace your screen without transferring over your original home button, you will lose Touch ID functionality. If your replacement screen came with a replacement home button anyway, take it off and carefully replace it with your original home button.
For the 7, the home button also must detect a fingerprint in order for the home button functionality to work. Because the security feature turns off the TouchID function, the iPhone stops trying to detect a fingerprint and makes the home button not work at all. You want to keep the original home button and be careful not to rip the cable because for this particular generation of iPhone, there is no replacing the home button.
The recommendation of discharging the battery is completely unnecessary. Even a 25% charged battery can explode. Completely ridiculous suggestion.
pargoff -
The risk of thermal runaway on these batteries decreases with the battery's SOC (state of charge). Below 50% charge the risk is fairly low, and at 25% charge the risk of a thermal event is near zero. If I recall correctly, the same suggestion appears in Apple's official (non-public) service manuals for the iPhone.
Jeff Suovanen -
@jeffsu Yes, that is correct. Apple does require all certified staff to discharge the battery below 25%. This is an industry standard for all LiION batteries. If you don’t want to do this, just make sure to not puncture the battery and disconnect it first thing.
iHelpU.Tech -
Hang on a second here, doesn’t the Ifixit part I ordered come with the seals? The display assembly? It doesn’t. Now I have to wait another week?!
Vanessa Pinter -
How do you turn off if the screen isn’t responding to touch?
adam -
The replacement battery came with the seal—but how do you put it on???
lkollar -
Instructions for replacing the seal are here: Sostituzione guarnizione adesiva display iPhone
bester -
I just found the instructions on how to install the seals AFTER I was completed and had to figure it out. Maybe, just maybe you should link this somewhere on the guild instead of buried in a comment. Just a thought.
Charles Meitin -
Step 1 is: Read through all the steps and comments or the method prior to starting on this Step 1. There's a lot of much needed information and experience that you can learn from which will reduce the chance of struggling, wasting time or even breaking your device.
My favourites are:
Use a hot water bottle.
Label all screws you remove with their size and location on a piece of paper with double sided sticky tape.
Test the lightning assembly at step 13
There is a Standoff driver bit in the box, don't use a screwdriver.
etc...
Neil Eriksen -
A tip for looking out for all those little screws. I used an ice block tray, for all the little screws etc. I numbered each with the step number, as in the instructions, but not all steps have bits to look out for. Where two different size screws are used I had a tray for each size and marked step a and step b. For this I coloured each tray sticker with the colour of the screw as shown in the instructions. All this worked a treat with no confusion or using the wrong part.
Herb
Herb Adler -
The screw size for those with a screw set is P2.
Gareth Flandro -