Introduzione

Rimuovere lo schermo richiede il taglio dell'adesivo attorno al perimetro dello schermo. Dopo averlo tagliato, l'adesivo non può più essere usato per reincollare lo schermo.

Segui questa guida per applicare delle nuove strisce adesive.

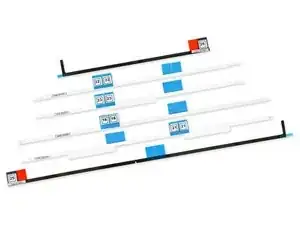
Le strisce adesive sono disponibili in due varianti: strisce per i modelli 2012-2015 e per i modelli 2012-2019. Le strisce 2012-2015 non hanno la rientranza per il microfono sulla striscia per il bordo inferiore e vanno usate solo per i modelli 2012-2015 di iMac.

  1. VNCQ6U1rQr3Dxsfm
    • Prima di iniziare, assicurati di avere le strisce adesive corrette:

    • Le strisce adesive per i modelli iMac del 2012-2019 hanno una rientranza per il microfono e sono numerate 16, 21, 22, 23, 25 e 26. Possono essere usate per i modelli di iMac dal 2012 al 2019.

    • Se le tue strisce sono numerate 11-16, segui la guida per le strisce adesive iMac 2012-2015.

    Is there anything better than these self-adhesive strips?

    They don’t seem as thick as the original adhesive and not as strong. As the adhesive weakens when warm, I’ve had a screen come loose within a few days of use. Luckily the user was in front of it to catch it, else we could have been looking at a very expensive repair.

    Cool_Breeze -

    Hello, in 99% of cases this happens because the residues of the old stripes on the display side have not been completely removed.

    McFix -

    My strips are labelled 14, 15, 16, 21, 22, 23 in a kit for the late 2013 iMac. That matches neither set mentioned here. So I have 14 and 15 instead of 25 and 26. It seems a mix of the two sets described, but since either should work for the 2013 model I should be fine?

    Bernd -

  2. CqVQhbkHPqYA4veK
    • Con la copertura posteriore libera di muoversi, l'iMac non sarà bilanciato e sarà difficile lavorarci. Le riparazioni possono essere completate anche in questa situazione, ma sono più rapide e semplici con il supporto in cartone iFixit.

    • Segui queste istruzioni per montare il cuneo di cartone.

    • Se non hai un supporto per iMac, stai molto attento durante l'installazione e mentre lavori dietro lo schermo: lo schermo può cadere facilmente e rompersi se la copertura si muove inaspettatamente.

  3. SXyZVVQNeM5hJWdI
    SXyZVVQNeM5hJWdI
    BDehN5GZ1IsguqTZ
    • Prima di installare le nuove strisce adesive, rimuovi tutto l'adesivo originale dal perimetro della cornice.

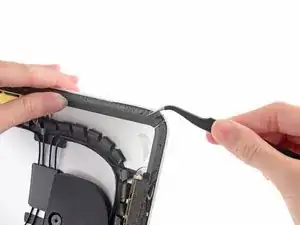
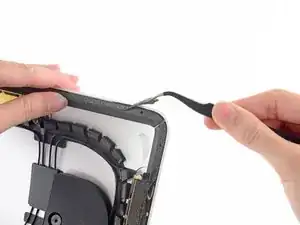
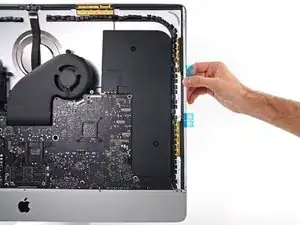
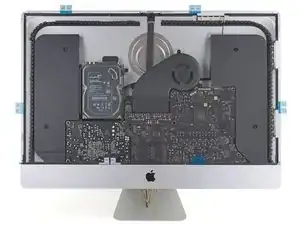
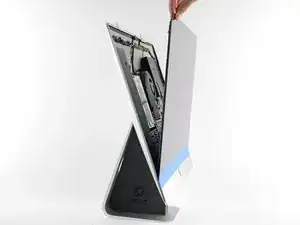
    • Se stai reinstallando lo schermo originale, dovrai rimuovere l'adesivo originale anche dal retro dello schermo.

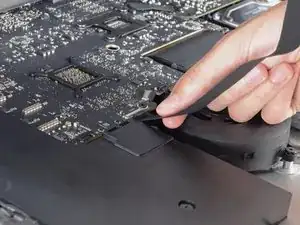
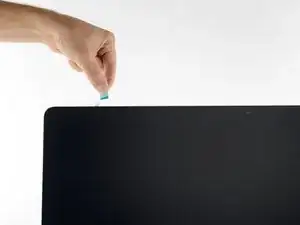
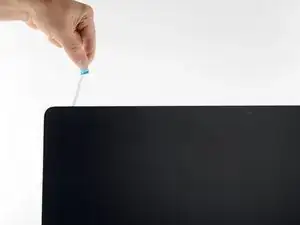
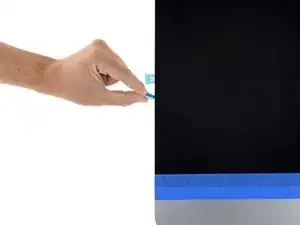
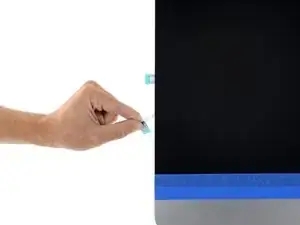
    • Rimuovi l'adesivo usando delle pinzette o le dita. Inizia sulla parte inferiore e tiralo verso l'alto, verso la parte superiore del dispositivo.

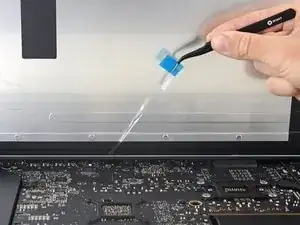
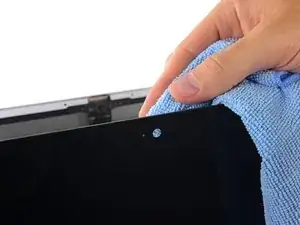
    • Dopo aver rimosso tutto l'adesivo originale, pulisci attentamente la superfice con dell'alcool isopropilico (>90%) e un panno senza lanugine. Fai scorrere il panno in una sola direzione, non in avanti e indietro.

    • Non saltare questo passaggio, o il tuo nuovo adesivo non si incollerà correttamente e lo schermo dell'iMac potrebbe cadere.

    The black border on the back of the screen glass appears to be painted on. When removing the foam adhesive, be careful with tools as it can scratch off the paint and that will show through when all is back together. Fingernails worked best for me; peeling the tape up slowly followed by the alcohol wipe.

    Tom Pentz -

    On mine the glue stuck mostly to the enclosure. It required a lot of elbow grease to get it off.

    Larry -

    Used a little dab of Goo Gone with a micro fiber cloth and a lot of elbow grease on the enclosure to remove the adhesive. As far as the glass side, mine was fairly clean so I just used some 70 % alcohol and was careful. Then went back over all areas with 70 % alcohol again. Was able to clean everything thoroughly. It’s tough but worth it for good adhesion. Thanks Darren S.

    Darren Stewart -

    My 27" iMac was damaged in shipping and I had to replace the display. When trying to replace the display, I found that the case was bent on the top, just barely visible. Makes sense as the top right corner of the display was totally smashed... Check your display fit and alignment BEFORE placing the adhesive strips. This way you can work on straightening the frame without worrying about damaging the adhesive strips.

    The case is actually soft, in that it is easily bent. Work only when relaxed and not stressed out! I used my body weight and a small piece of wood as a fulcrum to accomplish the (un)bends. If you place it on a totally flat surface you can see where it's touching and where it's high, so you know where to bent it. I had to use some pliers to get the last bit straight. I used multiple (4 - 6) layers of cardboard under the pliers to prevent scratching the aluminium. Go gently, slowly, checking for alignment / flatness many times, rather than doing too much and having to bent it back again.

    VikingShips -

  4. pmDBkCBjaNxAsY3w
    pmDBkCBjaNxAsY3w
    adBJVpwrsGLZVvPD
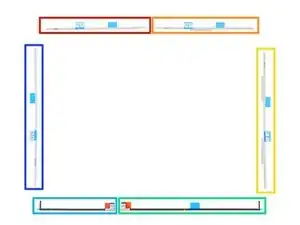
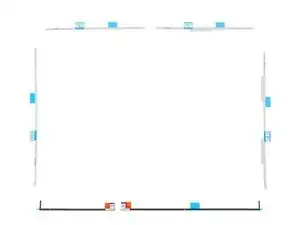
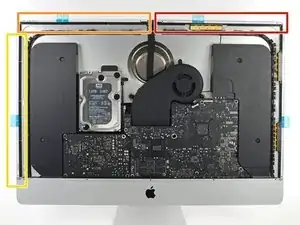
    • Prima di iniziare, appoggia sul tavolo le strisce adesive nella disposizione corretta in modo da non applicare accidentalmente una striscia nella posizione sbagliata:

    • Striscia 22 in alto a sinistra

    • Striscia 23 in alto a destra

    • Striscia 21 sul lato destro

    • Striscia 25 in basso a destra, con il bordo scuro rivolto verso l'alto

    • Ricontrolla che questa striscia abbia la rientranza necessaria per il microfono.

    • Striscia 26 in basso a sinistra, con il bordo scuro rivolto verso l'alto

    • Striscia 16 sul lato sinistro

  5. Fb63RVbbGSSQ2cm3
    Fb63RVbbGSSQ2cm3
    NHFl32nQXpOjYups
    REoIvKhMKZNkqqVV
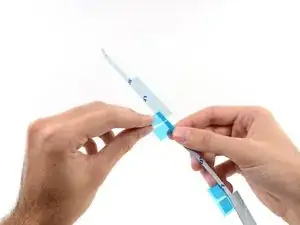
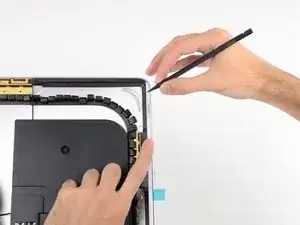
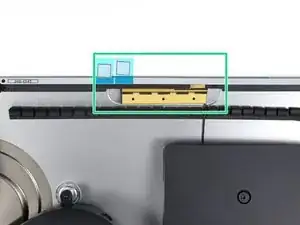
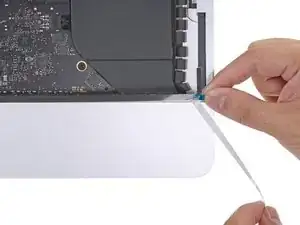
    • Inizia con la striscia 21, che va sul lato destro della cornice dell'iMac.

    • Prima di rimuovere ogni pellicola protettiva, allinea la striscia lungo la cornice dell'iMac per farti un'idea di dove vada applicata.

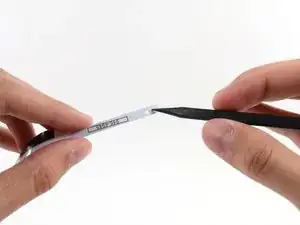
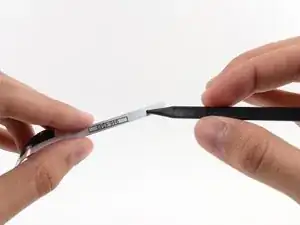
    • Rimuovi il pezzo corto della protezione dell'adesivo posteriore dalla striscia.

  6. HwAXmSQWVH4thVeq
    HwAXmSQWVH4thVeq
    rMoHuELKfAAOODvX
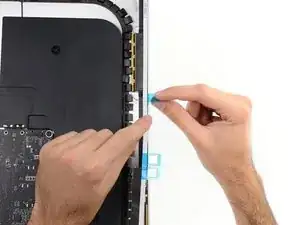
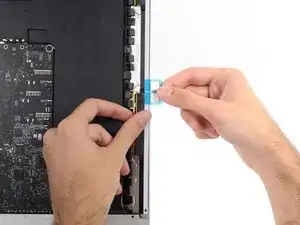
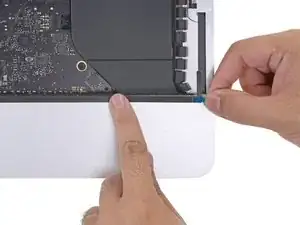
    • Infila la punta di uno spudger nel foro all'estremità della striscia dove hai appena rimosso la pellicola protettiva posteriore. Infila lo spudger dal lato con ancora la protezione bianca.

  7. XSCyxR2QnGYxELqs
    XSCyxR2QnGYxELqs
    DaBoHdGpJ1yEXNpv
    ySWFecPZaqQkEIlR
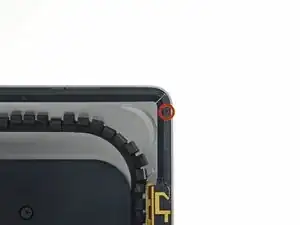
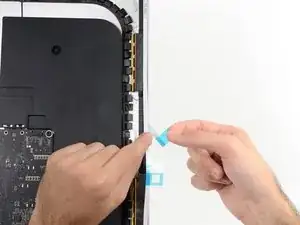
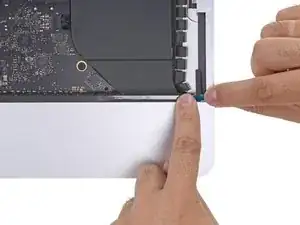
    • Con lo spudger che sporge ancora dal foro nella striscia adesiva, spingi la punta dello spudger nel foro corrispondente nella cornice deell'iMac.

    • Usando il foro e lo spudger come punto fisso della striscia, allineala contro il bordo destro, tirandola delicatamente verso l'alto per assicurarti che sia tesa, quindi incollala alla cornice.

  8. VvLYsDbK1FRqJeB4
    VvLYsDbK1FRqJeB4
    LEAvW6ApvEZqCYnD
    FTwgDXUjBMvIkoyu
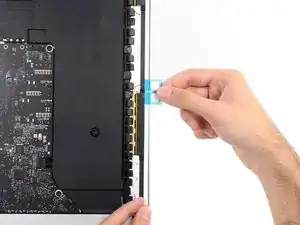
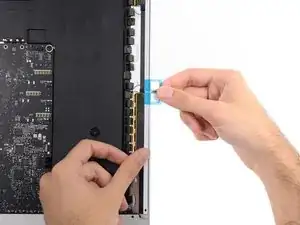
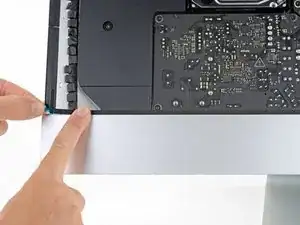
    • Una volta allineata correttamente la parte superiore della striscia adesiva, rimuovi il lungo pezzo blu della pellicola protettiva posteriore dalla striscia.

    • Se la parte superiore non è allineata correttamente, puoi rimuoverla attentamente e reincollarla prima di rimuovere la pellicola protettiva posteriore restante. Assicurati di usare la punta dello spudger come punto fisso.

  9. AomxhWjDQ4QLtwII
    AomxhWjDQ4QLtwII
    jWFYISpjqBKrMja3
    • Allinea la parte inferiore della striscia con il bordo destro della cronice e incollala.

  10. 6OenXdKNQuWPZFqo
    6OenXdKNQuWPZFqo
    XmHAGdLiIsDFOwmN
    • Usa le dita per appiattire la striscia. Assicurati che sia correttamente allineata con il bordo destro e che non ci siano increspature.

    • Non rimuovere ancora la pellicola protettiva anteriore dell'adesivo.

  11. ylkfCQraIawuDAaw
    ylkfCQraIawuDAaw
    tOVU32wbl41LHVPq
    • Continua in senso antiorario lungo il perimetro dell'iMac, incollando altre tre strisce adesive come fatto per la prima;

    • Striscia 23 in alto a destra

    • Striscia 22 in alto a sinistra

    • Striscia 16 sul lato sinistro

    • Queste tre strisce hanno un foro ad ogni estremità: usa sempre il foro più piccolo per allinearle correttamente.

    • Sull'iMac Intel Retina 5K da 27", le alette blu della striscia superiore destra non si allineeranno con l'antenna superiore allo stesso modo del modello non 5K. Questo allineamento non perfetto è accettabile e non influirà sulle prestazioni delle antenne.

    2017 27”, lining up the top strips with the smaller outside holes, the tape holes at the other end did not line up with the larger holes in the case, near the camera.

    ebay -

    For the late 2012 27” iMac, strip 23 didn't line up correctly with the antenna. the antenna adhesive was a cm off from where it should have been. No biggie though.

    Daniel -

    I can confirm above comment - EMC 2546 Late 2012 27" iMac, strip 23 antenna does not align with adhesive.

    Michael -

  12. cMOaYcLYefCumkYU
    • Nei prossimi passaggi ti mostreremo come applicare la striscia adesiva in basso a destra (striscia 25), che ha una rientranza che deve essere allineata con il microfono.

    • Leggi questo e i prossimi quattro passaggi prima di eseguire questa procedura.

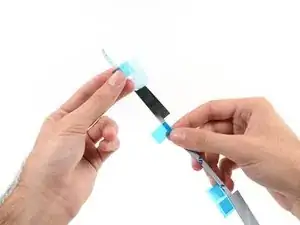
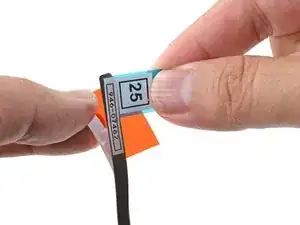
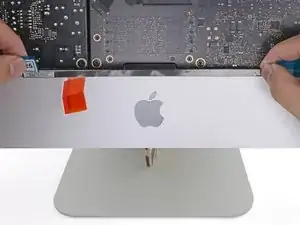
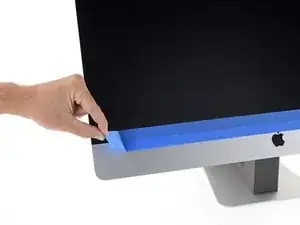
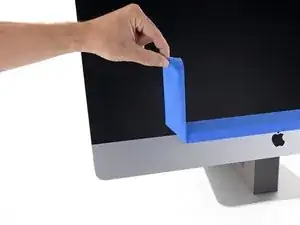
    • Prendi la linguetta rossa sulla striscia 25 e tirala per rimuovere circa 5 cm della pellicola protettiva bianca posteriore.

    These steps instruct you to install the lower strips to the iMac frame first, as that is what Apple instructs their techs to do. If you have an iMac without a microphone hole, you can choose to install the lower strips onto the display first. Peel the blue tab instead of the red to expose the adhesive. Carefully place the adhesive along the bottom edge of the display. The L-bend on the adhesive should match the display contours.

    Arthur Shi -

    My EMC No. 2546 did not have a microphone hole, so I was confused at first. A different instructional video (https://vimeo.com/139364064) recommends placing the strips on the display instead. I installed the strips on the frame, but I reckon installation on the display glass might have been a better option, at least with no microphone hole to contend with.

    Lennart Saaf -

    Yep, no microphone hole on the late 2012 27” iMac. I followed the video but I don’t think it made anything easier.

    Maybe my mistake was putting the screen back on when the frame was lying down. I was left with a mm gap on one side due to misalignment. Stand up the mac so the screen can sit on the lip and be aligned properly.

    Daniel -

    Je pense qu’il est possible de coller les adhésifs inférieurs légèrement plus haut que sur l’image, pour dégager 2mm afin de permettre à l’écran à l’horizontale de glisser latéralement pour faciliter l’alignement lors du remontage.

    stbrille -

  13. FaYQj6iEGDWeSfQs
    FaYQj6iEGDWeSfQs
    VHZ4xSNt1dcojwxM
    5S21WaLMMNkjyGrG
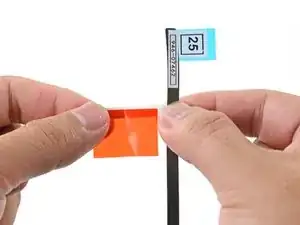
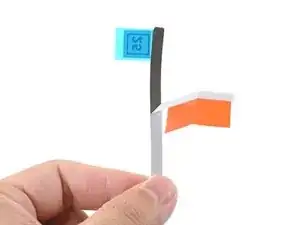
    • Piega a 90° rispetto alla striscia la parte staccata della pellicola protettiva bianca e schiaccia con le dita la piega così formatasi.

    • Piegare da parte la pellicola protettiva espone 5 cm di adesivo.

    I had difficulty here. The red tab wanted to pull off from the white backing.

    ebay -

    It's not the red tab. It's the bond between the white backing and the adhesive that's causing the problem. When I tried to peel the white backing off, it takes the adhesive along with it. I had to detach it with my finger nail, already risking a weaker bond between the screen and the adhesive. I thought the problem was only around the edge of the strip (where I had to pull the red tab), but the whole strip was pulling the adhesive off the clear backing as I was aligning it with the iMac. This is the second time this has happened with these strips. And now I'm concerned, since the adhesive is now slightly compressed and there's a little air gap in the middle now...

    adrianfpommier -

  14. Umv5ACKToyTFTC4U
    Umv5ACKToyTFTC4U
    K6BOxPIkXCrwd2T1
    OOF1VfCAZDHIISZU
    • Il foro del microfono è quello centrale affiancato da altri due fori più grandi.

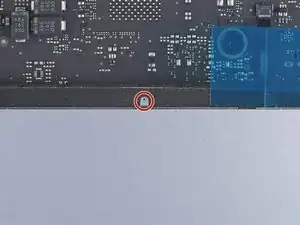
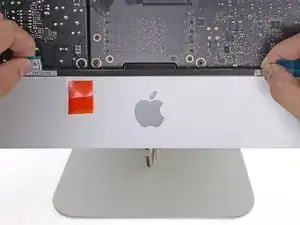
    • Allinea la striscia al bordo inferiore posizionando la rientranza nella striscia con il foro del microfono.

    • Se il tuo iMac non ha un foro per il microfono, allinea l'estremità destra della striscia in modo che la curva a L sia accanto alla striscia verticale sula lato destro. La curva a L non deve sovrapporsi alla striscia adesiva verticale sul lato destro.

    • L'adesivo si strappa facilmente. Stai attento a non tirare la striscia con troppa forza.

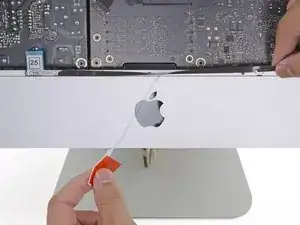
    • Una volta allineata la striscia, incolla attentamente l'adesivo esposto alla cornice per assicurarne l'allineamento.

    Can anyone confirm that the mic is the middle small hole as the photo in step 14 appears to show a larger hole? I ask as I don’t have the mic kit and will have to cut the kit to suit my late 2015 iMac 27 retina. Thanks.

    Amuseme -

    Good catch!! Yes, the mic hole is the small center hole. The step image is showing the wrong hole. I’ll upload the correct photo shortly.

    Arthur Shi -

    i have a late 2015 iMac 27” 5K (iMac 17,1) and I do not have a microphone along the bottom. I am confused because other people do?

    R L -

    The 2017 iMacs (both 21.5 and 27" models) were the first to have the microphone at the bottom. Previous models had it at the top center with the camera.

    Mike Rosenberg -

  15. TymHB1EigmSftrMb
    TymHB1EigmSftrMb
    443LWSHYanNQwGbO
    cFvtGF6EDegyHpET
    • Rimuovi la pellicola protettiva posteriore per esporre l'adesivo restante.

  16. FxNP2mo45gbNxkDV
    FxNP2mo45gbNxkDV
    2lrLodBsHcYulLhS
    • Fai scorrere il tuo dito da sinistra a destra lungo la striscia per assicurarti che sia dritta e senza pieghe, premendo mentre lo fai scorrere per incollare l'adesivo.

  17. AeFDLJJwHHx3PyyE
    AeFDLJJwHHx3PyyE
    aoqLLkmQ4Kl1GRBE
    XtMaVUrlftYcjDVe
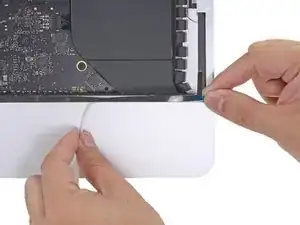
    • Ripeti i passaggi precedenti per la striscia inferiore sinistra (26), applicandola al bordo inferiore sinistro della cornice dell'iMac.

    • La striscia 4L dovrebbe essere posizionata in modo che la curva a L sia accanto alla striscia verticale sula lato sinistro. La curva a L non deve sovrapporsi alla striscia adesiva verticale sul lato sinistro.

    • Una volta applicate tutte le strisce adesive, l'iMac dovrebbe essere come mostrato nella seconda immagine.

    This strip is adjacent to the power supply of the iMac. Take care not to touch any part of the power supply module during this step.

    Zachary Hill -

    At this point, before proceeding, I would make sure the the power supply is fully de energized(no power cord) by holding down the power button for 30 seconds!

    Macrepair SF -

  18. jWlGUmAVUDAVDcyP
    jWlGUmAVUDAVDcyP
    GeIOkUMXQv3djbrK
    • Appoggia delicatamente lo schermo all'iMac e allinealo attentamente.

  19. Q6cmVLJt4LAGscky
    Q6cmVLJt4LAGscky
    f1RPGdP4bULqvKqx
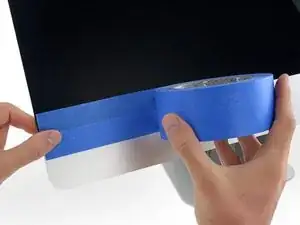
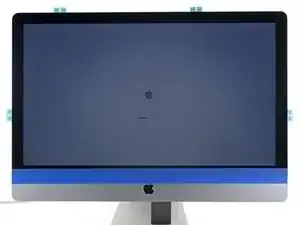
    • Usa il nastro adesivo di carta o il nastro isolante per fissare momentaneamente il bordo inferiore dello schermo alla cornice dell'iMac.

    • Il nastro mantiene l'allineamento dello schermo, ma ti permette di aprire in sicurezza il bordo superiore per accedere ai cavi dello schermo.

    I used 2” painter’s tape to hold the display in place, but did it a little differently. With the wedge holding the iMac at an angle, I laid the display in place and felt on the sides to make sure it was centered. Then I put small strips (4-5” long) all along the sides and top, wrapping the tape around to the back of the display to hold it in place. Then tested my repair to make sure everything worked.

    I had seen some comments about problems with the strips holding in place over time, so I didn’t actually install them. Instead, I’ve left the painter’s tape on mine. I’m a week or more in, and so far there’s no sign of failure to hold. I’m going to leave it this way until I decide whether or not to replace the blade and hard drive with an SSD. I find I don’t even notice the painter’s tape as I’m using my iMac.

    paul -

    Paul- If you haven’t made the move to SSD yet, i suggest you replace the SATA 3.5” HDD with a 2.5” SSD, and leave the blade SSD already installed in place. You can create a new Fusion Drive with the SATA SSD & stock blade SSD. This allows you to still take advantage of the blade SSD for extra RAM.

    I just did this myself on my Late 2015 iMac 5K with the 2TB Fusion Drive. I swapped the dinosaur HDD for a 4TB Samsung 870 QVO 2.5” SATA SSD and my computer feels like new! better than new!

    I don’t recommend replacing the blade SSD because it’s a lot more complicated and you run a real risk of damaging the logic board.

    R L -

    @R L I'm 99% certain that it is not possible to fuse two SSD drives (and certainly not advised). i.e. your 2.5" SATA SSD and your stock blade SSD. I'm about to replace the failing 3TB HDD in my Late-2013 iMac 27 (stock 128gb blade SSD). My plan, assuming the blade drive even mounts, is to format it and let it mount as a separate volume. It's too small to really be of any use and my understanding is the disparate speeds may actually reduce performance overall.

    Kupe -

    I'm 99% certain that it is not possible to fuse two SSD drives (and certainly not advised).

    I have fused the stock ssd drive with a samsung evo ssd drive for years with no problems in my 2012 iMac The downside is that to do so you have to boot from a recovery disk and do pretty complicated stuff with terminal to fuse both ssd drives. Once that's done you cannot touch your fusion drive with disk utility (mac will not reboot and you will have to erase both disk and start over). The easy option is just leave both drives separated, they work just like any standard ssd drive.

    David C. -

    It seems to me that some emphasis could be added to this step. I had successfully upgraded my HDD to SDD, and I had confirmed the success of the upgrade by booting my iMac 5G 27 2017 to the Apple prompt. In this step 19, I did not use a sufficient, nor a strong enough masking tape to hold my monitor when I was attempting to remove the backing from the bottom adhesive strips in Step 23. When the tape let go, the monitor screen dropped, and unfortunately I still had the power and data cables connected. In the process the data cable and the power cable receptacle were damaged. I hope to recover by purchasing a new data cable. the power receptacle is still usable, perhaps with an adhesive tape piece over the connection. I found this procedure difficult.

    NTAbbott -

  20. BotQGgDKskPIPRUF
    BotQGgDKskPIPRUF
    AajvpY1ocF35cdGH
    4DQEIjDvb1yZnwXm
    • A questo punto è una buona idea provare la tua riparazione, in modo da verificare che il tuo iMac funzioni correttamente prima di richiuderlo. Segui i prossimi tre passi per collegare momentaneamente i cavi dello schermo e accendere il tuo iMac prima di rimuovere le pellicole protettive dalla strisce adesive.

    • Se hai già verificato che il tuo iMac funziona correttamente e sei pronto per richiuderlo, salta al passo 22.

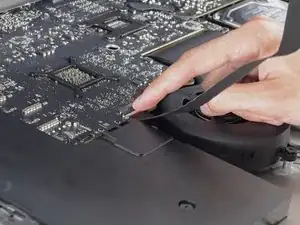
    • Infila delicatamente il connettore dati dello schermo nella sua presa sulla scheda madre. Assicurati di infilarlo nella presa parallelamente alla scheda madre e che sia infilato del tutto.

    • Fissa la staffa di bloccaggio in metallo del connettore del cavo dati dello schermo sulla sua presa.

    • Infila il cavo di alimentazione dello schermo nella sua presa sulla scheda madre.

    After I completed this repair I noticed that the fan was spinning all the time. What is going on?

    Diane Radke -

    If the fan is going constantly the thermal (temperature) sensor is likely not attached to the hard drive. It should be okay to run it like this - but it’s loud… Better to have the thermal sensor attached and configured. I bought my kit from iFixit and the sensor was wrapped in some of the paper packaging - took me a few minutes to find it.

    Greg Postma -

    I used my foam support wedge to hold open the glass side from the enclosure side. I placed in in the center to even out the weight. I used the longer areas of the wedge so more was in contact with the two parts. This freed up my hands to plug in both power and data cables. *Just be careful

    Darren Stewart -

    You can also use a sw version instead of a hw thermal sensor. I found on my 27 inch iMac 2019, that the hw sensor didn’t really work for me. In fact, some of the ssd cases used in the hard drive bay are made of plastic. I found for me using Mac Fan Control by Crystal Ideal a good alternative. You can use the free version, or pay for the pro version for about 15.00 dollars to have better control of your fan speed. Of course, your mileage may vary.

    George Martinez -

  21. ksqZWna2nXm3MdyQ
    ksqZWna2nXm3MdyQ
    nfQSrf1XdZxnQO1I
    • Appoggia lo schermo sul case posteriore dell'iMac.

    • A questo punto collega l'alimentatore del tuo iMac, accendilo e controlla la tua riparazione prima di incollare lo schermo. Assicurati di controllare tutte le funzionalità di ogni componente che hai rimosso o scollegato.

    • Quando hai finito, spegni l'iMac e scollega l'alimentatore prima di continuare.

  22. soWVFrVPAFJRlKBv
    soWVFrVPAFJRlKBv
    wcKWSJwHjcIgI2hX
    6lXREDkdNXtXLb3b
    • Verifica che l'iMac sia spento e scollegato prima di continuare.

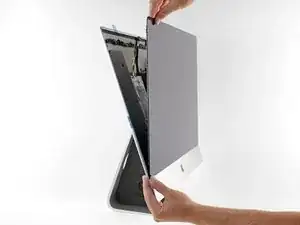
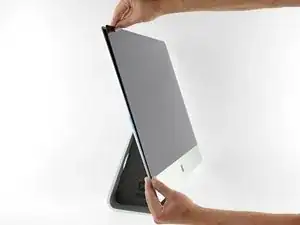
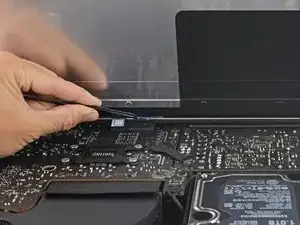
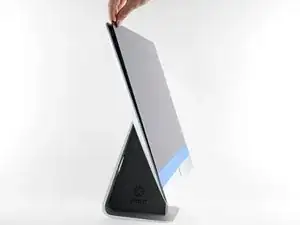
    • Dopo aver confermato che il tuo iMac funziona correttamente, scollega i cavi dello schermo e inclinalo attentamente in avanti.

    • Rimuovi la pellicola protettiva dalle due strisce inferiori da sopra lo schermo, raggiungendole con un paio di pinzette e tirando le linguette blu verso l'alto dal bordo inferiore dello schermo.

    Here's a sure fire way to replace the LCD onto the frame. It involves using painters tape, a foam wedge and 12" Surgical Hemostat Forceps clamps. iMac is upright on a low table so I can look down into it, painters tape applied, Foam wedge keeps it at an upward tilting angle. Headlamp recommended. LCD and power display connectors have been re-attached. Carefully open the LCD from the frame, keep in mind that the 2 cables give you about 2" of space to "look down" and with your 12" locking forceps grab and lock onto the blue tabs, getting a good, firm bite and then pull upwards to detach from the bottom adhesive strips. There will be 2 of them. The pull tab may detach but not difficult to find the transparent thread to continue the pulling. When both sides have films removed, let the display rest back on the frame and plug it in. If boot screen you can then carefully again separate the LCD slightly to then easily pull off the rest of the strips. Reseal and I use 6 pressure clamps on all sides to cure.

    Macrepair SF -

  23. PwPlLTlgt4HwQWet
    PwPlLTlgt4HwQWet
    hGYLCNqxJHtjAJGw
    QCBksaMXV56GEdPU
    • Ricollega i cavi di alimentazione e del segnale video per un'ultima volta.

    • Ricordati di fissare la staffa di bloccaggio in metallo del cavo dati dello schermo.

    I used my foam support wedge to hold open the glass side from the enclosure side. I placed in in the center to even out the weight. I used the longer areas of the wedge so more was in contact with the two parts. This freed up my hands to plug in both power and data cables. *Just be careful

    Darren Stewart -

    The display I bought had some pink protective plastic film covering the camera portion of glass on the back of the display. Be sure to remove this before finally seating the display in place! Not doing so would result in improper focusing and a pink tinted picture all the time.

    VikingShips -

    amazing now it won't turn on anymore. I see as green LED but that's it.

    Kerim Incedayi -

  24. nOGv2JVlxNs3hCWf
    nOGv2JVlxNs3hCWf
    SRYJcOvCSDvVEFGV
    iAf1f6RoZtRbjJCo
    • Controlla il vetro direttamente sopra la fotocamera in cerca di polvere e altra sporcizia. Se necessario, puliscilo con un panno in microfibra prima di chiudere lo schermo.

    • Tieni lo schermo con una mano mentre rimuovi le pellicole protettive nei seguenti passaggi, oppure appoggialo delicatamente sulla cornice.

  25. RVTZXH4QSoRKJMdb
    RVTZXH4QSoRKJMdb
    rbOZJnacV6QSf4Fs
    fMJwoN1FimFxNTSE
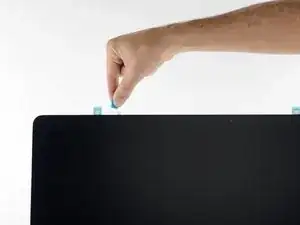
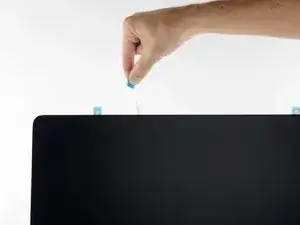
    • Rimuovi un lato della pellicola protettiva dalla striscia superiore sinistra tirando la sua linguetta verso l'alto.

  26. Byqc6CGZDCYTYhdu
    Byqc6CGZDCYTYhdu
    AmJeivIHsxBRif4J
    • Rimuovi l'altro lato della pellicola protettiva dalla striscia superiore sinistra.

  27. UmjUc16tRcxO6NQB
    UmjUc16tRcxO6NQB
    HfXCqFfqbj3EKY2O
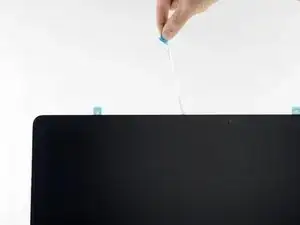
    • Ripeti i passaggi precedenti per rimuovere le pellicole protettive da tutte le strisce adesive rimaste.

    When pulling the adhesive strips off I had one snap in half right (just the white part revealing the adhesive) one my top right corner. I panicked because there was not adhesive there so I pulled a quick maneuver. I slipped in one of the guitar pick type triangles near the gap quickly before the adhesive has set in and was then able to slip my bent nose tweezers in and grab the white tape and peal the remaining. Whew! It worked. *Just be careful

    Darren Stewart -

  28. pFVDvVUpi4xSPFTV
    pFVDvVUpi4xSPFTV
    26LYMptoCEeAo1kV
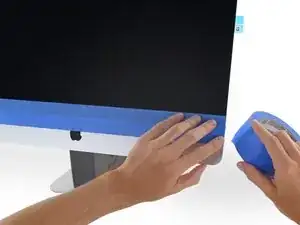
    • Per garantire una presa salda, appoggia attentamente l'iMac sul suo retro (con lo schermo rivolto verso l'alto) e premi cautamente ma con decisione lungo tutti i quattro bordi dello schermo.

    • Rimuovi il nastro che fissava lo schermo alla cornice.

    • Controlla lo schermo dopo 24 ore per assicurarti che non si sia scollato dall'iMac.

    Before lowering the glass display, I would recommend removing the tape from the edges, in order to check that the glass is seated flush against the bottom shelf of the frame. In my case, the glass got slightly out of alignment with all the lifting and lowering of the display, and I ended up with one corner being about 1 mm above the frame ledge. Not a huge error, but regrettable, as once you start to lower the display with all adhesive exposed, there is no turning back!

    Lennart Saaf -

    A big +1 to this. I had the same issue but was able to adjust the monitor before it was fully set. Hopefully the guide can be updated with this suggestion!

    I also did 1 more power on check after removing the screen after pulling the bottom strips covers off.

    Don Rhodes -

    Has anyone had the display fall out after a few days of use when the machine warms up and the adhesive softens?

    How do we prevent that from happening?

    Is it just my imagination or are the replacement adhesive strips thinner than the Apple originals? After cutting the original adhesive we are left with a thin layer on the frame AND a thin layer on the back of the front glass. To me it feels like the replacement tape is only as thick as one of these layers, so there’s less flex to take up any minor variations in level and ultimately a weaker join.

    I also have no idea if the replacement adhesive retains its grab strength once the machine warms up in use.

    Cool_Breeze -

    I'm an (unauthorized) Apple computer tech and have replaced over 24 displays on 21.5 and 27" iMacs. The only time I had a display fall off was when I tried using GooGone to remove the adhesive residue. It leaves a greasy residue that is hard to remove and will prevent proper adhesion of the replacement strips. My customer found that her 27" display had fallen off TWICE (both times it miraculously ended up on their office chair with no damage). I now use 91% IPA and the flat edge of a new spudger tool to remove residue. Never had a problem since.

    I've used several different makes of strips purchased via amazon and they all work fine.

    Corey Matsumoto -

    I have the same problem. I followed the instructions exactly, after gluing the display I let the iMac lie on its back for 24 hours.

    Then I tilted the iMac forward and after 2 days the display started to peel off.

    What needs to be done so that the display does not come off? Ambient temperature? Or is it necessary to heat the display somehow after gluing the display?

    Ondrej -

    Corey, could I ask you a question? Have you successfully removed a display after it has been attached using the aftermarket adhesive strips? I didn't have a problem removing the original display adhesive, but when I decided to reopen my iMac to upgrade the SSD, I had a very difficult time, which ended up breaking the screen...Thanks very much

    S. Baxter -

Arthur Shi

Membro da: 03/01/18

248257 Reputazione

8 commenti

what if i dont put on new adhesives?

sean_gizzle -

You cannot reuse the iMac’s foam-core adhesive. However, you hold the display in place with tape and the iMac will work fine.

Arthur Shi -

Bonjour,

Merci pour ce tutoriel. Les outils fournis dans le kit sont parfaits. Pour moi, le plus difficile a été de réaligner parfaitement l’écran sur le châssis aluminium. l’adhésif temporaire m’a aidé, mais je pense qu’il est possible de coller les adhésifs inférieurs légèrement plus haut, pour dégager 2mm afin de permettre à l’écran à l’horizontale de glisser latéralement pour faciliter l’alignement lors du remontage.

stbrille -

Don't be a "Man", read all the instructions first or you WILL be buying another adhesive set.

danamyx -

I had the screen off to check the drive and went very carefully through the reinstall screen process. Yes, I used the adhesive strip kit. Installed by the number. I thought it was secure and good for the duration. I was out of the office when the screen fell off and hit the floor. This is a late 2015 Imac Retina 27". I still have extended warranty coverage, but three hour round trip to take it to an Apple store. Since it appears the screen only costs $20 I'm thinking of repairing it myself. Any comments? I would also recommend putting the iMac flat and putting some weights on the edges of the screen for a day.

Leonard Jessup -

DO NOT BUY THIS KIT. the tape is old and not sticky. My screen fell off overnight!!! and now I have to replace it! waste of time and money, they are charlatans!!

Francesco -

Hi Francesco,

I'm so sorry to hear about this. I've brought this tape issue to our product development folks.

Arthur Shi -

What tape would you recommend getting instead?

Tyler Moore -