Introduzione
Questa guida di riparazione è stata redatta dallo staff di iFixit ma non è stata approvata da Google. Leggi di più sulle nostre guide qui.
Segui questa guida per rimuovere e sostituire la porta USB-C danneggiata del Pixel 3a. La porta USB-C è completamente modulare e facile da sostituire.
Il pannello dello schermo del Pixel 3a non rinforzato è molto fragile. Se stai riusando lo schermo, assicurati di porre speciale attenzione agli avvertimenti durante la procedura di apertura.
La parte più difficile è riattaccare il connettore del sensore di prossimità, il quale richiede un po' di pazienza e delicatezza.
-
-
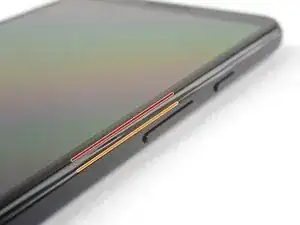
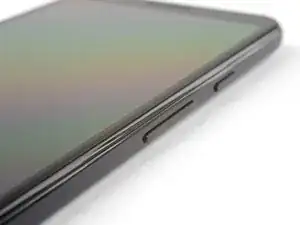
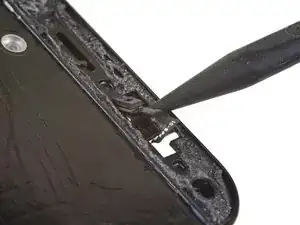
Fai caso alle due fessure di giunzione attorno al perimetro del telefono:
-
Giunzione dello schermo: questa fessura separa il display del resto del telefono. E' qui che dovrai agire.
-
Giunzione della scocca: qui la scocca di plastica si unisce alla cover posteriore. È tenuta in posizione da viti. Non agire su questa giunzione.
-
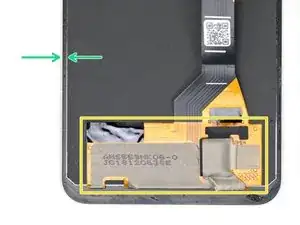
Prima di iniziare a infilare gli attrezzi nella fessura, prendi nota delle seguenti aree sullo schermo:
-
Cavo flessibile dello schermo: in questo punto, non entrare a una profondità maggiore di quanto indicato per non danneggiare il cavo stesso.
-
Perimetro dell'adesivo: infilare il plettro senza angolarlo oltre questo stretto perimetro significa danneggiare il display.
-
-
-
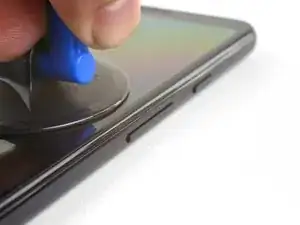
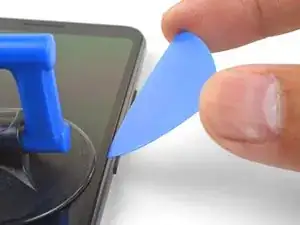
Disponi una ventosa vicino al bordo destro dello schermo.
-
Tira la ventosa con forza abbastanza elevata e costante.
-
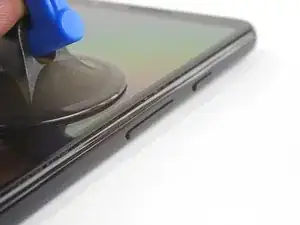
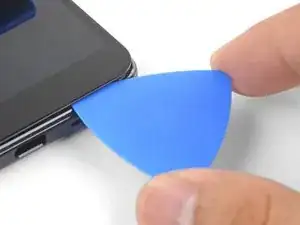
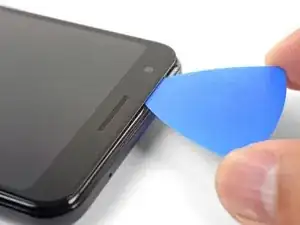
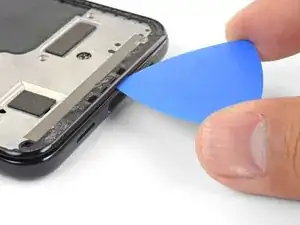
Inserisci un plettro di apertura nella fessura per non più di 1 mm.
-
-
-
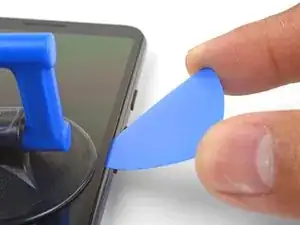
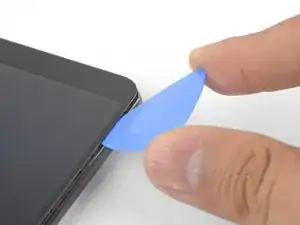
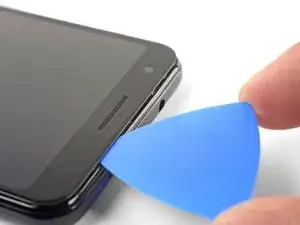
Con il plettro infilato a una profondità di 1 mm, ruota l'attrezzo verso l'alto facendogli raggiungere un angolo elevato.
-
Mantenendo questo angolo, spingi delicatamente il plettro nella fessura per circa 6 mm. Il plettro dovrebbe infilarsi al di sotto del pannello OLED.
-
-
-
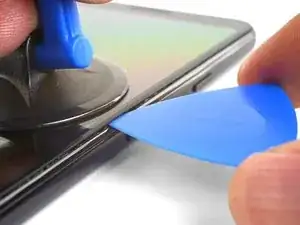
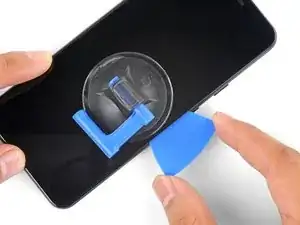
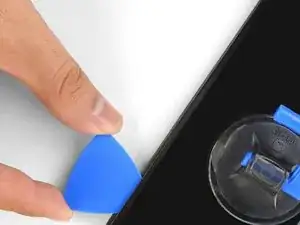
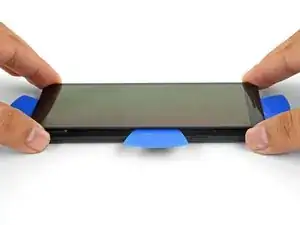
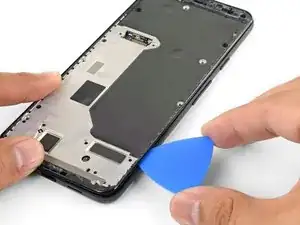
Fai scorrere il plettro lungo il bordo destro, tagliando l'adesivo.
-
Lascia il plettro in posizione per impedire che la colla possa attaccarsi di nuovo.
-
-
-
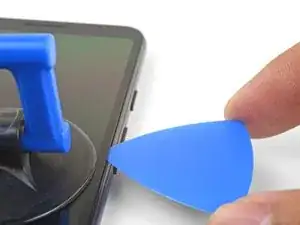
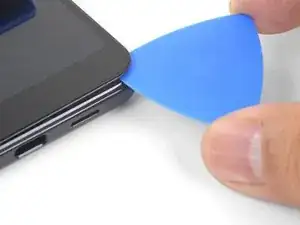
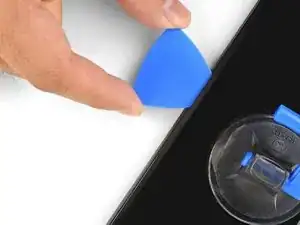
Fai scorrere il plettro attorno all'angolo inferiore destro per tagliare tutto l'adesivo.
-
Continua a tagliare lungo il bordo inferiore del telefono e attorno all'angolo sinistro.
-
-
-
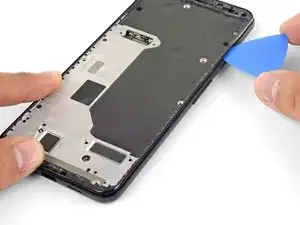
Taglia attraverso tutto il lato sinistro del telefono, ricordandoti di angolare correttamente il plettro perché passi sotto il pannello OLED e di non inserire la punta più di 6 mm.
-
Per angolare il plettro in modo che passi sotto il pannello OLED, inserisci la punta per meno di 1 mm, angola verso l'alto lo strumento e poi spingilo dentro per 6 mm.
-
-
-
Taglia lungo il bordo superiore mentre mantieni inserito il plettro a una profondità inferiore a 8 mm.
-
-
-
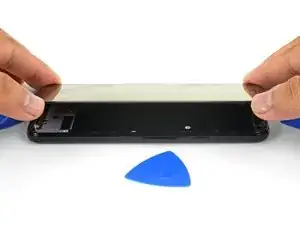
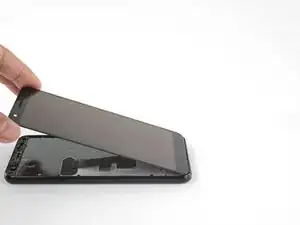
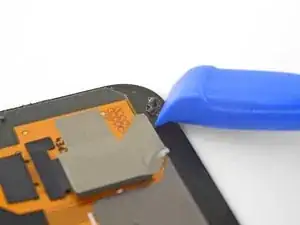
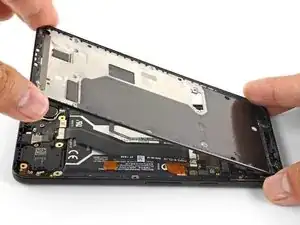
Una volta che hai tagliato lungo tutti i bordi, apri delicatamente lo schermo a libro, sollevandolo dal bordo destro.
-
Usa un plettro di apertura per tagliare, prestando molta attenzione, tutto l'adesivo rimasto.
-
-
-
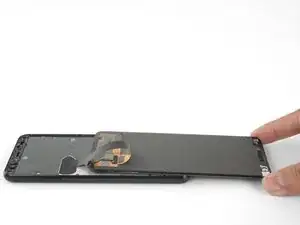
Una volta staccato tutto l'adesivo, ribalta lo schermo, sempre collegato dal cavo, portandolo sopra il telefono con il vetro rivolto verso il basso. Il cavo flessibile del display deve rimanere con una curvatura piuttosto ampia.
-
-
-
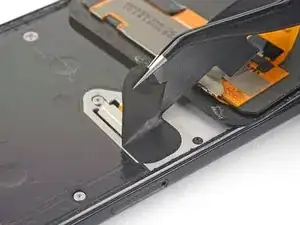
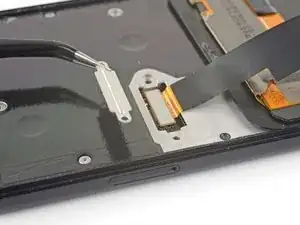
Stacca con delicatezza il nastro nero che copre la staffa del connettore dello schermo.
-
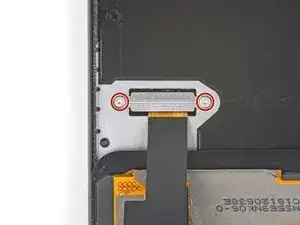
Rimuovi le due viti Torx T3 da 4,4 mm che fissano la staffa del connettore dello schermo.
-
Rimuovi la staffa del connettore dello schermo.
-
-
-
Usa la punta di uno spudger per sollevare e disconnettere il cavo flessibile dello schermo.
-
-
-
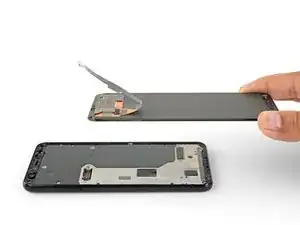
Rimuovi lo schermo.
-
Confronta attentamente il tuo schermo sostitutivo con quello originale. Può essere necessario trasferire alcuni componenti (come la griglia dello speaker) nel nuovo schermo.
-
Segui questa guida se stai usando degli adesivi pretagliati.
-
Se invece stai usando del nastro biadesivo come il nastro Tesa, segui questa guida.
-
-
-
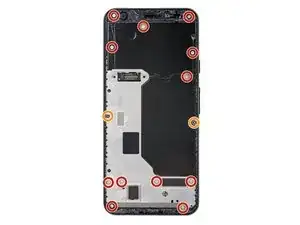
Rimuovi le quattordici viti Torx T3 che fissano il telaio intermedio in plastica, delle seguenti tipologie:
-
Dodici viti cromate da 4,3 mm
-
Due viti nere da 4,3 mm
-
-
-
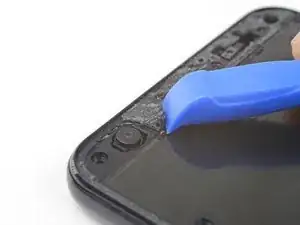
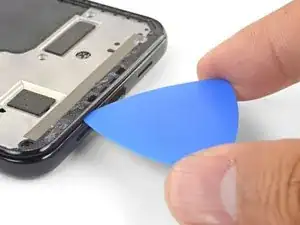
Inserisci un plettro di apertura nella giunzione della scocca nella parte inferiore del telefono. Questa giunzione si trova tra il midframe in plastica e la cover posteriore.
-
Fai scorrere il plettro lungo la giunzione per liberare le clip che trattengono il midframe in plastica.
-
-
-
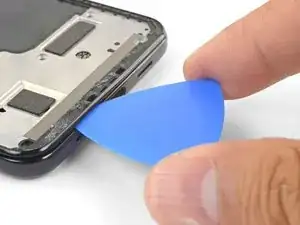
Fai scorrere il plettro di apertura lungo i bordi sinistro e destro del telefono per sganciare le clip del midframe.
-
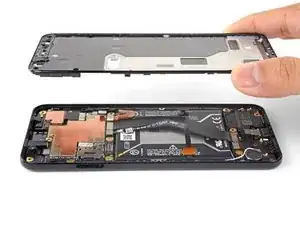
Solleva il bordo inferiore del telaio centrale in plastica ma non provare a rimuovere già ora il midframe. Il telaio in plastica è ancora collegato al telefono dal fragile cavo del sensore di prossimità nel bordo superiore.
-
-
-
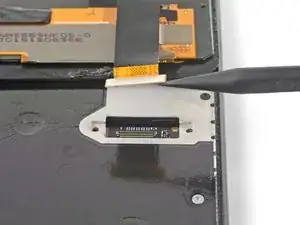
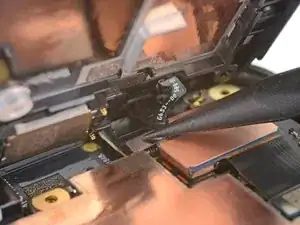
Usa la punta di uno spudger per far leva delicatamente sul connettore del sensore di prossimità scollegandolo dalla scheda madre.
-
Rimuovi il telaio intermedio in plastica.
-
-
-
Allinea il bordo superiore del midframe di plastica con il telefono.
-
Usa la punta di uno spudger per allineare con cura e premere il connettore del sensore di prossimità nel suo zoccolo sulla scheda madre.
-
Questa operazione richiede un po' di pazienza e mano ferma. Una volta messo in posizione il connettore, puoi usare anche un dito per premerlo nello zoccolo.
-
Usa la punta di uno spudger per sollevare delicatamente il sensore di prossimità dal suo alloggiamento sul telaio intermedio. Il sensore è blandamente incollato al midframe.
-
Rimuovi il sensore dal midframe. Infila il connettore del sensore nel suo zoccolo sulla scheda madre.
-
Fai passare il cavo del sensore attraverso il midframe e rimetti il sensore nel suo alloggiamento. Premi con il dito per far aderire di nuovo il sensore al telaio centrale.
-
-
-
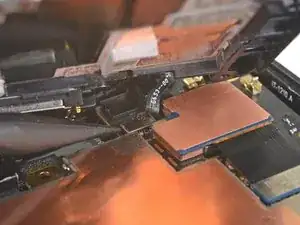
Usa la punta di uno spudger per staccare e scollegare il connettore della batteria dal suo zoccolo sulla scheda madre.
-
Piega lievemente il cavo flessibile della batteria in modo che non possa fare contatto accidentalmente con lo zoccolo.
-
-
-
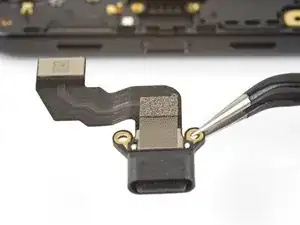
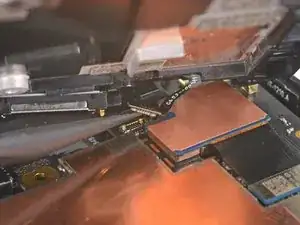
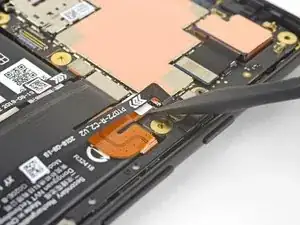
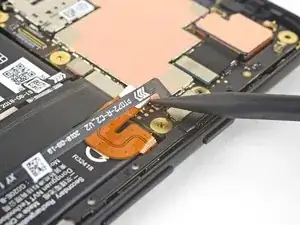
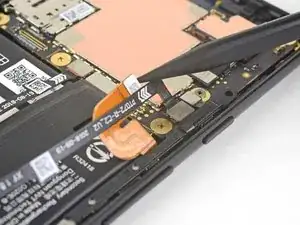
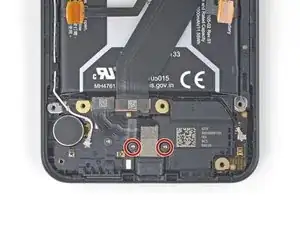
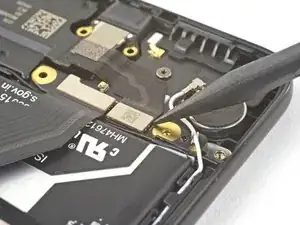
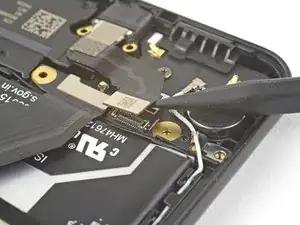
Usa la punta dello spudger per sollevare e scollegare il connettore della porta USB-C dalla scheda figlia.
-
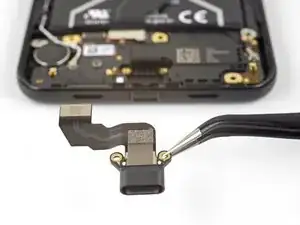
Rimuovi il modulo della porta USB-C.
-


Per rimontare il dispositivo, segui le istruzioni nell'ordine inverso.
La riparazione non è andata come previsto? Dai un'occhiata alla nostra comunità Risposte Google Pixel 3a per trovare aiuto nella risoluzione dei problemi.

10 commenti
There was moister in the tip of my USB C cable when I plugged it into my phone to charge. A warning popped up on my screen to unplug. I did right away and the cord smoked…. My charging port is charged… the rest of the phone seems to work fine. The case did not feel hot afterward. Do you think my battery might be damaged too?
Hi Desmond,
It sounds like moisture may have shorted some contacts at the USB port. That normally shouldn’t damage the battery. It’s possible the charging circuitry may be damaged.
Where is the part for this? I can't find the USB C port for the 3a!
Just did this. A few notes:
* There’s a lot, like a lot, of adhesive up by the front camera. Lacking an iOpener, I used a washcloth soaked in hot water and sealed in a plastic bag to soften the adhesive.
* My ifixit kit is old and didn’t have a pick, but I used the knife to shave down the corner of an old gift card so it was thinner, and that worked fine. I found it easiest to get the screen off by placing several old gift cards under the edges to keep them from sticking down as I pried at other areas.
* I got my replacement port from an eBay listing entitled “Charging Port Flex Cable for Google Pixel 3a G020A G020E G020B 5.6” and it works fine.
* I forgot to buy extra tape for sticking the screen back on, so to keep it from falling off while the tape is in the mail, I’ve applied clear cellophane tape around the outside edges of the screen and back where there are no ports or buttons. It works ok.
* I found that the T4 bit worked better than the T3 for all of the screws involved in this process.
Power is off, but does the battery need to be disconnect to safely do this replacement?
mplishka -
Da ich keinen iopener ( dachte das wäre alles dabei wie auf der bstellvorschau!!!) habe ich eine Wärmflasche auf das Handy gelegt ..behutsam und nicht zu heiß. Besonders an Kopf und fußende war das Display ziemlich fest...befolgt man die Anweisungen genau ist es eigentlich kein Problem das Display vom Rahmen zu lösen, jedoch bin ich der Meinung, dass hier schon ein gewisses Maß an motorischer Vertrautheit mit der Materie bestehen sollte, da wie gesagt oben und unten doch ein tieferes eingreifen in den Rahmen unter das Display nötig ist...
Ralph S. aus Neumünster
Ralph S -
You definitely want to use the iOpener on all sides as you make your way around the screen. The adhesive on my device was quite strong!
My screen was cracked in the corner and it was a real pain in the neck to get the little bits and pieces out of the corner. I don't know if this step is easier with an intact screen, but it was definitely the most difficult step on the repair for me.
Simon Stone -