Introduzione
Questa guida di riparazione è stata redatta dallo staff di iFixit ma non è stata approvata da Google. Leggi di più sulle nostre guide di riparazione qui.
Segui questa guida per sostituire lo schermo rotto o danneggiato di un Pixel 4a.
Il pannello del display, privo di rinforzi, nel Pixel 4a è fragile. Fai particolarmente attenzione agli avvertimenti durante la procedura di smontaggio se per qualche motivo devi riutilizzare lo stesso schermo.
-
-
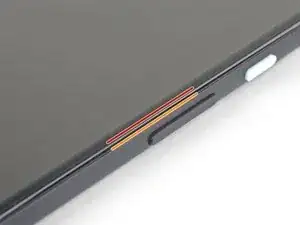
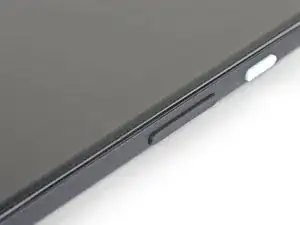
Nota i due livelli di giunzione sui bordi del telefono:
-
Giunzione dello schermo: un dislivello separa lo schermo dal resto del telefono. La sezione su cui far leva è questa
-
Giunzione del frame: qui un frame di plastica si congiunge con la cover posteriore: Non fare leva su questa giunzione
-
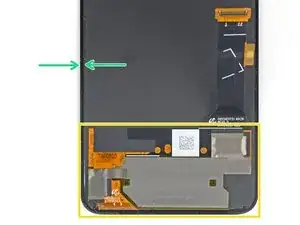
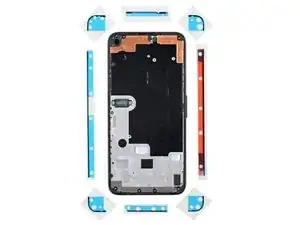
Prima di iniziare, nota le seguenti zone dello schermo:
-
Cavo flex del display: Non inserire il plettro più a fondo di quanto indicato per non rischiare di danneggiare questo cavo.
-
Perimetro dell’adesivo: far leva oltre questo stretto margine senza angolare il plettro rischia di danneggiare il pannello OLED.
-
-
-
Posiziona un iOpener riscaldato sul lato destro del display, per un minuto, in modo da ammorbidire l’adesivo.
-
-
-
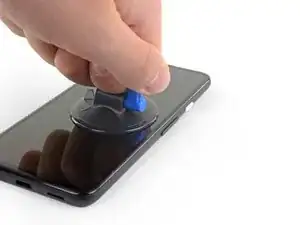
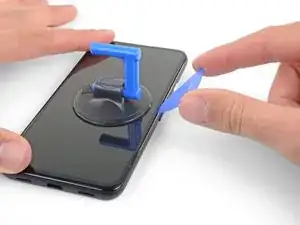
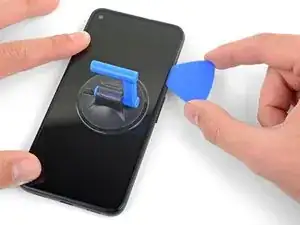
Posiziona una ventosa il più possibile vicino al bordo destro dello schermo.
-
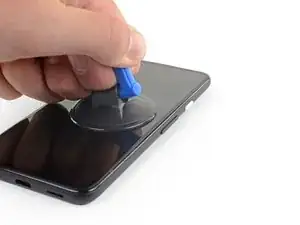
Solleva la ventosa, applicando una forza costante.
-
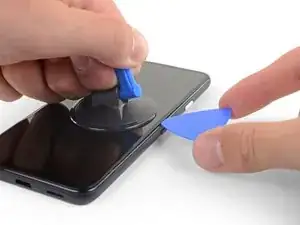
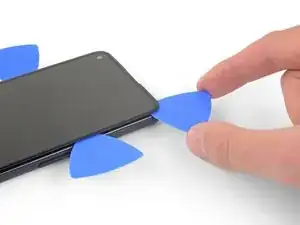
Inserisci la punta di un plettro all’interno della giunzione dello schermo per non più di 1mm.
-
-
-
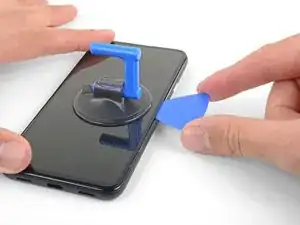
Mentre il plettro si trova 1 mm all’interno della fessura, sollevalo verso l’alto in modo da formare un angolazione abbastanza elevato.
-
Raggiunta l'angolazione elevata, spingi attentamente il plettro nella fessura per circa 6 mm. Il plettro dovrebbe scivolare al di sotto del pannello OLED.
-
-
-
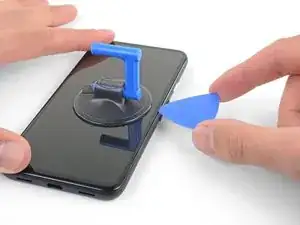
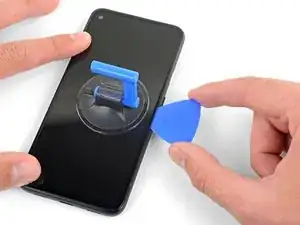
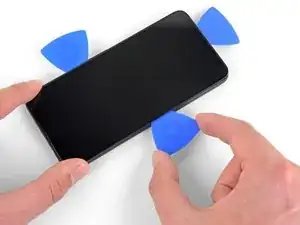
Fai scorrere il plettro lungo il lato destro dello schermo per rimuovere l’adesivo.
-
Lascia il plettro sull’angolo in alto a destra dello schermo per impedire che l’adesivo faccia presa di nuovo.
-
-
-
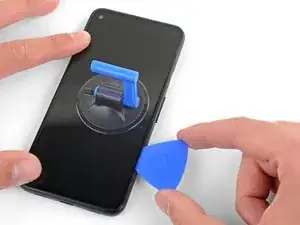
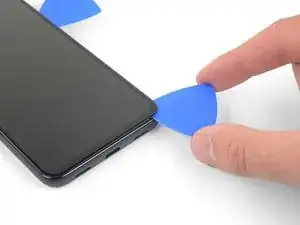
Inserisci un altro plettro di apertura in un angolo sul lato inferiore del telefono, dove si sarà formata un'altra fessura, in modo da evitare di danneggiare il pannello OLED.
-
Fai scorrere il plettro lungo il lato inferiore del telefono per tagliare l’adesivo.
-
Lascia il plettro inserito lungo il lato inferiore per evitare che l’adesivo faccia nuovamente presa.
-
-
-
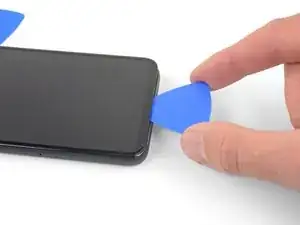
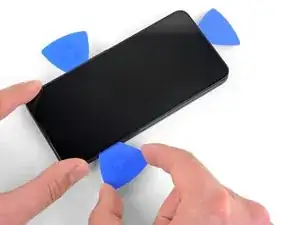
Inserisci un altro plettro di apertura in un angolo sul lato inferiore del telefono, dove si sarà formata un'altra fessura, in modo da evitare di danneggiare il pannello OLED.
-
Fai scorrere il plettro lungo il lato sinistro del telefono.
-
Lascia il plettro inserito lungo il lato sinistro del telefono, per evitare che l’adesivo faccia nuovamente presa.
-
-
-
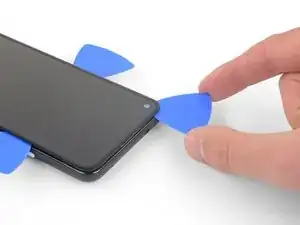
C'è una griglia che copre la capsula auricolare sotto il bordo superiore dello schermo. Se non hai una griglia di ricambio, stai attento a non danneggiarla o perderla.
-
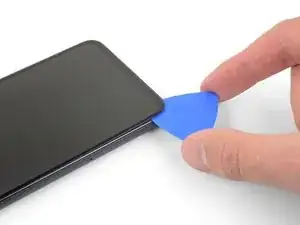
Inserisci un altro plettro in un angolo sul lato sinistro del telefono, dove si sarà formata un'altra fessura, in modo da evitare di danneggiare il pannello OLED.
-
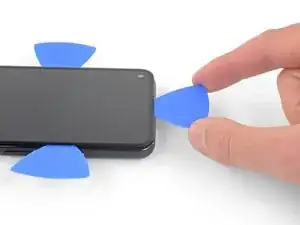
Fai scorrere il plettro lungo il lato superiore del telefono per rimuovere l’adesivo.
-
-
-
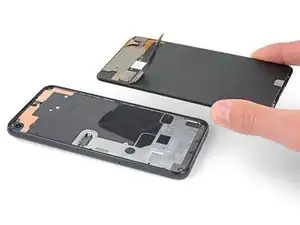
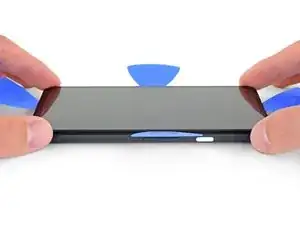
Una volta rimosso l’adesivo lungo tutto il perimetro del telefono, solleva attentamente il lato destro dello schermo, aprendo il telefono come se fosse un libro.
-
Fai scorrere un plettro delicatamente lungo eventuali parti adesive rimaste incollate, per rimuoverle.
-
-
-
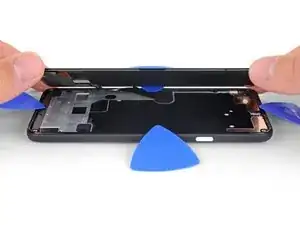
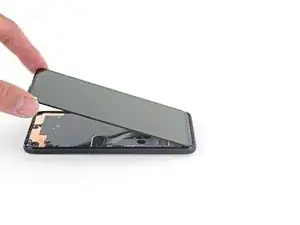
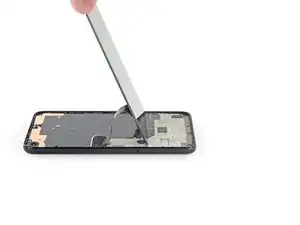
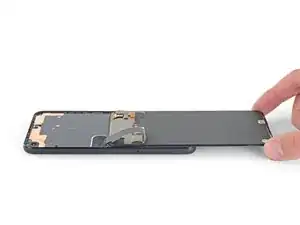
Solleva lo schermo dal lato superiore e fallo girare attorno al lato inferiore, finché non riesci a poggiarlo con il vetro rivolto verso il basso.
-
-
-
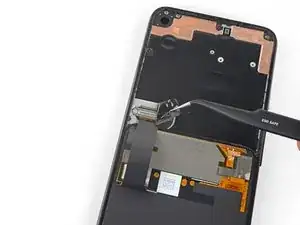
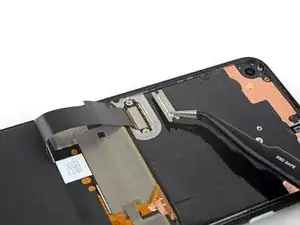
Con un paio di pinzette, rimuovi delicatamente il nastro isolante che copre la staffa sopra il connettore dello schermo.
-
-
-
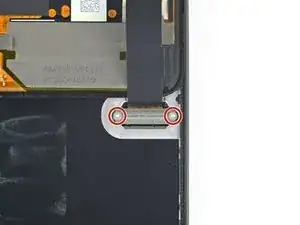
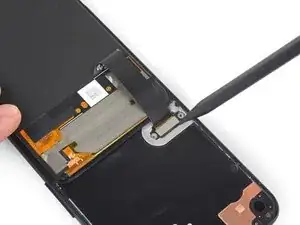
Usa un cacciavite Torx T3 per rimuovere le due viti da 2.1 mm che tengono in posizione la staffa sopra il connettore dello schermo.
-
-
-
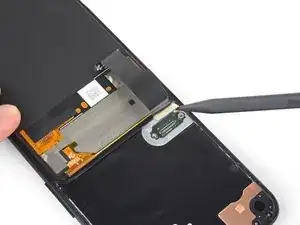
Rimuovi lo schermo.
-
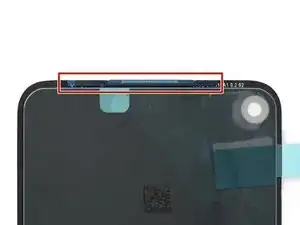
Verifica se il tuo nuovo schermo di ricambio ha la griglia degli altoparlanti e l'adesivo sul bordo superiore preinstallati.
-
In tal caso, non avrai bisogno dell'adesivo sul bordo superiore.
-
Se non ce l'ha, rimuovi il rivestimento trasparente più grande dall'adesivo sul bordo superiore e applicalo allo schermo (non alla cornice). Assicurati che l'apertura più grande si allinei con la griglia degli altoparlanti.
-
Segui questa guida se stai usando adesivi ritagliati su misura.
-


Confronta il tuo ricambio con il pezzo originale -potrebbe essere necessario trasferire dei componenti da esso o rimuovere le pellicole adesive di protezione prima dell’installazione.
Per riassemblare il tuo dispositivo, segui i passi elencati sopra in ordine inverso.
Porta i tuoi rifiuti elettronici a un riciclatore certificato R2 o e-Stewards.
La riparazione non è andata come previsto? Prova alcune procedure di base di risoluzione problemi, o chiedi alla nostra comunità Risposte per ottenere supporto.

31 commenti
Where do you recommend that I purchase the Pixel4a screen replacement from? I found these two with Witrigs being cheaper, but not sure if either are reliable high quality screens.
Coll down guys and gals.
1) go below the Display and not between the backcover/middle (see the other comments)
2) just take care about the flex/display cable position (which is iirc about on the middle i.e. 2nd 3rd from the bottom ON THE LEFT side dear OP)
Everything else is just separting the glued on Display from the Phone.
See the other comments
Aleksandar Dejanovic -
Cool down guys and gals.
1) go below the Display and not between the backcover/middle (see the other comments)
2) just take care about the flex/display cable position (which is iirc about on the middle i.e. 2nd 3rd from the bottom ON THE LEFT side dear OP)
Everything else is just separting the glued on Display from the Phone.
See the other comments
Aleksandar Dejanovic -
I've measured it: The cable starts arround 1.4-1.6 cm from the lower half from the bottom on the left side.
So You can cut the bottom left corner and of course the upper left one but for safety's sake, watch out for the camera.
You can go up to 5cm down from the upper left side till You're near the cable.
Aleksandar Dejanovic -
When you say left side, is this your left when the phone screen is facing you?
jaunie -
The third image her shows the back of the screen, not the body of the phone
blueslondon -