Introduzione

Questa guida alla riparazione è stata scritta dallo staff di iFixit e non è stata approvata da Google. Scopri di più sulle nostre guide alla riparazione qui.

Segui questa guida per sostituire lo schermo del tuo Google Pixel 7.

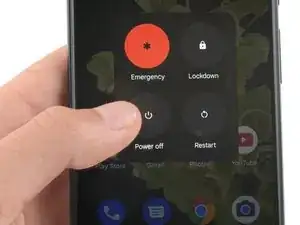
Per la tua sicurezza, scarica la batteria al di sotto del 25% prima di smontare il telefono. Ciò riduce il rischio di incendio se la batteria viene accidentalmente danneggiata durante la riparazione. Se la tua batteria è gonfia, prendi le dovute precauzioni.

Attenzione: Pixel 7 contiene laser di classe 1. Lo smontaggio potrebbe comportare l'esposizione a emissioni laser a infrarossi invisibili.

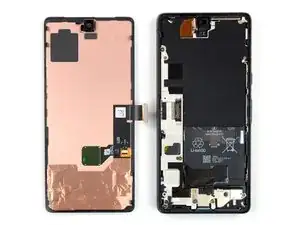
Il tuo nuovo schermo sostitutivo dovrebbe essere fornito con il lettore di impronte digitali già collegato. In caso contrario, dovrai reinstallare il lettore di impronte digitali originale sul nuovo schermo sostitutivo e ricalibrare il lettore per mantenerne la funzionalità.

Il mantenimento dell'impermeabilità dopo la riparazione dipenderà da quanto bene riapplichi l'adesivo, ma il tuo dispositivo perderà il suo grado di protezione IP (Ingress Protection).

Avrai bisogno di adesivo sostitutivo per completare questa riparazione.

  1. RH1hNR5DYvEMTNGX
    RH1hNR5DYvEMTNGX
    kUNSpM2wM3aEGX23
    • Lascia scaricare la batteria sotto al 25% prima di cominciare la riparazione. Una batteria carica potrebbe prendere fuoco se danneggiata.

    • Spegni completamente il telefono e scollega tutti i cavi.

    i replaced my pixel 7 screen, I noticed that my proximity sensor is no longer working, I have tried to calibrate it using 3rd part apps and it ddisnt work,i tried using developer settings to switch the proximity sensor and i also updated my android version...all these didnt work

    Ian -

  2. uWsCCoGWV5JIrUns
    uWsCCoGWV5JIrUns
    qBuyTnEhoZIp4ycS
    rCPFaRmEDnGc6YSe
    • Lo schermo del Google Pixel 7 è tenuto in posizione da ganci di plastica e adesivo.

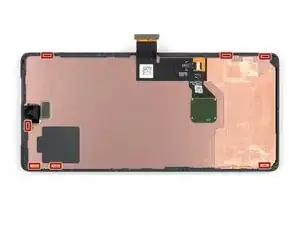
    • Durante la procedura di rimozione, accertati di inserire i plettri nella posizione giusta, per evitare di separare lo schermo dalla sua cornice di sicurezza, invece che dall'insieme del telefono.

    • Inserisci il plettro solo 3,5 mm circa durante la procedura di rimozione per evitare di danneggiare i componenti interni e per evitare di interferire con i ganci di plastica.

    • Ci sono diversi ganci tutto intorno allo schermo. In caso il tuo plettro si blocchi durante la procedura, significa che hai inserito il plettro troppo in profondità sotto lo schermo.

  3. uNWQn4O2iyarfTwP
    uNWQn4O2iyarfTwP
    X4Mot1WmVF3dl5H6
    hwdBtFR1G1bs6cUM
    • I prossimi tre passi dimostrano l'uso dell'Anti-Clamp, uno strumento che abbiamo progettato per rendere più facile la procedura di apertura. Se non stai usando l'Anti-Clamp, salta i prossimi tre passi per un metodo alternativo.

    • Per le istruzioni complete su come usare l'Anti-Clamp, da' un'occhiata a questa guida.

    • Se il tuo schermo è crepato, coprilo con uno strato di nastro adesivo trasparente da pacchi, per aiutare la ventosa a fare presa.

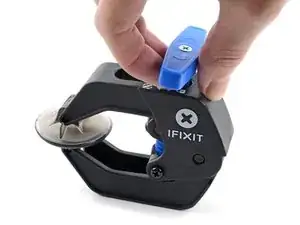
    • Tira la manopola blu all'indietro per sbloccare i bracci dell'Anti-Clamp.

    • Fai scorrere i bracci oltre il bordo sinistro o destro del tuo telefono.

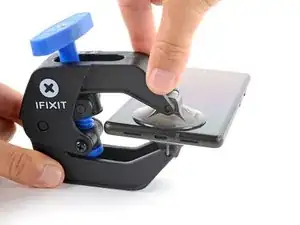
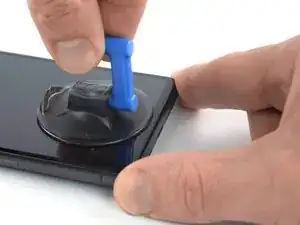
    • Posiziona le ventose vicino al bordo inferiore del telefono, una davanti e una dietro.

    • Premi le ventose insieme per fargli fare presa sull'area desiderata.

    • Se la superficie del tuo telefono è troppo scivolosa perché l'Anti-Clamp faccia presa, puoi usare del nastro adesivo per creare una superficie più aderente.

  4. C5UOdfJGyBNrPmud
    C5UOdfJGyBNrPmud
    NT1pkIvVebv5WAbQ
    5q3uaImPG2XtyBUP
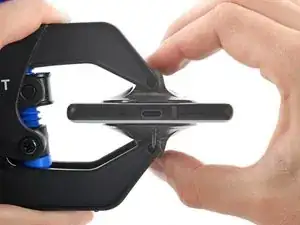
    • Tira la manopola blu in avanti per bloccare i bracci.

    • Gira la manopola in senso orario di 360° o finché le ventose cominciano ad allungarsi.

    • Accertati che le ventose rimangano allineate fra loro. Se si spostano, allentale leggermente e riallinea i bracci.

  5. iu5TEcPWZeWgMueB
    iu5TEcPWZeWgMueB
    iklY4LILrc5nWFlx
    mI2NZfhUYJ3QJbYH
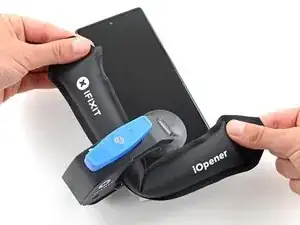
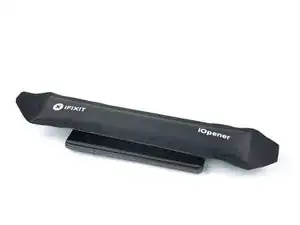
    • Scalda un iOpener e fallo passare attraverso i bracci dell'Anti-Clamp.

    • Puoi anche usare un asciugacapelli o una pistola termica, ma il calore estremo può danneggiare lo schermo o la batteria interna, quindi procedi con cautela.

    • Piega l'iOpener, così che rimanga appoggiato sul bordo inferiore del telefono.

    • Aspetta un minuto per dare la possibilità all'adesivo di scollarsi e presentare una fessura di apertura.

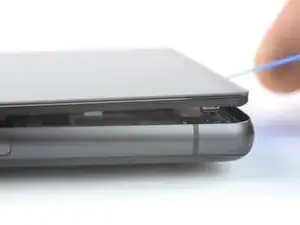
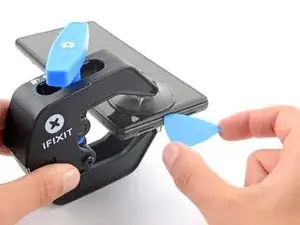
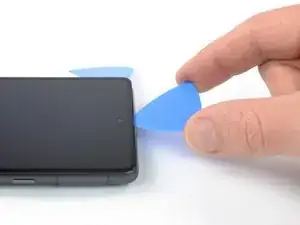
    • Inserisci un plettro sotto la cornice dello schermo, quando l'Anti-Clamp crea una fessura abbastanza grande.

    • Se l'Anti-Clamp non crea una fessura sufficiente, applica più calore sull'area e ruota la manopola di mezzo giro in senso orario.

    • Non ruotare più di mezzo giro alla volta e aspetta un minuto tra ogni giro. Lascia che l'Anti-Clamp e il tempo facciamo il lavoro per te.

    • Salta i prossimi due passi.

  6. 6cKgLNhBJSeuArNm
    • Appoggia un iOpener scaldato sullo schermo per ammorbidire l'adesivo sottostante. Lascia l'iOpener appoggiato per 3 minuti.

    • Puoi anche usare un asciugacapelli, una pistola termica o una piastra termica, ma fa' attenzione a non surriscaldare il dispositivo. Il bordo dovrebbe essere leggermente troppo caldo al tatto.

  7. CexARCSAqGYQbmha
    CexARCSAqGYQbmha
    4gF4DCWXWHNS2aGI
    gfaVVfZV1RGTbMLx
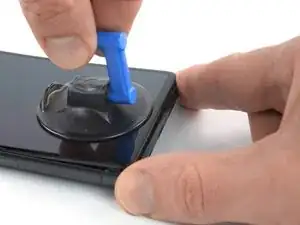
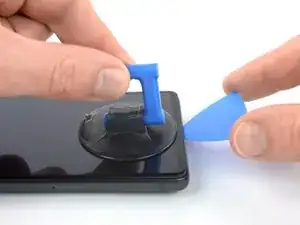
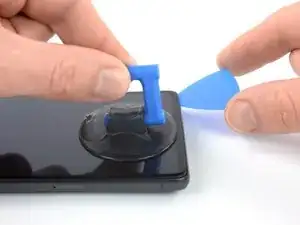
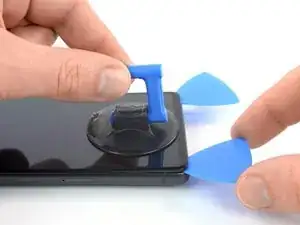
    • Una volta che lo schermo è caldo al tatto, applica una ventosa sul bordo inferiore dello schermo.

    • Se il tuo schermo è molto crepato, coprirlo con uno strato di nastro adesivo trasparente può permettere alla ventosa di aderire. In alternativa, puoi usare del nastro adesivo molto resistente invece di una ventosa. Se tutto il resto fallisce, puoi incollare la ventosa allo schermo con della supercolla.

    • Solleva lo schermo, inclusa la cornice di sicurezza, con la ventosa per creare una piccola fessura tra lo schermo e il telefono.

    • A seconda dell'età del telefono, questo potrebbe essere difficile. Se stai avendo problemi, scalda ulteriormente il bordo inferiore e riprova.

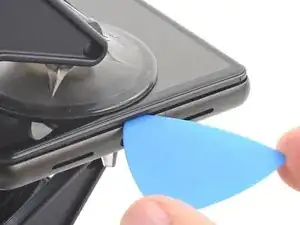
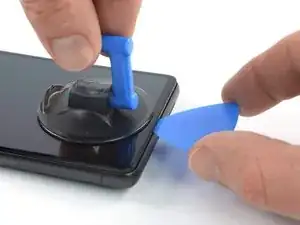
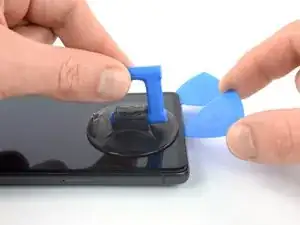
    • Inserisci un plettro nell'apertura.

    If you're having trouble getting the first pick in, try a different hand position than what is shown. Grip the suction cup's handle with your index finger, and keep your thumb and middle finger on either side of the screen. Choose a forgiving surface underneath in case you slip. Then hold firmly and keep it stable (no need to really push down). Just be prying it open deliberately and evenly. Then take your pick and use gentle prodding, experimenting with your angle and pressure, feel around. That should be all you need to get in.

    Orin Zebest -

  8. IBUeZvgemYHWImZc
    IBUeZvgemYHWImZc
    2SO1E2gi6C2FiaZI
    • Per evitare di danneggiare il telefono, non inserire il plettro a più di 2,5 mm circa di profondità quando separi l'adesivo. Fa' attenzioni alle seguenti aree:

    • Il cavo dello schermo è un po' più in alto della metà del bordo sinistro del telefono. Qui presta molta attenzione per evitare di strappare il cavo.

    • Ci sono molti contatti a molla sul perimetro del telefono. Presta molta attenzione in queste aree per evitare di piegare i contatti.

  9. wtdv5UrUMow2CECH
    wtdv5UrUMow2CECH
    djiNoNgaVURRqAnE
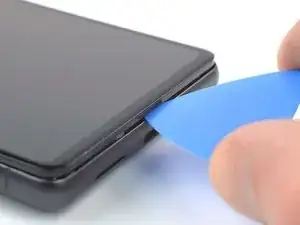
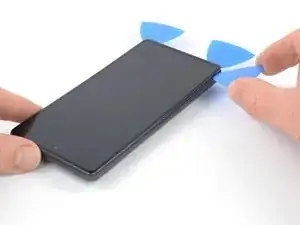
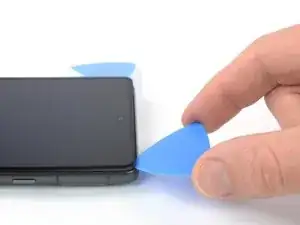
    • Fai scorrere il plettro di apertura intorno all'angolo in basso a destra del telefono per separare l'adesivo.

    • Lascia il plettro in posizione per evitare che l'adesivo si rincolli.

  10. BvVyMHlKdFsfT4jJ
    BvVyMHlKdFsfT4jJ
    STqP6jEultQQM41x
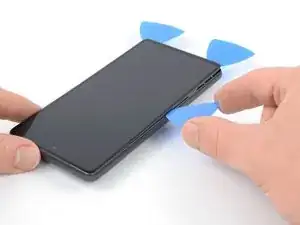
    • Inserisci un secondo plettro sotto al bordo inferiore e fallo scorrere verso l'angolo inferiore sinistro dello schermo per tagliare l'adesivo.

    • Lascia il plettro in posizione per evitare che l'adesivo si rincolli.

  11. 3TahkFe4ry6RCiY4
    3TahkFe4ry6RCiY4
    3JU6OqcJvHWxqoST
    6ZPHWVqkfEhNxfpF
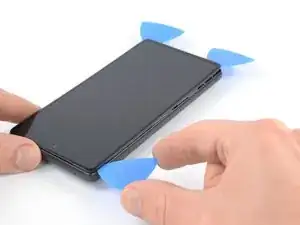
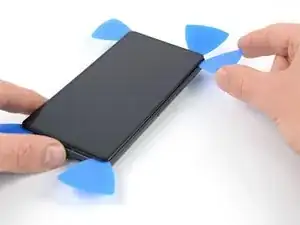
    • Inserisci un terzo plettro di apertura sotto l'angolo in basso a sinistra dello schermo.

    • Fai scorrere il plettro lungo il bordo sinistro dello schermo per tagliare l'adesivo e per sganciare le clip di plastica.

    • Lascia il plettro sotto l'angolo in alto a sinistra per evitare che l'adesivo si rincolli.

  12. RAqKHAsrl3xCRUU1
    RAqKHAsrl3xCRUU1
    snvx1NYmrDPfUDaX
    cnPPFVoxMmq3nELB
    • Se l'adesivo diventa difficile da tagliare, probabilmente si è raffreddato. Usa il tuo iOpener tuo ho la pistola termica per 12 minuti per riscaldarlo.

    • Quando fai scorrere il plettro vicino alla fotocamera frontale, inseriscine solo la punta (circa 2,5 mm) per evitare di danneggiare o sporcare la fotocamera.

    • Inserisci un quarto plettro di apertura all'angolo in alto a sinistra dello schermo.

    • Fai scorrere il plettro lungo il bordo superiore del telefono per tagliare l'adesivo.

    • Lascia il plettro sotto l'angolo in alto a destra per evitare che l'adesivo si rincolli.

    This is the only slice that makes me nervous. Never had a problem, but yeah... extra care because of the camera.

    Orin Zebest -

  13. PnfIw3f25Eqr1XHF
    PnfIw3f25Eqr1XHF
    KenvqZiSWYaywVKu
    TZuqyojhZfgKo23H
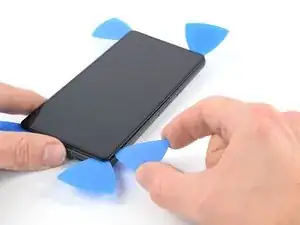
    • Inserisci un quinto plettro di apertura e fallo scorrere lungo il bordo destro del telefono per tagliare l'adesivo rimanente e sganciare le clip di destra.

    • Non cercare ancora di rimuovere lo schermo completamente, è ancora connesso al telefono tramite un cavo a nastro.

  14. rhQqo5C35FvoYK3U
    rhQqo5C35FvoYK3U
    IrVMIJexBS6bDSeP
    jLlFZYjxMwL21C2X
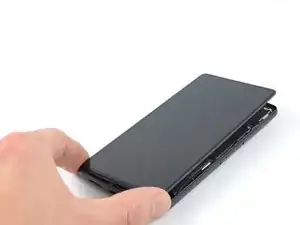
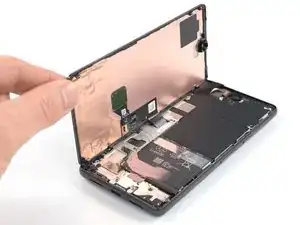
    • Solleva il bordo destro dello schermo verso l'alto e verso la sinistra del dispositivo, come se stessi aprendo un libro.

    • Non ruotare lo schermo e non allontanarlo troppo dalla cornice per evitare di tirare o danneggiare il cavo nastro.

    • Appoggia lo schermo a testa in giù e parallelo alla cornice prima di continuare.

    The adhesive still sticking to the screen might trip you up... don't let it pull the screen in weird ways. Just pick that stuff off and the screen sits perfectly next to the phone, as pictured.

    Orin Zebest -

  15. PSmtyE4SOWOdAwOu
    PSmtyE4SOWOdAwOu
    EP6lSfkEvCqupEtr
    • La staffa del cavo dello schermo è posizionata saldamente e richiede un po' di forza per liberarla.

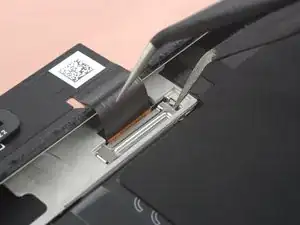
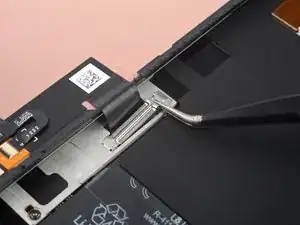
    • Inserisci un braccio di un paio di pinzette nella fessura sul bordo superiore della staffa del cavo dello schermo.

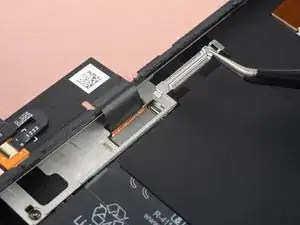
    • Spingi la staffa verso l'interno e solleva per liberarla.

    The way this piece is wedged in there can be a difficult to imagine, so you may need to apply force at a different angle than you expect. I bent mine a few times, but just bent it back into shape with no issue.

    Orin Zebest -

    This was a pain to get out! Felt like I was going to rip the whole cable out. But it popped out eventually.

    Alex Thengvall -

  16. WKPNiJHhVHnhCorC
    WKPNiJHhVHnhCorC
    LhAcZy62xFSngm3n
    • Usa delle pinzette per rimuovere la staffa del cavo dello schermo, tirandola da sotto la cornice intermedia e nella direzione delle fotocamere.

    I forgot to replace this the first time. It's not a dealbreaker (phone works fine without it), but if you ever open your phone again you must be super-extra careful -- nothing is securing the connection.

    Orin Zebest -

  17. jRnnMxxSKtAwg2aW
    jRnnMxxSKtAwg2aW
    HaPX5khLMl4bDRNB
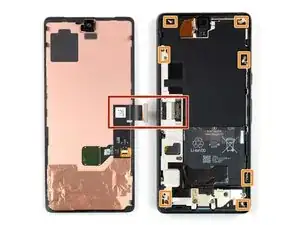
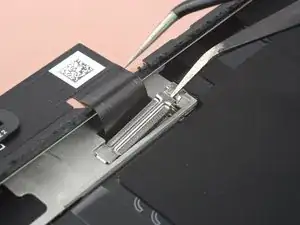
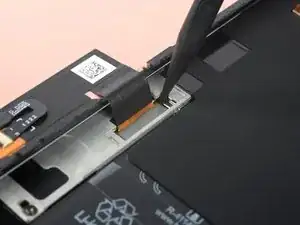
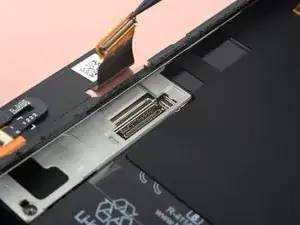
    • Usa uno spudger per scollegare il cavo a nastro dello schermo, sollevando il connettore direttamente dalla sua presa.
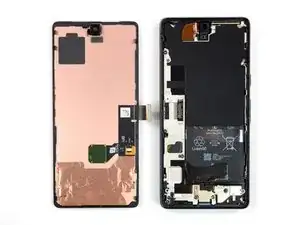
    • Per ricollegare i connettori a pressione come questo, allineali attentamente e premi su un lato finché non scattano in posizione, poi ripeti sull'altro lato. Non premere in centro. Se il connettore non è allineato correttamente, i pin potrebbero piegarsi, causando danni permanenti.

    Getting the press connector aligned properly is a very fiddly task and impossible without a light touch and several tries. My only advice is to take a break if you get frustrated. There's no 'click' or anything to help you notice that you've got it right. But when you do, it'll just... fit. And you'll probably think, "wait I did it? oh, not as hard as it sounded. just took awhile."

    Orin Zebest -

    Beware! I tried using the forceps instead of my finger and I ended up tearing into the ribbon cable. So be careful and use your finger if possible. I wouldn't use a sharp tool like I did. There are a couple Youtube videos that probably can help if you search "pixel 7 screen replacement". Sadly I didn't do that first.

    Alex Thengvall -

  18. XYNCjJjvlRE5kfxZ
    XYNCjJjvlRE5kfxZ
    q5ECwAhlHHcqfV4W
    • Rimuovi lo schermo

    • In fase di rimontaggio:

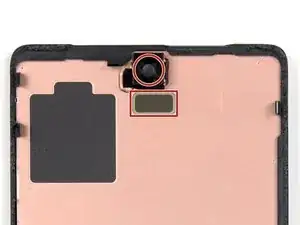
    • Se hai sostituito lo schermo, controlla il foro della fotocamera frontale e l'incavo del sensore sul tuo nuovo schermo di ricambio e rimuovi eventuali pellicole residue.

    • Ricorda di reinstallare la staffa del cavo del display.

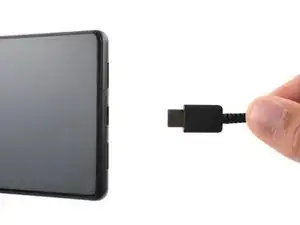
    • Questo è un buon momento per testare il tuo telefono prima di chiuderlo. Collega temporaneamente lo schermo, accendi il telefono e verifica che funzioni come previsto. Prima di continuare con il rimontaggio, spegni il telefono e scollega lo schermo.

    • Segui questa guida se utilizzi adesivi tagliati su misura per il tuo dispositivo.

    • Segui questa guida nel caso in cui utilizzi una carta adesiva pretagliata.

    • Se stai installando uno schermo nuovo, segui questa guida per calibrare il sensore di impronte digitali.

    It was much easier to remove the adhesive after the phone cooled down completely.

    Lacey E -

    That's super strange. There's certainly a middle ground of not being too hot, but I've done this job 3 times now, I can really tell if it needs a little more warmth.

    Orin Zebest -

    IMO this really needs some kind of jig to align the new adhesive. It is nigh on impossible IMO to align properly, and you'll end up with bunched-up sections of stretched adhesive all over the place. It is beyond frustrating, after taking ones time and being so careful.

    It seems that it should be possible to cut the plastic backing that the new adhesive comes on into a shape that would fit in the phone, and index it on some of the existing pins by making accurate holes. That might at least make it possible to get all of the new adhesive in a useful place.

    Otherwise pretty good. Thank you to the people who have taken the time to put this together.

    David B -

    How to unlock the fingerprint sensor ?

    Why is there no adhesive with the display.

    It's not very consumer friendly if you need to buy everything seperate

    paul E -

    Was there a solution to unlocking the fingerprint sensor? I have the same issue.

    Marian -

    Before putting the new screen, remove the black and not so visible black plastic frame under the surrounding scotch. Otherwise you cannot put the new screen, this black and surrounding plastic is also on the new screen with it's claws.

    Ratinox -

Conclusione

Confronta la tua nuova parte di ricambio con la parte originale: potresti dover trasferire i componenti rimanenti o rimuovere i supporti adesivi dalla nuova parte prima di installarla.

Per riassemblare il tuo dispositivo, segui le istruzioni nell'ordine inverso.

Per eseguire un test diagnostico con lo strumento diagnostico integrato di Pixel, clicca qui.

La riparazione non è andata come previsto? Prova alcune soluzioni dei problemi di base o chiedi aiuto alla nostra comunità Risposte di Google Pixel 7.

Dominik Schnabelrauch

Membro da: 23/11/16

200708 Reputazione

30 commenti

This guide was excellent. And the most tedious bit of the repair was removing the remaining adhesive before installing the new screen. Very easy repair for anyone with some patience.

If the fingerprint unlock does not work after this, you may get a message on the lock screen indicating that you need to go to a google website to fix it.

What you actually need to do is:

o Install the Google USB driver for Windows from here: https://developer.android.com/studio/run...

o Put your phone in fast-boot (turn off, then turn on while holding volume down)

o Connect the Pixel to your PC

o Using chrome, visit this site, which will reset the fingerprint reader: https://pixelrepair.withgoogle.com/udfps

I had to reboot twice after this to actually get it to work, but it's all good now.

bradappel -

Thank you for this. Since the message on the phone is unhelpfull, this info should really be added to the manual.

Vincent van Leijden -

Thank you! No driver needed on a Mac (as it says at the first link.) Just go to the withgoogle pixelrepair page and follow the instructions. Worked on the first restart for me.

Chris K. -

Ohhh thank you so much for this, I was about to give up on the fingerprint reader ha

Joshua Chandler -

The above instructions are not complete. These are the full instructions that work for me:

1.Before you turn your phone off, go to the developer options and enable USB debugging.

Go to: Settings, About phone then tap Build number 7 times.

2. Go here Get the Google USB Driver | Android Developers and download the google USB zip file (this is for windows BTW)

3. Unzip however you want it

4. Open the folder usb_Driver and rightclick "android_winusb" and install

5. To make sure it installed, connect your pixel (with USB debugging still enabled) to your PC and open "device manager". You should see "Android Devices > Android Composite ADB Interface".

6. Disconnect pixel from PC

7. Go here Google Fingerprint Calibration website and follow the instructions.

https://pixelrepair.withgoogle.com/udfps

Filip Lou -

Thank you so much. This has worked for me :)

Robot Dog -

Thank you for the extra help. Bradapple pointed me in the right direction and you guided me in for the landing... so to speak. 😏

Already Sanchez -

I did all that but when connecting my computer the monitor shows "Unsupported device

To use this tool, your device must be a Pixel 3, 3 XL, 3a, 3a XL, 4, 4 XL, 4a, 4a (5G), 5, 5a, 6, 6 Pro, 6a, 7, 7 Pro, 7a, Tablet." That is very confusing because I have the Google Pixel 7.

Cedric Willi -

OMG thank you so much for this information, i've spent such a long time on various forums and threads, i even talked to google support they said factory reset would work.. no one mentioned the developer options and enabling USB debugging. Thanks again this finally worked!

Mitchell Rogers -

thanks so much. I think these steps should have been included in the guide. it doesn't seem like the system lets you do a straight swap without it (which makes sense given it is an important security feature)

Jesse Kohn -

I found attaching the press cable the most difficult, it eventually went in after a few hours trying on and off, but I couldn't tell you why. Once that was done everything was easy

Sam Rutland -

Yes i agree, this was fiddly and I was very worried about breaking pins.. though for me it was 10mins, not hours :(

Jesse Kohn -

Really good guide. Had some trouble with the removal of the display cable branket and the adhesive, but after an hour in the end, the screen turnee on. Also had to reinstall the fingerscanner….

Steffan Juel Højgaard Jensen -

guys my screen turn on but the touchscreen doesnt work, can anyone tell what do wrong?

ewdor gutierrez -

I have the same problem, did you solve it somehow?

Борис Міндер -

How to order the parts if im outside of shipping region, im in indonesia

Kristian Harjanto Abarja -

Great quality kit. I underestimated how fiddly cleaning off the old adhesive would be but otherwise this was straightforward and there were some really good pointers for things to watch out along the way. Glad I took the time to do this as now my screen is perfectly readable again. A couple of lessons learnt from me: 1/ impressed at how quickly the microwave heat pack gets super hot. one application was enough for me to get the screen off. 2/ The clips along the outside edges are very fragile.. be very careful when cleaning out the adhesive. 3/ Speaking of adhesive cleaning/removal.. I understimated this step. It took a looong time. Take breaks if getting tired/frustrated. Probably spent over an hour just on this step. Maybe more heat would have helped, but I was worried about damaging components 3/ As others have mentioned there are issues with the fingerprint sensor post install, the instructions above worked perfectly for me re/ windows driver, developer mode, google software update tool.

Jesse Kohn -

I followed this guide to open the phone and try to fix my broken glass: not screen, glass only. I decided to post here some advices.

Resources:
- This guide
- Video on how to open and apply OCA Glass
- Video on how to apply OCA without machines

Where I bought things and what I used?
- IFixIt Pro Tech Toolkit
- Glass replacement with OCA
- Molybdenum string
- Isopropyl alcohol
- Heat Gun / Hairdryer

Advices:
- you need to have something that will hold your screen still. It will move a lot, adhesive is strong as hell
- do not apply too much heat: if it's hot to touch, probably is too much (max 80°C)
- make sure to have A LOT of time, a LOT of patience and a LOT of molybdenum
- do not push on the internal screen and its components: go against glass, not the "LCD"
- screen-frame adhesive cannot be reused, you need a new one

At this point I need to tell you that I failed and ordered a new screen from iFixIt.
I managed to get half of the work done, but then my string started to eat the internal screen :(

Marcin Pabich -

Should I remove the thin blue backing off(has what look like serial number stickers on it) the new screen before install? Thanks

Chris Vann -

When installing a replacement screen be sure to remove the black plastic cover that obscures the selfie camera hole, otherwise you won't be able to take selfies!

Josh -

I didn't notice this cover when closing it up, so it didn't want to close at the top edge. Still doesn't close snugly, and the front camera doesn't work now, but idk if it's worth trying to get the screen off again and risk breaking the new display. T_T It would have been helpful to have some information on what to remove from the new screen in the article.

Hitch -

Update, a few minutes later: I was able to fix it! The adhesive was fresh enough that a little heat was enough for me to get just the top edge open enough to slip in a pair of tweezers and remove the covering. Camera is now functioning.

Hitch -

Thank you Hitch!

I encountered the same situation and could solve it just as you did.

mikg -

how important is it to put the display cable bracket back on?? I forgot then sealed up

Kyle Walker -

Hi Kyle,

The display cable bracket with the piece of foam holds the connector in place. Without it, the connector just holds with a little friction and is likely to come off by vibration or shock. Your mileage may vary. At least you know how to fix it, should it come off. Keep the bracket in a safe place.

What I do not know is, if there is a possibility for electrical damage on the screen or the mainboard, should the connector not come off completely, leaving just some contacts connected. But given the low currents, damage seems not very likely. At least in my experience, these things are relatively robust.

mikg -

Hello! Does anyone know if it is possible not to change the whole screen of the phone but somehow to reattach the upper glass only? My problem is that the screen itself is fine but the glass goes off a bit in the left upper corner and now there's a several mm whole in between the glass and the screen. Is it possible somehow to fix it without changing the whole screen? Thanks a lot for your replies!

Lily -

The replacement screen isn't sitting flush with the phone. What have I missed?

Thanks

Jon Smith -

Hi Jon,

If it is on the top, you likely didn't remove the cover that obscures the selfie camera, which will prevent you from taking selfies too (see comments above). Happened to me and solved it, like Hitch described.

Other possibilities include incomplete cleaning of the old adhesive, torn application of the new adhesive or having some other 'body' lodged between frame and screen.

Best of luck!

mikg -

le tuto est genial tout fonctionne merciiiiiiii

Moi Tusauraspas -

Having issues with the proximity sensor after replacing display. Screen no longer turns off when against face on calls, nor does flip to shh work. I checked for all protective films, nothing present (looked just like the original display and even just like what's pictured above). What do I need to do?!

Kyle Walker -