Introduzione
Questa guida di riparazione è stata redatta dallo staff di iFixit ma non è stata approvata da Google. Leggi di più sulle nostre guide qui.
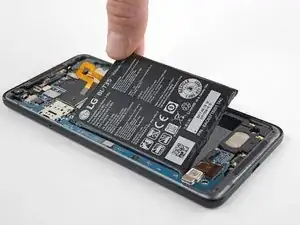
Usa questa guida per sostituire la batteria usurata del tuo Google Pixel 2 XL.
Prima di smontare il tuo telefono, scarica la batteria sotto il 25%. La batteria può prendere fuoco e/o esplodere se forata inavvertitamente.
Se la tua batteria è gonfia, prendi adeguate precauzioni. Non scaldare il tuo telefono. Se necessario, puoi usare un contagocce o una siringa per iniettare alcol isopropilico (concentrazione >90%) attorno ai bordi della cover posteriore per indebolire l'adesivo. Le batterie gonfie possono essere pericolose, quindi indossa occhiali protettivi e usa la dovuta attenzione; se non sei sicuro di saper eseguire la procedura, porta la batteria da un professionista.
-
-
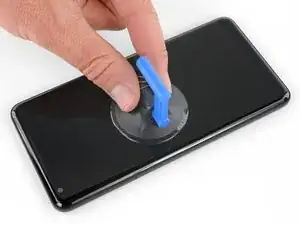
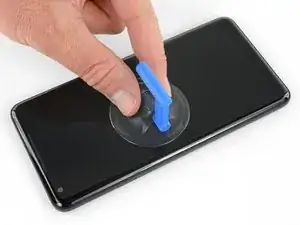
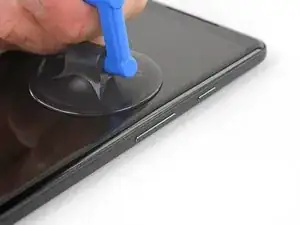
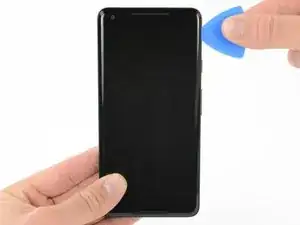
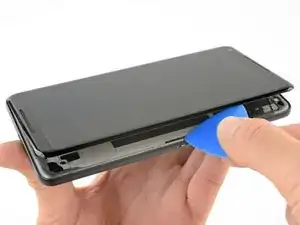
Applica una ventosa il più vicino possibile al lato SIM del telefono, appena prima della curva del bordo.
-
-
-
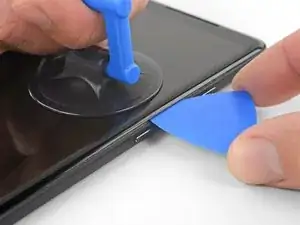
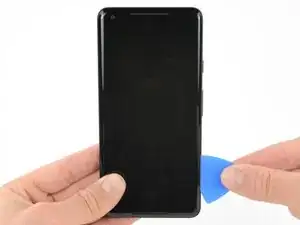
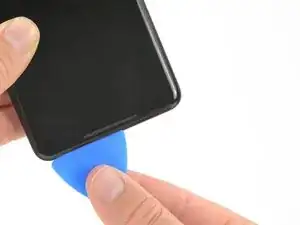
Tira la ventosa con una trazione decisa e costante e inserisci un plettro di apertura tra il pannello frontale e la cover posteriore.
-
-
-
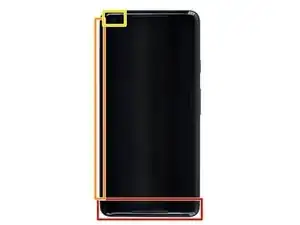
Non inserire il plettro per più di 6 mm nel bordo inferiore del telefono. Se il plettro entrasse in contatto con la parte curvata del pannello OLED, lo schermo potrebbe danneggiarsi.
-
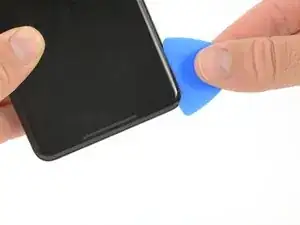
Non tagliare lungo il bordo sinistro: ci sono dei delicati cavi del display che potrebbero danneggiarsi.
-
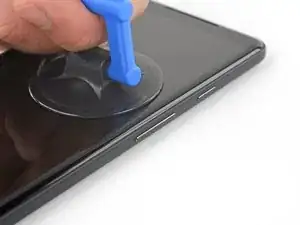
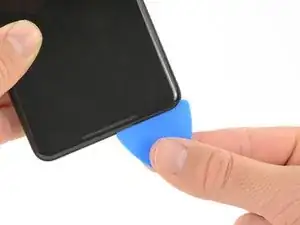
Nell'angolo superiore sinistro, limitati a dei tagli molto superficiali: infilando l'attrezzo molto all'interno potresti danneggiare la fotocamera anteriore.
-
-
-
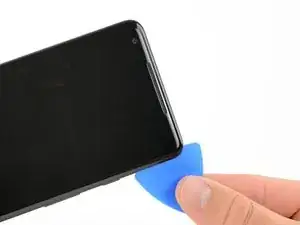
Fai scorrere il plettro di apertura verso il basso lungo il lato destro del telefono per staccare la colla dello schermo.
-
-
-
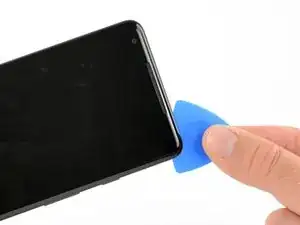
Fai scorrere il plettro di apertura attorno all'angolo inferiore destro e lungo il bordo inferiore del telefono.
-
-
-
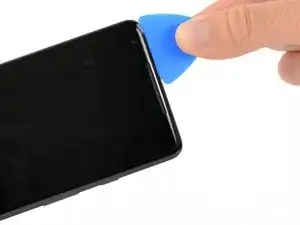
Inserisci di nuovo il bordo piatto del plettro nell'angolo superiore destro del telefono e fallo scorrere attorno all'angolo e al bordo superiore.
-
-
-
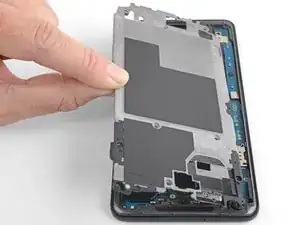
Solleva delicatamente lo schermo dal lato destro del telefono, aprendolo come se fosse un libro.
-
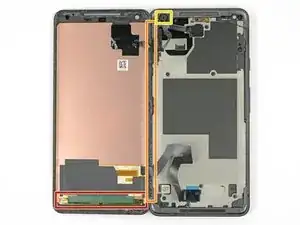
Disponi delicatamente il display di piatto sul tavolo vicino alla parte rimanente del telefono, tenendolo vicino per evitare di forzare i cavi del digitizer e dello schermo.
-
-
-
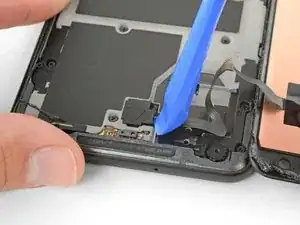
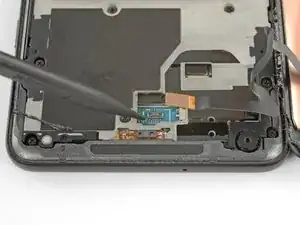
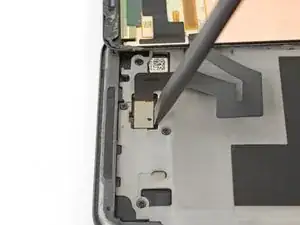
Usa l'angolo di uno strumento di apertura per sollevare la cover del connettore del cavo del digitizer.
-
Rimuovi la cover del connettore.
-
-
-
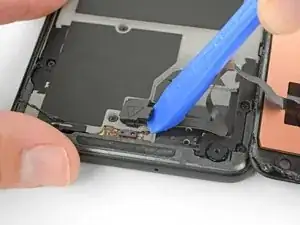
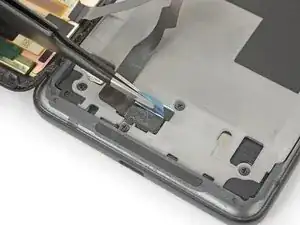
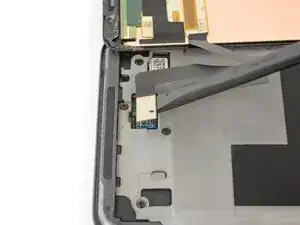
Usa l'estremità a punta di uno spudger per sollevare il connettore del cavo del digitizer e staccarlo dal suo zoccolo sulla scheda madre.
-
-
-
Usa delle pinzette per rimuovere eventuali nastri adesivi sulla cover del connettore dello schermo.
-
-
-
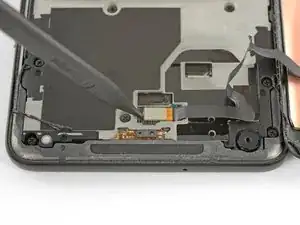
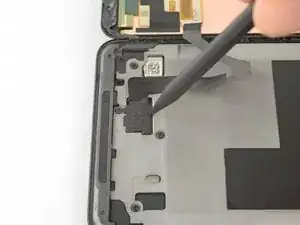
Inserisci l'estremità a punta di uno spudger nel piccolo foro sul bordo della cover del connettore dello schermo.
-
Usa lo spudger per estrarre la cover dal suo alloggiamento.
-
Rimuovi la cover del connettore.
-
-
-
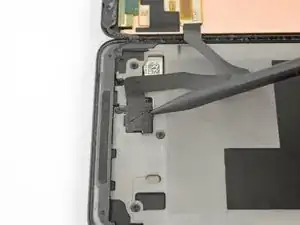
Usa l'estremità piatta di uno spudger per sollevare il connettore del cavo del display dal suo zoccolo.
-
Rimuovi lo schermo.
-
-
-
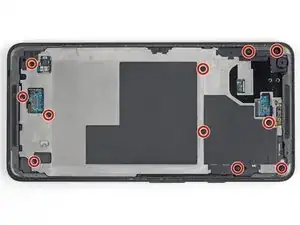
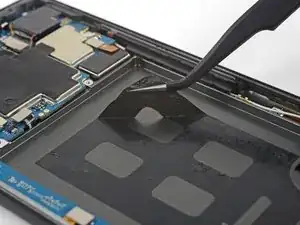
Inserisci un plettro di apertura nell'intaglio nel telaio centrale vicino ai pulsanti del volume e solleva il midframe staccandolo dal resto del telefono.
-
Rimuovi il telaio intermedio.
-
-
-
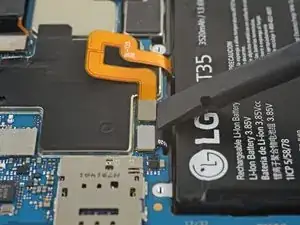
Se disponibile, applica un po' di alcol isopropilico sotto ciascun angolo della batteria e aspetta diversi minuti per lasciarlo penetrare sotto la batteria e indebolire l'adesivo.
-
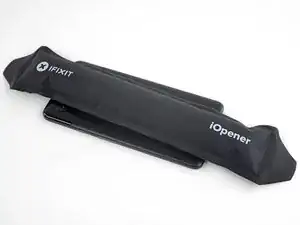
In alternativa, puoi applicare un iOpener riscaldato sul retro del telefono sopra la batteria per almeno due minuti. Se necessario, scalda di nuovo e applica più volte l'iOpener per ammorbidire sufficientemente l'adesivo della batteria.
-
-
-
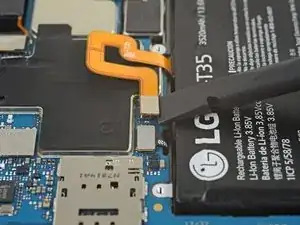
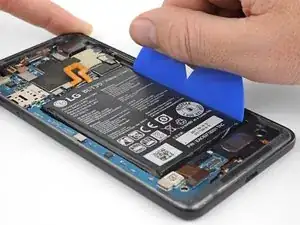
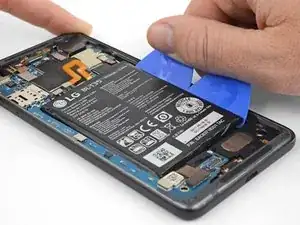
Inserisci una coppia di plettri di apertura o una scheda di plastica lungo il bordo destro della batteria.
-
Applica una pressione forte e costante per far leva lentamente per sollevare e quindi rimuovere la batteria.
-
-
-
Rimuovi la batteria.
-
Se c'è ancora dell'alcool nel telefono, puliscilo via attentamente con una panno senza lanugine o lascialo asciugare all'aria prima di installare la batteria.
-
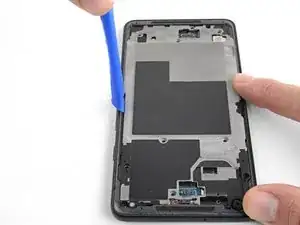
Usa delle pinzette per staccare ogni parte di adesivo rimasto sul telefono e pulisci le aree di incollaggio con alcol isopropilico e un panno privo di pelucchi.
-
Fissa la nuova batteria con un foglio adesivo pretagliato oppure nastro biadesivo. Per posizionarlo correttamente, applica il nuovo adesivo sul telefono e non direttamente sulla batteria. L'adesivo non dovrebbe toccare nessuno dei cavi sotto la batteria.
-
Premi con fermezza la batteria in posizione per 20-30 secondi.
-


Per rimontare il dispositivo, segui queste istruzioni in ordine inverso.
Per prestazioni ottimali, dopo aver completato questa procedura, calibra la tua nuova batteria appena installata.
Porta i tuoi rifiuti elettronici a un riciclatore certificato R2 o e-Stewards.
La riparazione non è andata secondo i piani? Vai sulla nostra comunità Risposte per trovare aiuto nella risoluzione dei problemi.

18 commenti
Just completed this last night. They weren't kidding when they all say the battery is no fun.
I managed to get it, but doesn't mean the old one wasn't bent like crazy when I was done. I was planning on keeping it as a backup since it wasn't bad, but I don't think I would risk it at this rate. Getting a thin stiff plastic to push through the adhesive along with the spudger helped.
There are a lot of components and boards along the edge of the battery. It's hard to pry without touching them. I saw a guide recommend taking the guts out to remove the battery.
One thing I would recommend while you're in there is to replace the thermal paste. Mine wasn't too bad after a year, but I'm sure it won't make a solid and effective cover on the processor to the heat pipe.
Can I just use Artic silver MX4 for thermal paste? Or is there a paste specifically for it?
DheerajR -
Arctic Silver should be fine!
Its pretty easy to do if you use the iPhone battery tool/pryer thing!
Never again, a nightmare to get it changed out.
Shouldn’t this be “As close as possible to the volume rocker”?
Mihai Turdean -
Forget about the tiny toy suction cup they provide to battery replacement kits. I used a dent puller from an automotive shop. The smallest they had was just small enough for the Pixel's screen. I still needed to heat the edges with a heat gun.
Tamás Polgár -
I wish someone tell me in advance that if I doing this replacement after using phone for a few years it better to have spare "display adhesive" and be ready to follow Google Pixel 2 XL Display Adhesive Replacement
Original adhesive become dirty with time and fat chances it will be damaged during opening phase. In my case I replaced battery but can't use the phone, as still waiting for adhesive to be delivered
Maxim Vorontsov -