Introduzione

Questa guida di riparazione è stata redatta dallo staff di iFixit ma non è stata approvata da Google. Leggi di più sulle nostre guide qui.

Segui questa guida per rimuovere e sostituire la batteria di un Google Pixel 5.

Per la tua sicurezza, scarica la batteria al di sotto del 25% prima di smontare il tuo telefono. Questo riduce il rischio di pericolosi eventi termici se la batteria viene danneggiata accidentalmente durante la riparazione. Se la tua batteria è gonfia, prendi le precauzioni appropriate.

Le fotocamere posteriori sono state rimosse nelle immagini, ma non è un passaggio necessario per rimuovere la batteria.

  1. QQGLSFPODbK54uDM
    • Scalda un iOpener e appoggialo al bordo inferiore dello schermo per un minuto.

    • Puoi anche usare un asciugacapelli, una pistola termica o una piastra scaldante, ma stai attento a non surriscaldare il telefono: lo schermo e la batteria sono facilmente danneggiabili dall'eccessivo calore.

    It would be helpful to know for how long ally the heated pad

    Yuri Deglin -

    Agreed, my friend from the past.

    Albert Einstein -

    If you click on the "iOpener" link, it tells you to heat it up for 30 seconds, and if you're using a microwave with a carousel, make sure it moves freely.

    Azurina Schalk-Smith -

    How long do you think it would take with a hair dryer?

    Gen L. -

  2. XB15jHbG4YWAkvHj
    XB15jHbG4YWAkvHj
    idLGWGUERlrSUErg
    FsdxJwViyOclRRRc
    • Mentre stai aspettando che l'adesivo si allenti, prendi nota di quanto segue:

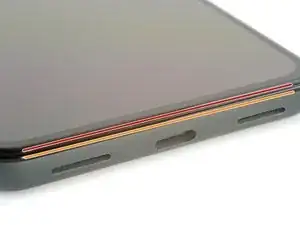
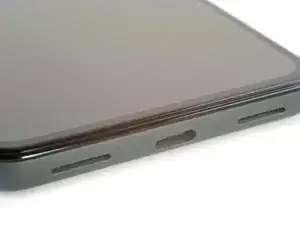
    • Linea dello schermo: Questa giuntura separa lo schermo dal resto del telefono. Non fare leva su questa linea.

    • Linea della cornice: Questo è il punto in cui la cornice in plastica progettata per proteggere lo schermo incontra la struttura. È mantenuta in posizione da clip in plastica. Qui è dove dovresti fare leva.

    Please remove the image of the pick in the bottom of the phone in Step 2. This led me to place a pick there BEFORE step 5 which damaged my digitizer. Now I have to replace the entire screen as a result.

    Alternatively, add the image from step 5 with the suction cup in place, or just draw an arrow digitally to the seam you're referring to in step 2. Or call "Step 2" "Important Note" instead of a step.

    David Smith -

  3. 23sHH3BUSbtCbtOh
    23sHH3BUSbtCbtOh
    wIVYR4w6CPIbpvc1
    Pi3qHdWqZra6AUCg
    • I prossimi due passaggi mostrano l'Anti-Clamp, uno strumento che abbiamo progettato per semplificare la procedura di apertura. Se non stai usando l'Anti-Clamp, vai avanti di due passaggi per un metodo alternativo.

    • Per istruzioni complete su come utilizzare l'Anti-Clamp, consulta questa guida.

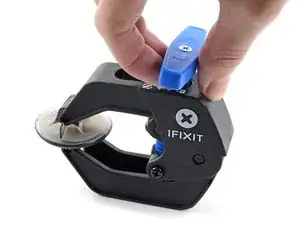
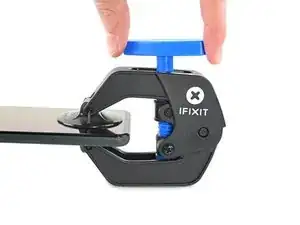
    • Tira la maniglia blu verso il cardine per disattivare la modalità di apertura.

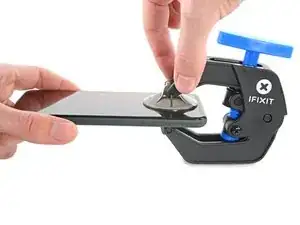
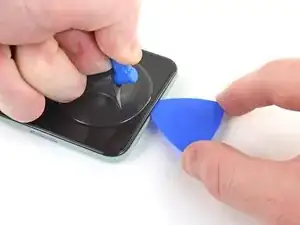
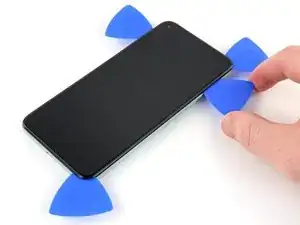
    • Posiziona le ventose vicino al bordo inferiore dello schermo: una davanti e una dietro.

    • Premi sulle ventose per applicare la suzione nell'area desiderata.

    • Se trovi che la superficie del tuo dispositivo è troppo scivolosa perché l'Anti-Clamp faccia presa, puoi utilizzare del nastro adesivo per imballaggi per creare una superficie più aderente.

  4. LHErCKT1C5tQ23UD
    LHErCKT1C5tQ23UD
    ffUX41QYpsWEufib
    WJrFDynE3AHciwdH
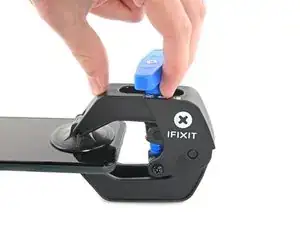
    • Spingi la maniglia blu lontano dal cardine per attivare la modalità di apertura.

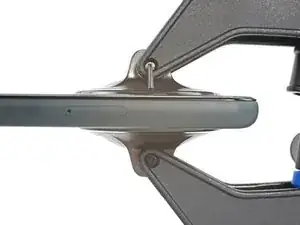
    • Gira la maniglia in senso orario finché non vedi che le ventose iniziano a allungarsi.

    • Assicurati che le ventose rimangano allineate tra loro. Se iniziano a scivolare fuori allineamento, allenta leggermente le ventose e riallinea i bracci.

    • Attendi un minuto per dare all'adesivo la possibilità di rilasciarsi e creare un'apertura.

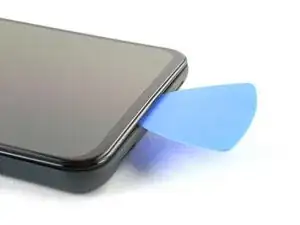
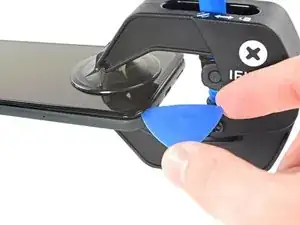
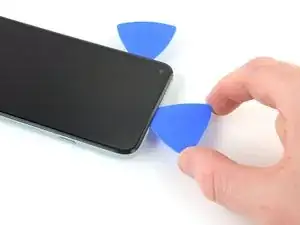
    • Inserisci un plettro di apertura sotto lo schermo e la cornice quando l'Anti-Clamp crea un'apertura sufficientemente ampia.

    • Se l'Anti-Clamp non crea un'apertura sufficiente, applica più calore all'area e gira la maniglia in senso orario di mezzo giro.

    • Non girare più di mezzo giro alla volta e attendi un minuto tra una rotazione e l'altra. Lascia che l'Anti-Clamp e il tempo facciano il lavoro per te.

    • Salta il passo successivo.

  5. Z6keo3lUlisS6PiX
    Z6keo3lUlisS6PiX
    r3JOcDoYsjpYSPFJ
    TNkpv1vbVMDOwwPO
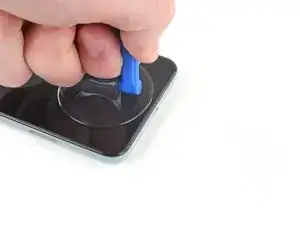
    • Fai aderire una ventosa allo schermo, il più vicino possibile al bordo scaldato.

    • Se il tuo schermo ha moltissime crepe, segui questa guida per applicare del nastro adesivo sopra lo schermo. Se anche così hai difficoltà, puoi usare della super colla per incollare la ventosa allo schermo rotto.

    • Tira la ventosa verso l'alto con forza costante per creare una fessura.

    • A seconda dell'età del tuo dispositivo, questo può essere più o meno difficile. Se hai delle difficoltà, scalda ulteriormente e riprova.

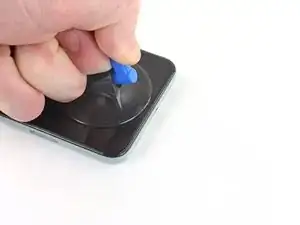
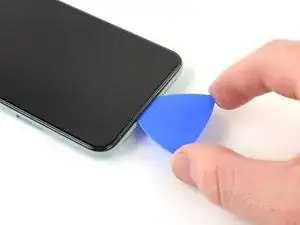
    • Infila il plettro nella fessura.

    "Insert the opening pick into the gap." NOT the gap under the glass, the second gap... If not you will probably break your screen, at least I did. Especially important if your pixel 5 shipped with the screen gap :(

    Alex Beaven (Nevbox) -

  6. JR3ablPZImMYsdPw
    JR3ablPZImMYsdPw
    16NeY1RIgBr4ALBD
    eHki2SVKH3c4LedP
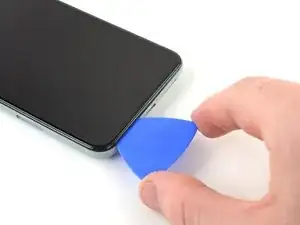
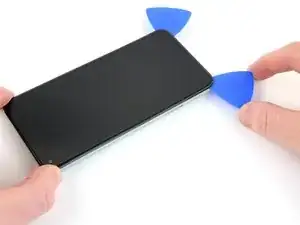
    • Fai scorrere il plettro avanti e indietro sotto il bordo inferiore per tagliare l'adesivo.

    • Lascia il plettro sotto l'angolo in basso a destra per evitare che l'adesivo si reincolli.

  7. YYBV6DBqqFtaUCfr
    • Appoggia un iOpener scaldato al bordo sinistro dello schermo per un minuto.

  8. PkwPMyUxTWxYtfMG
    PkwPMyUxTWxYtfMG
    t1IgSk2tcCpnLXL1
    m4ZVwT1q3UtyNBso
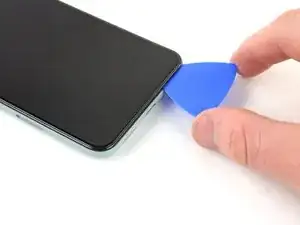
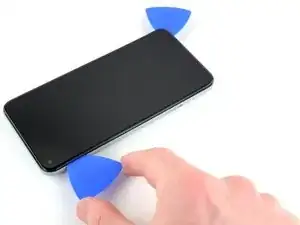
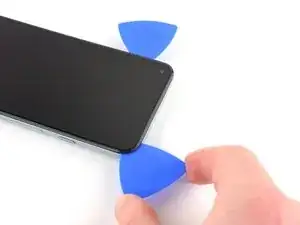
    • Infila un secondo plettro sotto l'angolo in basso a sinistra.

    • Fai scorrere il plettro attorno all'angolo in basso a sinistra.

    • Non infilare il plettro per più di 6 mm o potresti danneggiare il cavo a nastro dello schermo che si trova al centro del bordo sinistro.

    • Fai scorrere il plettro verso la fotocamera frontale per tagliare l'adesivo sotto il bordo sinistro dello schermo.

    • Lascia il plettro infilato per evitare che l'adesivo si reincolli.

  9. oEPA4kQQ5fVdHWvt
    oEPA4kQQ5fVdHWvt
    XhJQ6tagwvAhEmpG
    RKsZYcUGPiGcP3sF
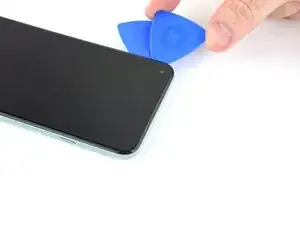
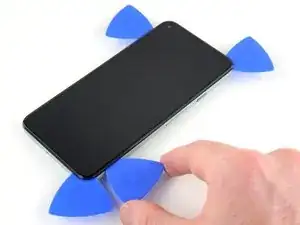
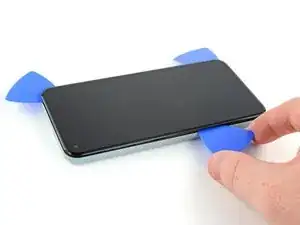
    • Infila un altro plettro sotto l'angolo in alto a sinistra dello schermo.

    • Fai scorrere il plettro attorno alla fotocamera frontale e sotto il bordo superiore dello schermo.

    • Se l'adesivo è difficile da tagliare, scalda la zona interessata per un minuto e riprova.

    • Fai scorrere il plettro verso l'angolo in alto a destra e lascialo infilato lì sotto.

  10. 1QnGhC4UIh3IUk1d
    1QnGhC4UIh3IUk1d
    HkkaPbXOq1RfD2hL
    eAIALPreGV2eXEBQ
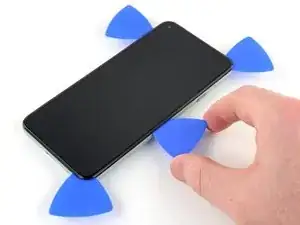
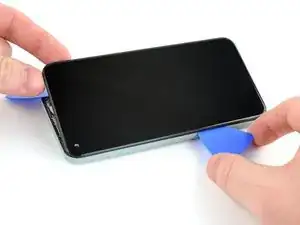
    • Infila un plettro nell'angolo in basso a destra dello schermo.

    • Fai scorrere il plettro verso l'angolo in alto a destra per tagliare l'ultima parte di adesivo sotto allo schermo.

    • Potresti dover far scorrere un plettro lungo tutti i bordi per assicurarti di aver tagliato tutto l'adesivo. L'adesivo è più spesso sotto agli angoli.

  11. lNM4JsPdVK4M1MxG
    lNM4JsPdVK4M1MxG
    O1oOFnIGMGbAJoAG
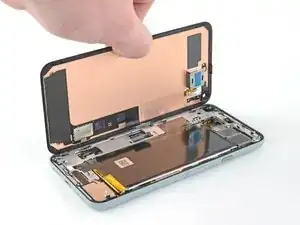
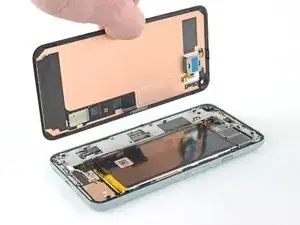
    • Usa il plettro sotto l'angolo in alto a sinistra per sollevare il bordo sinistro dello schermo di qualche millimetro. Questo eviterà che i ganci rifacciano presa sulla copertura.

    • Solleva il bordo destro dello schermo e aprilo come un libro.

    • Non aprire lo schermo per più di 90° per evitare di danneggiare il cavo a nastro dello schermo.

  12. Fy2oOr21rAtW4q2W
    Fy2oOr21rAtW4q2W
    OVUGNVxv23M3tSAM
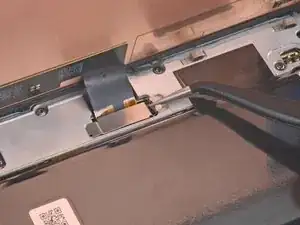
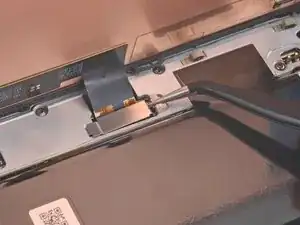
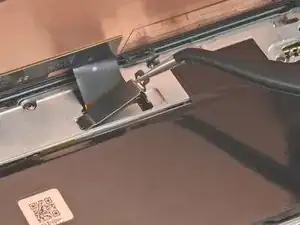
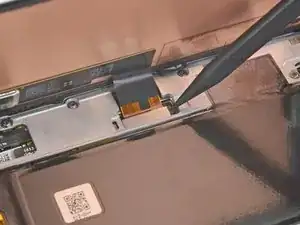
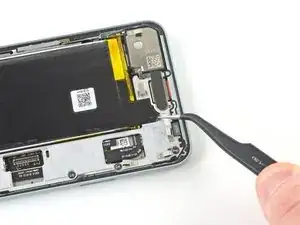
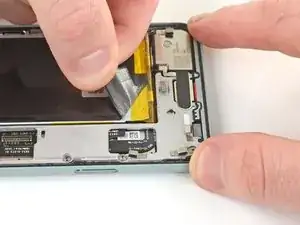
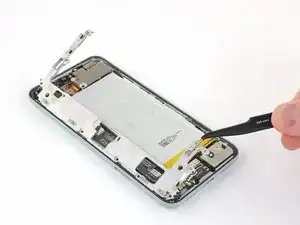
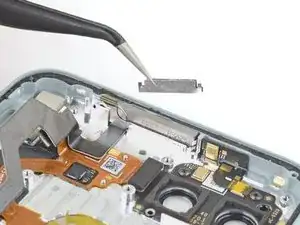
    • Usa delle pinzette per prendere la copertura del connettore che tiene fermo il cavo a nastro dello schermo.

    • Spingi il gancio verso il connettore per liberarlo.

    I found it easier to use the spudger here rather than the tweezers (which have sharp ends that could damage something if you happen to slip).

    tristanwaddington -

    some 5a models will have a screw instead of clip , here's a photo https://imgur.com/a/9dZG5pQ


    Daniel Gonzales -

  13. YHjY6XJvlJjJ5tLY
    YHjY6XJvlJjJ5tLY
    bWD4NvY5CfksGydP
    • Rimuovi la copertura del connettore dello schermo.

    • Assicurati di tenere questo componente per reinstallarlo durante il rimontaggio.

  14. cCDA2hvJgjXGYnJM
    cCDA2hvJgjXGYnJM
    3tLAI2OIwSxJUEYL
    • Usa la punta di uno spudger per sollevare e scollegare il cavo a nastro dello schermo.

    • Per ricollegare i connettori a pressione come questo, allineane attentamente un lato e premilo in posizione, quindi ripeti per l'altro lato. Non premerlo nel centro. Se il connettore non è allineato correttamente, i contatti si possono piegare, causando dei danni permanenti.

    The curved ends of the blue iFixit Opening Tool helped me reseat the connector when installing the new screen.

    tristanwaddington -

    Jesus no wonder the Chinese factory workers kill themselves, this thing is brutal

    Holy Moly -

    So hard to get this thing reseated to test the screen, even before putting the adheasive round the phone edge to finish the job. What made it particularly hard was that the flex cable on mine seemed very short compared to video's i've seen online.

    Jake Boddington -

  15. ZMAy1r2nNBMo5WNf
    ZMAy1r2nNBMo5WNf
    t5oZvVG2wXnsOAxs
    • Rimuovi lo schermo.

    • Usa le pinzette per rimuovere l'adesivo restante dal case.

    • Se utilizzi alcool isopropilico per pulire l'adesivo dal display, assicurati di non farlo schizzare su componenti non intenzionalmente, poiché ciò potrebbe indebolire il loro legame adesivo.

    • Se hai sostituito lo schermo, controlla il foro della fotocamera frontale dello schermo e rimuovi eventuali pellicole protettive che lo coprono.

    • Se il cavo del tuo schermo di ricambio è tenuto fermo con del nastro adesivo, rimuovi il nastro prima di installarlo.

    • Se stai usando delle strisce adesive tagliate su misura, segui questa guida per vedere come applicarle allo schermo di ricambio.

    • Se stai usando del nastro Tesa per reincollare lo schermo, segui questa guida.

    • Durante la procedura di avvio dopo il rimontaggio, lo schermo attraverserà una fase di calibratura. Non toccare lo schermo durante questa fase, in quanto potrebbe causare una calibrazione errata del touch e generare problemi.

    Where from we can buy the screen. Thanks

    Ajay Sharma -

    the screen does not fit

    Joel Kelly -

    After reconnecting the screen, is it necessary to remove a screen protector (if installed) for the a proper screen calibration?

    Maxx -

  16. JjAfOqeYvPL5Q1AO
    JjAfOqeYvPL5Q1AO
    wLheS56raJwteEcq
    mjgDKNJOCZiBdShT
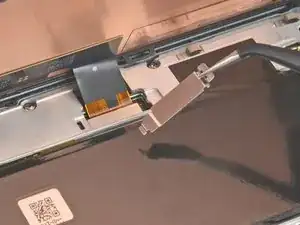
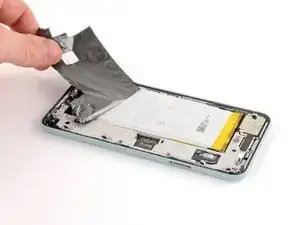
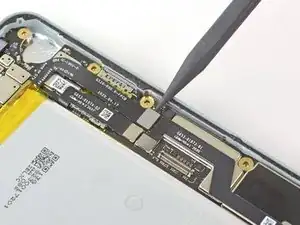
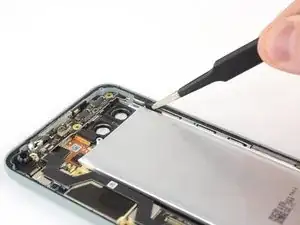
    • Usa delle pinzette per sollevare il nastro in grafite finché non riesci a prenderlo con le dita.

    • Stai attento a non forare o piegare la batteria con i tuoi strumenti: una batteria forata o piegata potrebbe rilasciare delle pericolose sostanze chimiche o causare un pericoloso evento termico.

    • Rimuovi il nastro in grafite.

    On reassembly, I missed the graphite tape installation. Will this be an issue?

    Gene Harriman -

  17. tfXQmjGhSOU33UD2
    tfXQmjGhSOU33UD2
    1jrdoV3IGxUvBHwp
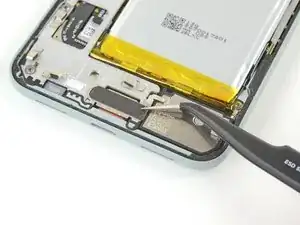
    • Usa le pinzette per rimuovere il pad in grafite che copre la copertura della porta di carica.

    • Se riesci a mantenere questo pad in grafite in buone condizioni, puoi riutilizzarlo durante il rimontaggio.

    Would have been much more helpful to start off by saying to be careful removing this piece so you can reuse.

    Also would have been helpful to say that the kit comes with a new one, so don't worry about saving it.

    lupa -

  18. 1eBqEykKCjSnXjba
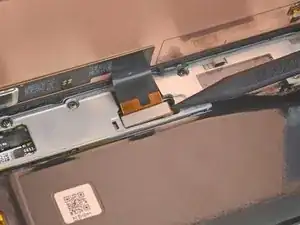
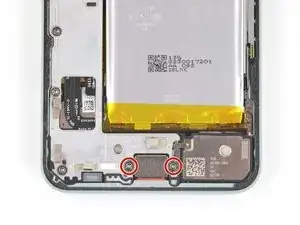
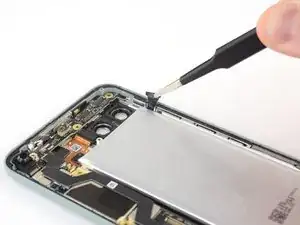
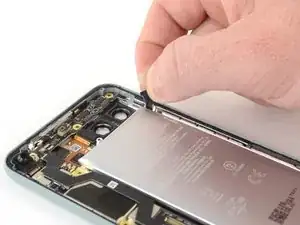
    • Usa un cacciavite Torx T3 per svitare le due viti da 4,6 mm che fissano la copertura della porta di carica al telaio intermedio.

    • Durante questa riparazione, tieni traccia di ogni vite ed assicurati di riavvitarla esattamente dove era.

  19. MRXQwTZ2RrfesIYE
    MRXQwTZ2RrfesIYE
    vxTHHVZE22vHJCO2
    • Usa delle pinzette per rimuovere la copertura della porta di carica.

    • Assicurati di tenere questo componente per reinstallarlo durante il rimontaggio.

  20. oR3xLWXumQOWvDOi
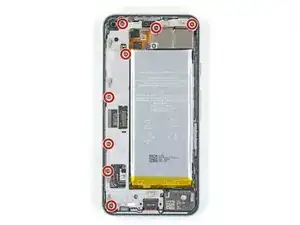
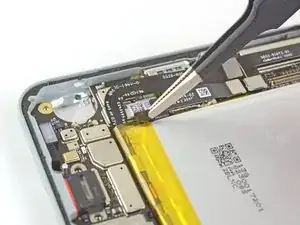
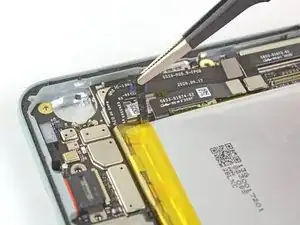
    • Usa un cacciavite Torx T3 per svitare le otto viti da 4,6 mm che tengono fermo il telaio intermedio.

  21. JPgBZLYKgs1THrXW
    JPgBZLYKgs1THrXW
    EPgFFlgRcP264jrI
    nFXAFwvFhDLKAJcn
    • Usa le pinzette per sollevare il lato destro del telaio intermedio.

    • Rimuovi il telaio intermedio.

    • Lo spessore in alto al telefono è probabile che cada quando rimuovi il telaio intermedio. Ricorda di conservare questo spessore per il rimontaggio. Consulta le immagini nella guida alla sostituzione della scheda madre.

    Removing the midframe may cause a metal-foam spacer above the light sensor to pop out. After placing in the midframe on re-assembly, you can use the tweezers to squeeze the spacer back in between the midframe and the metal divider near the top of the phone.

    Dumpy Sheep -

    There is a picture of this spacer at https://www.ifixit.com/Guide/Google+Pixe.... To replace it, first replace the midframe. Then, before screwing the midframe back down, use the tweezers to pinch the space together, compressing the foam in the middle, and slide it into place.

    soren -

    In step 21 (and step 23) the photo showing the spacer shows the cover over the rear camera and apparently the camera itself removed. But this is not required and nor is it instructed in this guide. Confusing for photo to not match what I'm looking at.

    Gregg Lee -

  22. wYIZd3UBYiJOIH6B
    wYIZd3UBYiJOIH6B
    mTkFMKoNFSJlHdsA
    • Usa la punta di uno spudger per sollevare il connettore della batteria e scollegarlo dalla scheda madre.

  23. KR4lNjRZkgFkZdZh
    KR4lNjRZkgFkZdZh
    VQALn1g6aEC4IOhf
    qWmxLyJrbZFB6Vjw
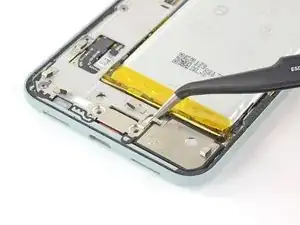
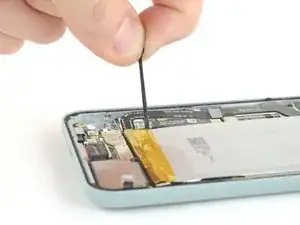
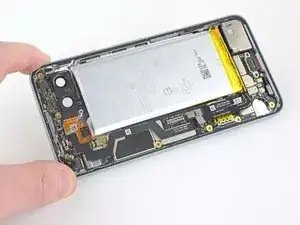
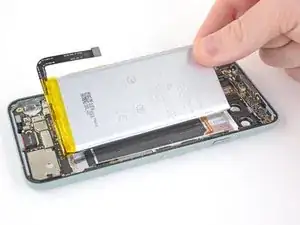
    • Usa delle pinzette a punta arrotondata per prendere la striscia adesiva estensibile che si trova sul bordo destro della batteria. Solleva la striscia con le pinzette finché non riesci a prenderla con le dita.

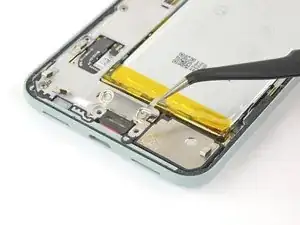
    • Tira la striscia adesiva estensibile lentamente, con forza costante e a un angolo basso per evitare che la striscia si strappi a metà.

    • Cerca di tenere la striscia adesiva piatta e senza pieghe durante questa procedura: le strisce raggrinzite si incolleranno tra loro e si romperanno invece di sfilarsi facilmente.

    • Se l'adesivo diventa troppo difficile da tirare, puoi arrotolarlo su uno spudger e continuare a tirarlo.

    • Se la striscia adesiva estensibile si rompe, usa le pinzette per recuperare la parte rimasta e continua a tirare.

    • Se non riesci a recuperarla, procedi con il prossimo passo.

    I found what helped the best, was after grabbing the tab wrapping it around the tip of the spudger, and rolling slowly away, holding it as close as possible to where the tab was. Before I did that since you're pulling so much at once it easily snapped in half. Luckily I could grab a tiny bit of the strip. After wrapping it around the spudger, it no longer broke. The whole strip came off in one piece. Both pieces are complete horizontal pieces and are along the entire width of the battery, from the side you're pulling to the other side of the battery. There's quite a bit there especially since it stretches during this process. You'll feel it suddenly basically give away. ******

    It is very much like the adhesive strips you use to hang items on the wall. When you're removing the hook, you pull at a low angle on that tab and it stretches until it comes off clean. Pull too high and you peel paint. A similar process here, keep it low and roll it slowly on the spudger. It will come away cleanly.

    Jesse -

    Pull very slowly. Once there is enough out to grip with fingers use your fingers . The tweezers concentrated the load in a small contact area with hard edges. more likely to start a tear. Easier to control pull as well. As the tab comes out keep regripping closer to the battery. That takes the load off the part of tab that has already been stretched thin and weakened.

    Gregg Lee -

    "Shallow" is not a very helpful descriptor for the angle, nor do any of the pictures demonstrate what they meant.

    Instead of pulling straight up, try pulling as parallel to your work surface as possible. It's like removing Command hooks.

    lupa -

  24. PNnhcXiI3Fjrt5DW
    PNnhcXiI3Fjrt5DW
    LNvauDhS6lXaVhvY
    FuVYIte1ITLyvmvO
    • Usa la stessa procedura per rimuovere la striscia adesiva estensibile posizionata sulla parte inferiore del bordo sinistro della batteria.

    • Se questa striscia adesiva estensibile si rompe e non riesci a recuperarla con le pinzette, procedi con il prossimo passo.

    I had to fish around for this tab. It was not as easy to find as the last.

    lupa -

  25. gChMTRLxNnsAymdF
    gChMTRLxNnsAymdF
    PfeiY5VKlLvcsxCN
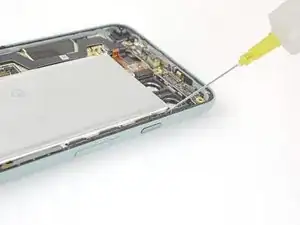
    • Se le strisce adesive si sono rotte sotto la batteria e non possono essere recuperate, applica qualche goccia di alcool isopropilico ad alta concentrazione (> 90%) nell'apertura della striscia interessata.

    This is a frustrating step since I bought the kit thinking I had everything I needed. I don't keep 90% isopropyl alcohol on hand (71% is effective as a disinfectant, where as 90% is not).

    For those who also do not have 90% on hand, I was able to just gently lift the battery out without the alcohol and the graphite under the battery remained in perfect condition and did not tear at all.

    lupa -

  26. LajAYQFplGJcMSbs
    LajAYQFplGJcMSbs
    bTTWR2UoNMAkYcPs
    • Inclina il telefono in modo che l'alcool scorra verso l'adesivo rimasto.

    • Aspetta un minuto per far ammorbidire l'adesivo, quindi procedi con il prossimo passo.

    If you're like me, I ended up having a random piece fall out of the phone that I had no idea where it went. After searching I gave up and left it out. However, after looking at the second photo in this step, the one with it tilted fully towards the camera, I found it. Between the index and thumb in the photo, directly in the center of the phone is a thick gray bar. Just to the right of it is a loose piece that might fall out for you. It looks like two thin pieces of metal that sandwich some insulation. You will also notice two tiny tabs bent at an angle on each end only on one side. If that piece does fall out, that's where it goes. Just match the tab angles with this photo and location. I, unfortunately, don't have that piece anymore and am not willing to break through that display adhesive to put it back anyways.

    Jesse -

  27. DrliTJneKm2bIUSP
    DrliTJneKm2bIUSP
    2B64XTFTwiVjwueS
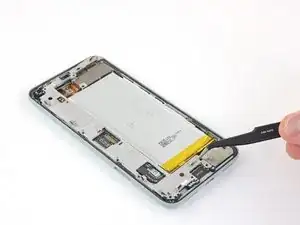
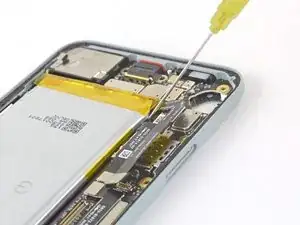
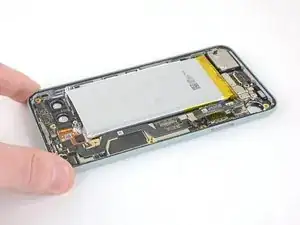
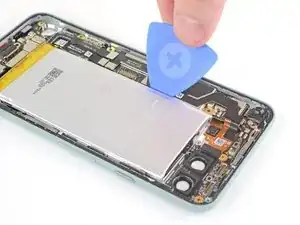
    • Infila un plettro nella fessura sul bordo sinistro della batteria.

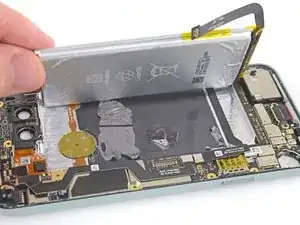
    • Usa il plettro per tagliare l'adesivo rimasto sotto la parte superiore ed inferiore della batteria.

    • Evita di grattare i due cavi a nastro sotto la batteria con il plettro.

    • Questo può essere difficile in quanto l'adesivo è posizionato strategicamente tra i cavi e l'alloggio della batteria. Una possibile soluzione è di tagliare una scheda di plastica da infilare tra i cavi a nastro e il bordo dell'alloggio della batteria.

    • Non piegare la batteria.

    • Evita i contatti della capsula auricolare posizionati vicino all'angolo in alto a sinistra della batteria mentre fai leva con il plettro.

    • Se non riesci a sollevare la batteria, applica qualche altra goccia di alcool isopropilico sull'adesivo. Una scheda di plastica può tornare utile durante questa procedura.

    This was, by far, the hardest step for me. Pay very much attention to that link "strategically located". It tells you exactly where the toughest adhesive is. I had to use a lot of isopropyl alcohol, a lot of waiting for the adhesive to dissolve, and the thin spudger on only the top and bottom of the battery to pry it out. I did not use the pick.

    I don't think it's worth applying adhesive when putting the battery back in.

    Dumpy Sheep -

    Absolutely agree. More isopropyl alcohol, a lot of waiting is the key.

    Artem Chepurnyi -

    I would recommend applying a little adhesive to the new battery. I didn't apply any and my battery rattles a bit. I wish I had put a small amount of tape in just to keep it in place.

    Elliot -

    Watch how far you push in. The thin cable for the finger print sensor is at the back I snapped it pushing into the glue.

    Kevin McDonagh -

    Try to not use alcohol. Or at least use just a tiny bit without tilting the phone too much. While it worked for me, it leaked into my primary camera lens. Wide camera is okay fortunately, so I can still take photos for important things, and I hope in the next few days alcohol will evaporate. I also tried to put the iOpener on the camera to increase the pressure and move the alcohol to the edges. It kinda worked but photos are still a no go, too blurred

    Emanuele Luciani -

    Just to update who may read this, alcohol fully evaporated after 1 day. I've been very lucky 😅!

    Emanuele Luciani -

  28. Z6ay1oul4bGqB32N
    Z6ay1oul4bGqB32N
    Nst3AuDPQCO3C3Hd
    • Non riutilizzare la batteria dopo averla rimossa, in quanto è un potenziale pericolo per la tua sicurezza. Sostituiscila con una nuova.

    • Rimuovi la vecchia batteria.

    Step 28 battery replacement guide. This is the battery replacement guide - for bad batteries. So why does it say "Do not reuse the battery if it has been deformed or damaged, as doing so is a potential safety hazard. Replace it with a new battery." This must have been copied from a different guide, that does not involve battery replacement.

    Gregg Lee -

Conclusione

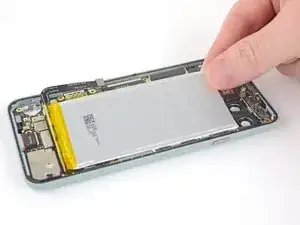
Per prestazioni ottimali calibra la tua nuova batteria appena installata dopo aver completato la procedura.

Confronta la tua parte di ricambio con quella originale: potrebbe essere necessario il trasferimento di alcuni componenti o la rimozione di protezioni adesive dalla nuova parte prima di installarla.

Per rimontare il tuo dispositivo, segui le istruzioni in ordine inverso.

Porta i tuoi rifiuti elettronici a un riciclatore certificato R2 o e-Stewards.

La riparazione non è andata come previsto? Prova delle soluzioni di base ai problemi, oppure rivolgiti alla nostra comunità Risposte per trovare aiuto.

Robert Boyd

Membro da: 01/02/21

26243 Reputazione

25 commenti

While this is an excellent guide, like the others here, I find the ending statement of "To reassemble your device, follow the above steps in reverse order." very much a throw you in the deep end type of scenario. Figuring out how to place the adhesives that come with the kit was very much a trial and error thing. They are not quite intuitive and I was unable to find any answers anywhere. In my first attempt, the two strips for the battery, are a mess. You never get a visual of how or where they are since you remove them by pulling tabs in Step 21.

Here's the deal with them. Two protective layers, a clear oversized layer on one side, and blue cut to the exact shape on the other. Both sides are sticky. Once you figure out the placement, apply the adhesives by peeling the clear protective layer first. Line it up and firmly press. When ready to adhere to the other side, the blue layer is removed by 2 tabs that are part of the layer. Pull 1 tab and carefully peel it away and it should come away in 1 or 2 pieces.

Jesse -

Very frustrating that a year and a half later the tutorial has not been fixed to include the information you've given, or any more information at all.

It's clear that this tutorial is not complete when multiple replies have had issues with vibration, screens, and other functions, along with pieces that got left out upon reassembly. I had better hopes for ifixit since they offer a complete kit and boast they have tutorials. I thought the experience would be higher quality.

lupa -

I followed this guide and successfully changed the battery. Unfortunately, vibration seems to be not working anymore. What could I have done wrong? Did I damage something?

Julian -

To keep you posted: I opened it again and apparently bent the contacts for the vibration motor in one corner of the main PCB. So be also careful here when removing the battery.

Julian -

There is a spacer between the midframe and the top of the phone that will fall out when the midframe is removed. This spacer is pictured at Google Pixel 5 Motherboard Replacement. When reassembling, first replace the midframe. Then, before screwing the midframe back down, use the tweezers to pinch the space together, compressing the foam in the middle, and slide it into place.

soren -

After changing the battery and putting the phone back together the proximity sensor showed that something was in front of it it all the time. Removing the display shows the sensor is still working. Is there any special trick?

Noel Mohring -

Found the issue, lost the proximity sensor grommet.

Noel Mohring -

did you get a new grommet? or find the old one? or is it still not working?

dan -

Followed the guide. First time doing this type of repair. Instructions were great and repair went smoothly using the ifixit battery replacement kit.

Daniel -

I had a good repair and everything works but i forgot the screen connector cover. Is it okay if it isn't in the phone?

Lucas Tye -

It will function just fine, but that screen connector cover is to keep the screen connected in case of any jostling. So if you drop your phone it's less likely to disconnect the screen.

James Tran -

%#*@ I must have made an error, the new battery charges I think (it heats up and green light on wireless charger) but the screen is not displaying anything

Ben F. -

I hear you. I mostly got it working--the screen mostly works, but it displays a vertical white (and some thin red and geen lines) in the center. It seems stable even when I re-seat the connector, so I'm thinking maybe my screen is broke.

Costano -

Good concise guide, and thank you for mentioning the spacer when pulling out the midframe, that would have had me in a panic when it came out along with the midframe.

Chris B. -

Where can I buy a battery for pixel 5 and be sure that it is original?Where can I buy a battery for pixel 5 and be sure that it is original?

Daniele S. -

Make sure all of the isopropyl is dry before reassembling. I was in a hurry, reassembled, and found condensation behind my rear camera glass. I had to take the glass off to let it out since the phone is mostly sealed up. Then you need to get the phone warm to try to evaporate out any moisture that may still be inside, otherwise the camera glass will fog if the phone gets warm. I used 70% isopropyl which might have been the issue.

Elliot -

Did that resolve the issue for you? Ive just done a quick test before sealing the screen and have the same issue

Christopher Bean -

Como hago para adquirir una batería ,pero para enviarme a Ecuador ????

Galo Tomas -

After replacement of the battery followig this guide, I cannot hear the caller when picking up the phone.
When switching to the main speaker it seems to work.

Obviously there is a speaker in the top part of the display, which does not work any more.

Any hints, how to fix that ?

Claus Bartetzko -

I successfully installed the new battery per the instructions in this guide. However, my phone won't turn on. I can get the phone to go to the fast boot menu by holding volume down/power but that's all I can do. None of the options in that menu even do anything when I select them. My phone just turns back off. I reconnected my old battery and my phone turns on just fine. Is it possible I was sent a faulty battery replacement? What other explanation is there that my phone wouldn't boot up with a new battery?

James Brown -

I'm sorry to hear your phone is not running correctly. I'd suggest watching a full tear down and reassembly video on YouTube or a reputable tutorial site and see if you can pinpoint any missed connections or pinched components.

The reddit group r/mobilerepair is also a great resource and may be able to help you diagnose your problem.

lupa -

I am thankful this is not my first battery replacement because this guide is not for beginners. I commented above with specific info, but overall I've never seen a tutorial that gives an ok teardown and then just says to do the reverse.

Nothing about how to prep surfaces prior to putting things back. No warning about pinch points. No instructions on how to apply the new graphite stickers or the adhesive. I had a rubber piece fall out while I was taking the battery out. There was no clear diagram so I had to hunt to find a pic with the piece in it. It did end belonging where I thought it did, but a lot of times people in competent tutorials will point out all of the loose things that may come out. Nothing about how you clean the glass on the camera in case you accidentally got fuzz or smudges on it before you seal your phone back up. Nothing about safe handling of the display (copper sticker has some marks on it, I was hoping it didn't affect my display but not addressed. It seems ok so far). Disappointing.

lupa -

This less a battery replacement guide and more of a battery removal guide as there no steps on how to apply the new battery and screen adhesives to actually complete the replacement. Many things may be end up being overlooked during the reassembly I think warrants at least a couple of tips.

For example, I managed to replace my battery successfully. It charges and the battery life is significantly improved. However, it appears I must have missed something when placing the screen back as the proximity sensor is now permanently triggered. I can see the flashing white dot where it's supposed to be, so it appears to be unobstructed but short of opening the phone again I don't really have a way to troubleshoot this. Does anyone have any ideas?

I may have to get another display adhesive before opening the phone again...

Sent -

I did not open my phone but had this issue too, I would guess its the adhesive with the display having a gap in the top?
For me it will eventually work when I press down on the phones top (slightly left) a bit and it will for a second pretend like nothing is infront of it. Its strange

Philipp Seincher -

On reassembly, I missed the graphite tape installation. Will this be an issue?

Gene Harriman -