Introduzione
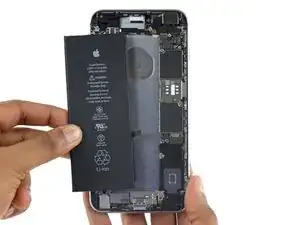
Usa questa guida per ridare vita con una nuova batteria al tuo iPhone 6s Plus. Se la tua batteria è gonfia, prendi le dovute precauzioni.
Questa guida ti spiega come rimuovere il gruppo display, allo scopo di prevenire danni ai cavi del display. Se ti senti sicuro della tua capacità di rimuovere la batteria senza sforzare i cavi del display, puoi saltare i passi relativi alla rimozione del display e andare direttamente ai passi sulla rimozione batteria.
Questa guida ti mostra anche come rimuovere il Taptic Engine. Questa procedura è opzionale ma raccomandata per aiutare a rimuovere l'adesivo della batteria.
Per prestazioni ottimali, calibra la tua batteria appena installata: caricala al 100% e poi mantienila sotto carica per almeno altre due ore. Quindi usa il telefono finché non si spegne a causa della batteria esaurita. Per finire, carica la batteria ininterrottamente fino al 100%.
Puoi anche usare questa guida per sostituire la staffa del connettore della batteria.
-
-
Spegni il tuo iPhone prima di iniziare lo smontaggio.
-
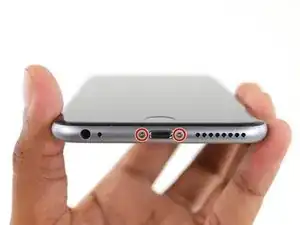
Rimuovi le due viti Pentalobe P2 da 3,4 mm sul lato inferiore dell'iPhone, vicino al connettore Lightning.
-
-
-
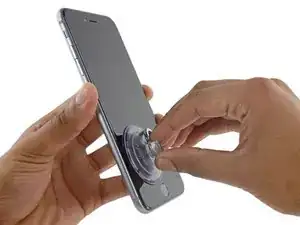
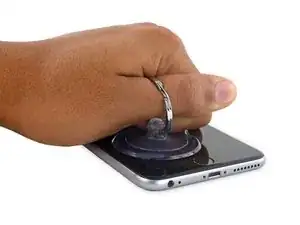
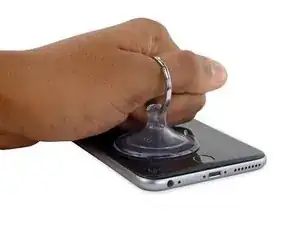
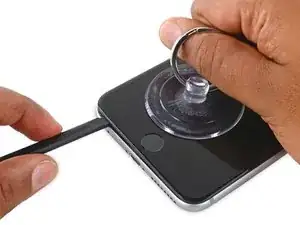
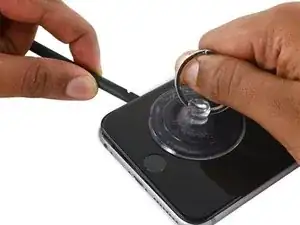
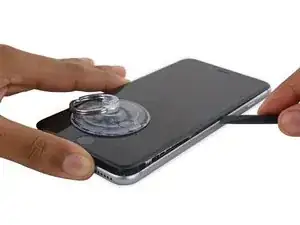
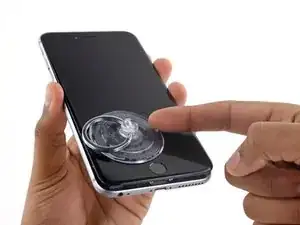
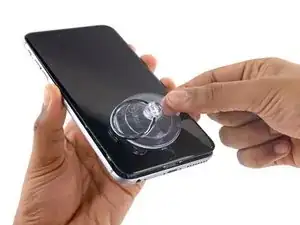
Tira la ventosa con una pressione forte e costante per creare una piccola fessura tra il pannello anteriore e il case posteriore.
-
-
-
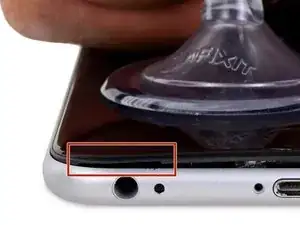
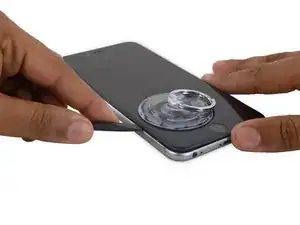
Il posto più sicuro da dove cominciare a far leva è l'intaglio nel pannello anteriore sopra il jack cuffie.
-
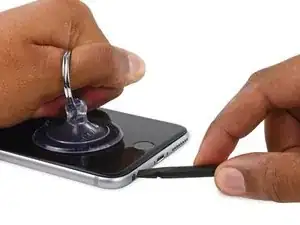
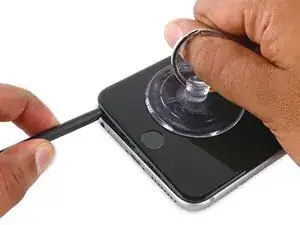
Mentre continui a tenere tirata la ventosa, inserisci la punta piatta di uno spudger nella fessura tra lo schermo e il case posteriore, direttamente al di sopra del jack cuffie.
-
-
-
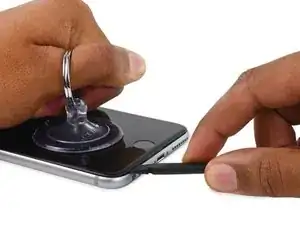
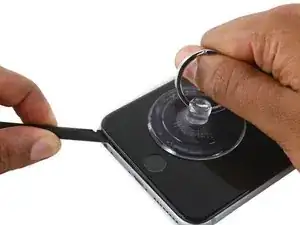
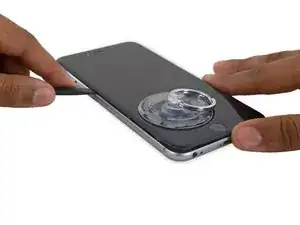
Fai ruotare lo spudger per allargare l'apertura tra il pannello frontale e il case posteriore.
-
-
-
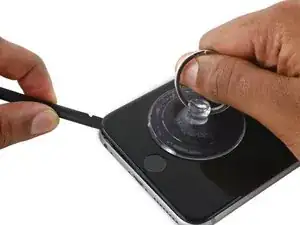
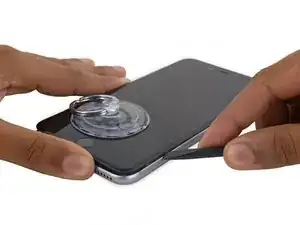
Mentre continui a tirare saldamente la ventosa, fai scorrere l'estremità dello spudger sotto il lato inferiore sinistro del display.
-
-
-
Fai scorrere lo spudger lungo il lato sinistro del telefono, tra il pannello frontale e il case posteriore.
-
-
-
Inserisci la punta piatta di uno spudger sotto il lato destro del telefono.
-
Fai scorrere lo spudger lungo il lato destro.
-
-
-
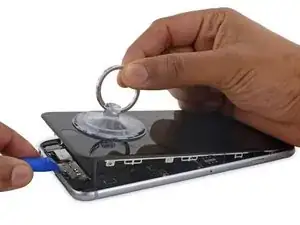
Usa una leva di apertura in plastica per tenere giù il case posteriore mentre tiri la ventosa per aprire il telefono.
-
-
-
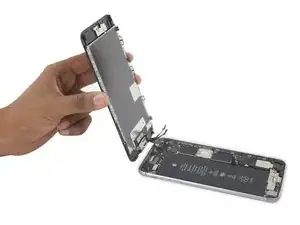
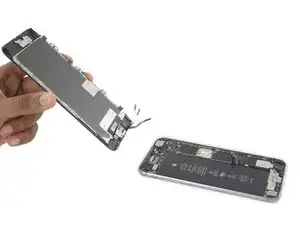
Afferra con delicatezza il gruppo display e sollevalo verso l'alto per aprire il telefono, usando le clip nella parte alta del pannello anteriore come una cerniera.
-
Apri il display a un angolo di circa 90° e appoggialo contro qualche cosa per tenerlo sollevato mentre tu lavori sul telefono.
-
Usa un elastico per tenere il display in una posizione sicura mentre lavori. In questo modo eviterai di forzare i cavi del display.
-
-
-
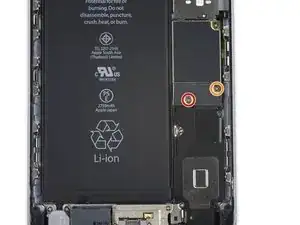
Rimuovi le due viti Phillips che fissano la staffa del connettore della batteria alla scheda logica:
-
Una vite da 2,9 mm
-
Una vite da 2,3 mm
-
-
-
Usa uno spudger o un'unghia pulita per scollegare, sollevandolo verso l'alto, il connettore della batteria dalla scheda logica.
-
-
-
Spingi indietro il connettore della batteria per evitare il rischio di contatto e quindi di alimentare l'iPhone mentre ci lavori.
-
-
-
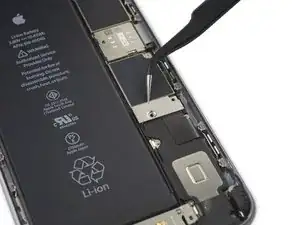
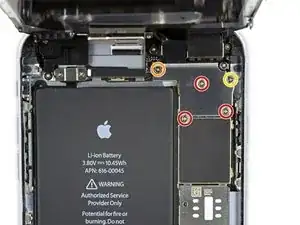
Rimuovi le seguenti viti a croce Phillips:
-
Tre viti da 1,3 mm
-
Una vite da 1,6 mm
-
Una vite da 3,0 mm
-
-
-
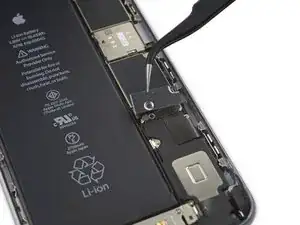
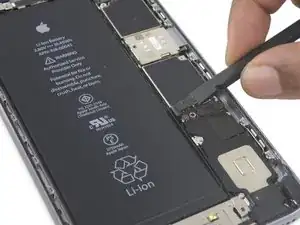
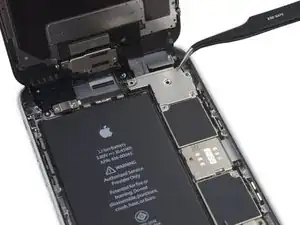
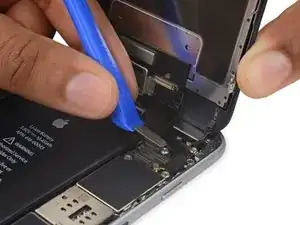
Usa uno strumento di apertura in plastica per staccare il connettore del cavo della fotocamera anteriore e del sensore.
-
-
-
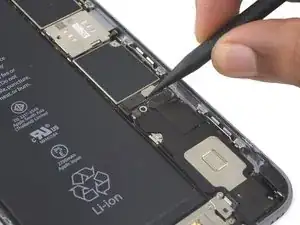
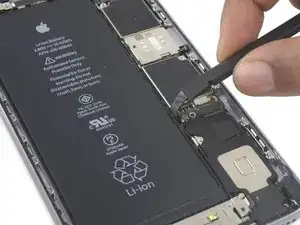
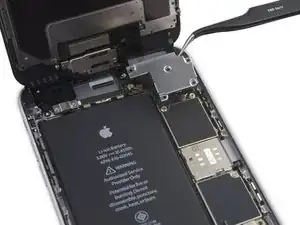
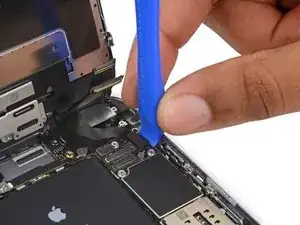
Usa uno strumento di apertura in plastica per disconnettere il cavo del digitizer facendo leva verso l'alto dal suo zoccolo sulla scheda logica.
-
-
-
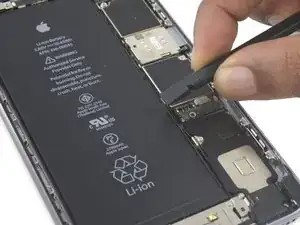
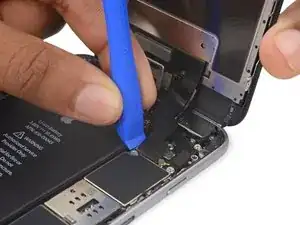
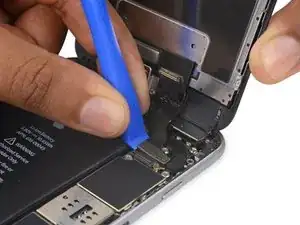
Scollega il cavo del tasto home/sensore delle impronte facendo leva verso l'alto dal suo zoccolo sulla scheda logica.
-
-
-
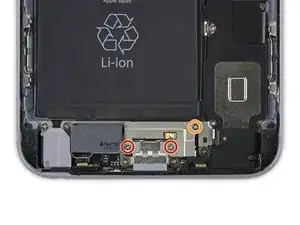
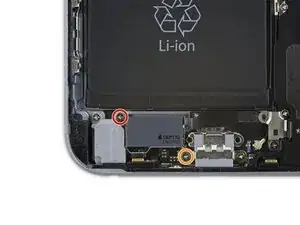
Rimuovi le seguenti viti a croce Phillips sopra la staffa del connettore del Taptic Engine:
-
Due viti da 3,5 mm
-
Una vite da 2,7 mm
-
-
-
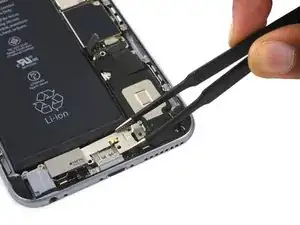
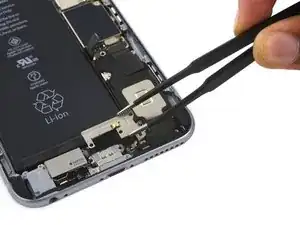
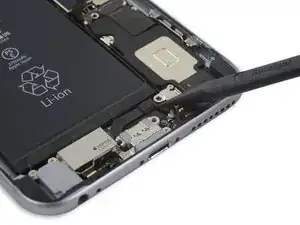
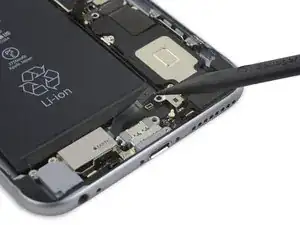
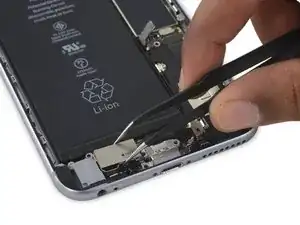
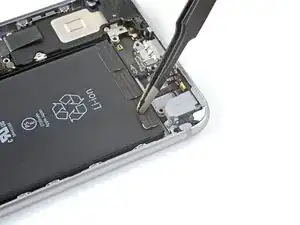
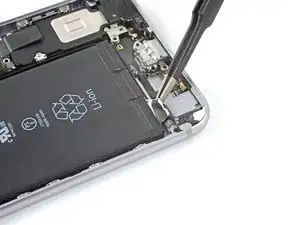
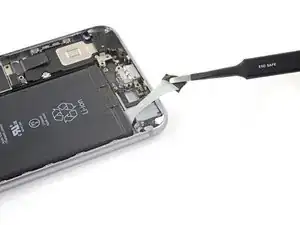
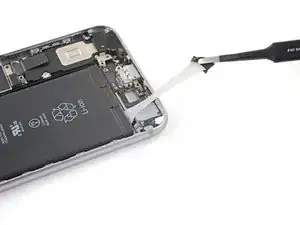
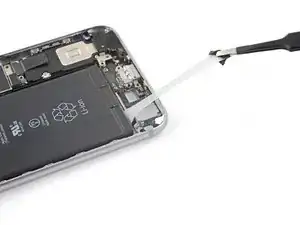
Stacca il cavo flex del Taptic Engine dall'alloggiamento del connettore flex del cavo Lightning.
-
-
-
Usa delle pinzette, o le dita, per rimuovere la linguetta nera su una delle strisce adesive.
-
-
-
Tira la striscia lentamente e con forza costante a un angolo ridotto. Dalle abbastanza tempo per estendersi e scollarsi da sotto alla batteria.
-
Ripeti il processo per le strisce adesive rimanenti.
-
-
-
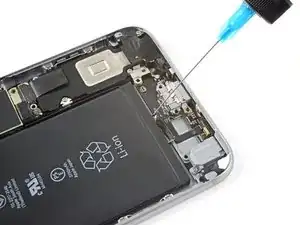
Se stai ancora avendo problemi a rimuovere la batteria, applica qualche goccia di alcool isopropilico ad alta concentrazione (90% o superiore) sotto il bordo della batteria, nell'area della striscia adesiva rotta.
-
Inclina il telefono così che l'alcool possa fluire verso la striscia adesiva.
-
Aspetta uno o due minuti per lasciare che l'alcool isopropilico indebolisca l'adesivo.
-
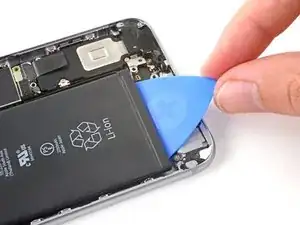
Usa un plettro di apertura o la parte piatta di uno spudger per sollevare lentamente la batteria.
-
-
-
Rimuovi la batteria.
-
Incolla la batteria, scollegala dalla scheda e procedi con il riassemblaggio.
-


Confronta il pezzo sostituito con quello originale, potresti dover trasferire componenti rimasti sulla vecchia parte o rimuovere adesivi sul retro del componente nuovo prima di installarlo.
Per riassemblare il tuo dispositivo, segui i passi descritti in ordine inverso.
Porta i tuoi rifiuti elettronici a un riciclatore certificato R2 o e-Stewards.
La riparazione non è andata secondo i piani? Vai sulla nostra comunità Risposte per trovare aiuto nella risoluzione dei problemi.

92 commenti
Most common on IPhone 6s/6 repair jobs is this battery replacement. Great tutorial!
so few comments on this one?!
has any/many done this without the adhesive strips.. and was it ok?
sarah -
If you mean the battery adhesive strips, sure—you can put a piece of double-sided tape down the back of the battery, and it probably won't move anywhere. There's not much room for the battery to move anyway. Use the adhesive strips if you want to do it right—but, if you're in a bind and you just need the phone working, you can skip the strips. And you can always open the phone back up and add the adhesive strips later.
If you mean the adhesive gasket around the display, the answer is pretty much the same—It's better to have it, but it doesn't hurt anything to put the phone back together without it.
by far the easiest repair I've done. only 3 screws! really dont think the cables need to be disconneted. i just used a shoe lace to gently hold up the screen. sticky strips came out fine. happy. thanks.
sarah -
Make sure you use the correct screw driver tip to remove these screws, which for the iPhone 6s Plus is the P2, otherwise you may strip the tip of the screw making it 10 times harder to remove. If once the screw is lose, it will not come off, use a magnet to remove it.
Miguel Perez -
If I do it by myself, will it damage the water resistant strip?
I know iphone 7 have it ,but I am not sure 6s plus have it.
Ganqian Zhu -
iPhone 6s has an adhesive gasket under the display, similar to the iPhone 7—however, it doesn’t add much in the way of waterproofing since the 6s has non-sealed openings in other parts of the phone. Water resistance on the 6s is primarily internal (seals around the logic board connectors, etc.). It may still be worthwhile to replace the adhesive on the 6s in order to help keep the display firmly seated so it doesn’t move/wobble at all under pressure, but the phone will continue to work fine whether you replace the adhesive or not.
Jeff Suovanen -
Salve nella procedura iniziale di smontaggio display con la ventosa non è menzionato il fatto di scaldare i lati del display per “ammorbidire” la striscia che incolla il display alla scocca.
Non è necessaria la cosa o è consigliabile ?
grazie
Hello, in the initial disassembling procedure with the suction cup, it is not mentioned how to heat the sides of the display to "soften" the strip that glues the display to the body.
Is not the thing necessary or is it advisable?
thank you
Daniele -
You’ve probably received your answer by now but for future enquirers, it does help the process of taking the screen off if heat is applied to the screen. If you have a hair Dryer use that on a low setting to heat the edges of the screen until it’s almost too hot to touch then slip very thin metal spudger around the edge to cut the adhesive. The carefully lift the screen with the help of the spudger and continue with your repair
Cheers Wayne
Wayne Lyell -
How do I know that the Battery has ZERO Charging Cycles on it when it arrives ? Is there a (downside) to Higher Capacity batteries ? It is INCREDIBLY DIFFICULT to maintain a “Zero Chinese Products Lifestyle”, so how do I know that I’m not getting a deficient Chinese battery, potentially a refurb. battery ?
integritybuilders -
When your repair is complete, you can use coconutBattery to check your new battery stats and cycle count. (A properly tested battery may already have a charge cycle or two on it.) Avoid higher capacity batteries on iPhones—they’re generally either gimmicks, unsafe, or both. As far as the quality of the part, that comes down to how much you trust your supplier and whether they guarantee the product.
Jeff Suovanen -
So I need to empty the battery to zero percent?
johnpatrickanat -
Below 25%, exactly as stated in the instructions. There’s no benefit to draining it further than that, and in fact you’ll slightly shorten the service life of the battery by draining it all the way to zero. Follow the instructions exactly as written—if you go off-script, you’re a lot more likely to break something.
Jeff Suovanen -
So my screen shattered completely and the screen first had colored lines on tge while right side then it went out completely. If i get an lcd and digitizer replacement I'd that oing to fix it
shellietheleo -
I would initially recommend a well-lit, comfortable area and placing the screws on a white piece of paper with the screw sizes written down (apparently there are magnetic mats, also). Also, I found placing the phone on a paper towel is good so that if a screw is dropped, it will lessen the likelihood of bouncing away.
Lou Fazio -
I recommend that, before you even lift a screwdriver or plug in the hair dryer, get a piece of paper and a pencil. As you unscrew and remove the parts, write the size and/or number for that step and put them by their label. I also used a microscope to identify the screw heads (I'm 75 and my vision is not what it used to be). Laying them out in order, I just went backwards when putting them all back in. I used an anti-static cleaning cloth instead of paper, but I should think they both will work.
N.B.: my kit had a nice pretty blue plastic sheet with a black outline on it. It was only when I put the whole phone back together and was packing up the supplies and tools that I realized it was a replacement gummi seal. A LABEL WOULD BE VERY USEFUL HERE!
I am a retired engineer, and aside from the size of the bits and bobs, it was a piece of cake! Thanks...you saved me $75!
P. Roberts -