Introduzione
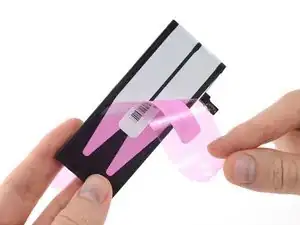
Usa questa guida per applicare correttamente le strisce adesive di ricambio della batteria in molti iPhone recenti. Ogni volta che rimuovi la batteria, queste strisce devono essere sostituite. Le strisce possono essere facilmente danneggiate se non applicate correttamente, quindi è consigliabile disporre di un set di strisce di ricambio a portata di mano se si segue questa guida per la prima volta.
I modelli di iPhone versione "Plus" usano tre strisce invece di due, ma la procedura è la stessa.
Prima di iniziare, dovresti aver rimosso la batteria seguendo una guida simile a quella riportata di seguito. Nota: i modelli iPhone 5 e precedenti non usano strisce adesive.
- sostituzione batteria iPhone 6
- sostituzione batteria iPhone 6 Plus
- sostituzione batteria iPhone 6s
- sostituzione batteria iPhone 6s Plus
- sostituzione batteria iPhone 7
- sostituzione batteria iPhone 7 Plus
Per sostituire le strisce adesive della batteria in un modello diverso di iPhone, utilizza una delle seguenti guide:
-
-
Se la nuova batteria ha già le strisce adesive attaccate, salta al Passo 7.
-
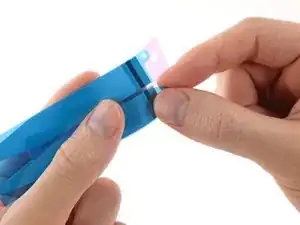
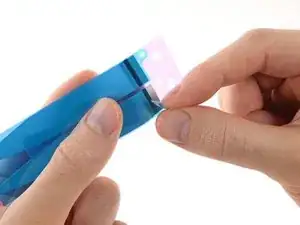
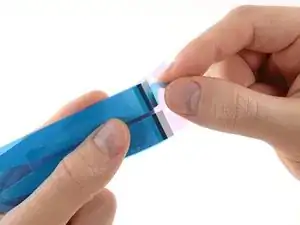
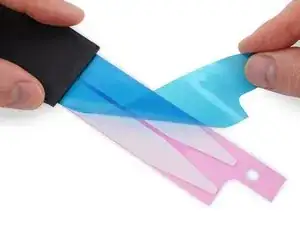
Altrimenti: se presente, rimuovere la pellicola o le pellicole di piccole dimensioni in plastica che coprono le estremità piatte delle strisce adesive.
-
-
-
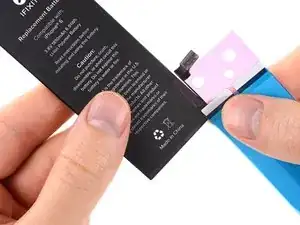
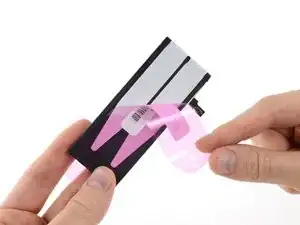
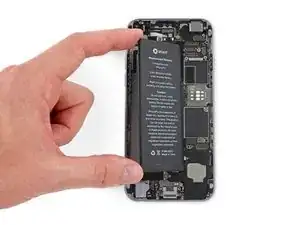
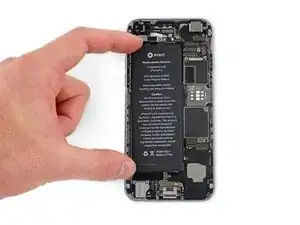
Con la batteria rivolta verso l'alto (connettore della batteria sulla destra), allineare attentamente la parte esposta delle strisce adesive lungo il bordo inferiore della parte anteriore della batteria e premerle delicatamente in posizione.
-
-
-
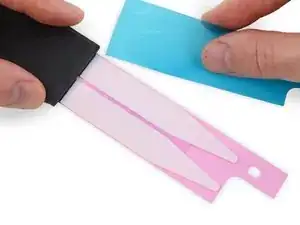
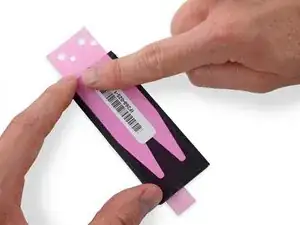
Colloca la batteria rivolta verso il basso su una superficie piana.
-
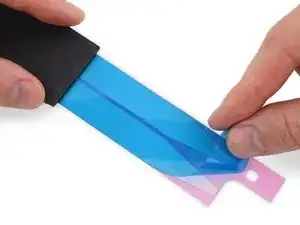
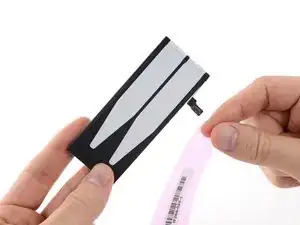
Partendo dall'estremità appuntita delle strisce adesive, stacca la grande pellicola blu che copre le strisce stesse.
-
Se ti succede questo e hai preso le strisce da iFixit, contattaci qui e ti invieremo la sostituzione in un battibaleno.
-
Nel frattempo, puoi temporaneamente rimontare il tuo iPhone con un po 'di nastro biadesivo per tenere ferma la batteria.
-
-
-
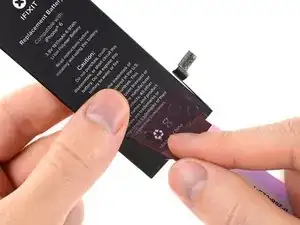
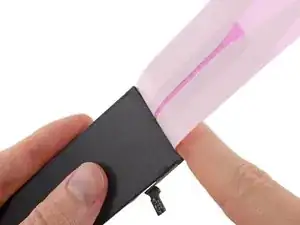
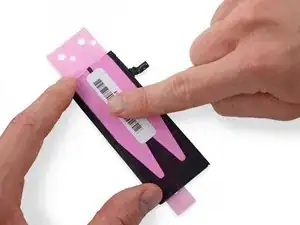
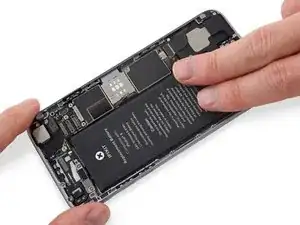
Usando la punta del dito, fai scorrere delicatamente le strisce adesive sul bordo inferiore della batteria, verso la parte posteriore.
-
-
-
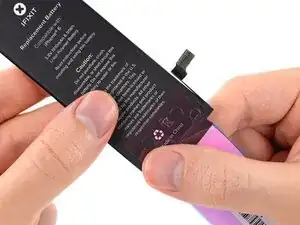
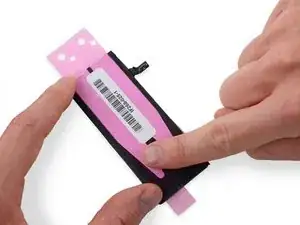
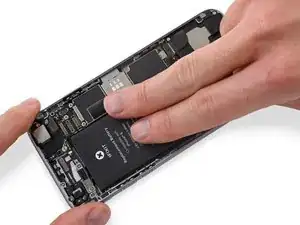
Usa le dita o un panno per premere saldamente le strisce in posizione sul retro della batteria.
-
-
-
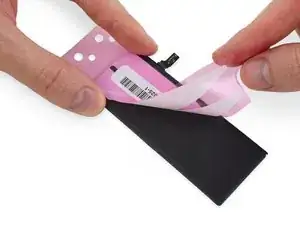
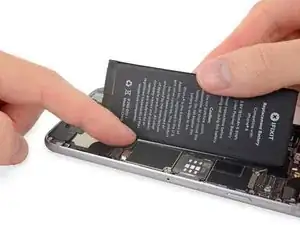
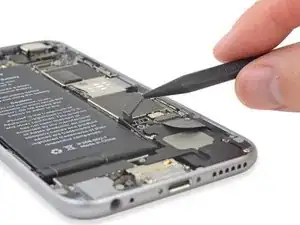
Senza lasciar cadere la batteria, abbassa il connettore nell'iPhone e allinealo alla presa sulla scheda logica.
-
Collega la batteria.
-
-
-
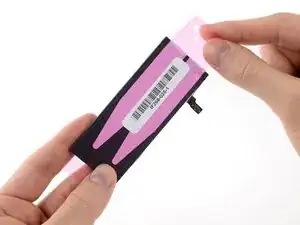
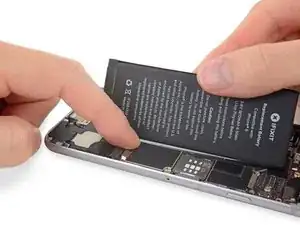
Quando la batteria è posizionata correttamente, inserisicila nell'iPhone e premila saldamente in posizione, consentendo alle strisce adesive di aderire al case posteriore.
-


Per riassemblare il tuo iPhone, torna alla guida che hai usato per rimuovere la batteria e segui i passaggi in ordine inverso.
Ricorda di portare la tua vecchia batteria a un riciclatore certificato R2 o e-Stewards.

68 commenti
I had to read these directions thoroughly three times before proceeding as I didn't want to screw it up on the adhesive. Went slow and it worked just fine
I would say jus watch out as you go from step 4 to step 5 - the white adhesive can become slightly detached from the backing as you push it onto the edge of the battery and then around to the back side. Extreme care here! Very good guide and equipment. Galaxy class!
All was good, aside from the adhesive bunched up when I removed the blue backing and it started to separate from the pink backing. I had to just gingerly make sure it was all straight and kept steady like a heart surgeon until I had it smoothed down as best as possible. It all went well, but I was worried I'd end up with a big stuck ball of white adhesive in the middle of the battery plate, making it all uneven and stupid looking.
It’s 2018 but still providing this same type of horrible adhesive strips that won’t let go of the blue backing like Jerad mentioned.
Guess I don’t have your skills guys and haven’t tried the one in the picture above but this really isn’t working and I don’t think changing the instructions will help removing the blue backing. I achieved nothing with mine… The rest is perfect.
Jou -
I just had the same experience. The blue backing would not separate from the adhesive.
I tried a new tactic: Remove the ping backing and apply to the case, and then remove the blue backing. No go. It stuck to the blue backing more than it did to the case.
I should have just left the remains of the old strips in place. Instead, I just installed the battery without the adhesive. I hope that’s good enough.
bester -
Effectivement j’ai connu la même expérience, le support bleu n’a pas voulu s’en détacher j’ai donc mis un adhésif double face sur deux petit points afin de maintenir la batterie et évite qu’elle bouge. C’est une étape qui m’a bien pourri le cession d’en remplacement de la batterie de l’iphone 5S. Je pensais avoir des difficultés sur autre chose mais certainement pas sur des adhésifs de m……e!
bekman -
I had the exact same problem, the adhesive wouldn’t release from the blue backing. I spent more time trying to get the adhesive off than rest of the steps combined. I ended up utilizing 3M double sided tape, which worked fine. There is obviously a problem with the adhesive and IFIXIT should correct the issue.
Dan Russow -
I’m in the same boat. Why iFixit uses this blue film the adhesive tends to stick to is beyond me. It’s impossible to remove, I tried the various techniques like highlighted above to no avail.
Florent Pillet -
To reiterate Kadan’s comments further down: If you run into issues with your adhesive strips not coming off the backing properly, or accidentally getting ruined in the process, please reach out to the Support team via help.ifixit.com. There are far too many guides to monitor to proactively seek customers who are encountering issues, so it’s best that you reach out to us so that we can assist you in a quick fashion. Thanks again for your comments, and we look forward to helping! —I think it comes down to a few defective strips getting into the supply chain and unfortunately there’s no way to test them before we ship them out. It’s a very small number as most customers are not having this issue, but I realize that’s not much consolation if you’re one of the few. Reach out to us and we’ll get it sorted, with apologies for the trouble. In the meantime, a little double-sided tape should hold onto your battery just fine until the replacement strips arrive.
Jeff Suovanen -
I think that there is a better way to align the strips. I suggest NOT removing ANY of the protective film(s) from the adhesives at first. First, lay the strips on the side of the battery that will adhere to the case, WITH THE PROTECTIVE STRIPS STILL ON. Make sure the right side of the strips is facing the battery, and move the strips around until they are correctly aligned right to left and up to down, and until the little tabs that go around the other side of the battery are the right length. At this point, use clear tape to hold the strips in place on the battery. NOW, once the strips are aligned, remove the small protective plastic strips as described in Step 1, and adhere them to the battery. Then, remove the clear tape you put on the strips to hold them in place on the battery, and continue with the tutorial. If I remove the small protective plastic strips first and try to put the small tabs on one side so that the long strips are aligned on the other side, I just can’t get it right.
Tom -
I found the instructions at https://www.youtube.com/watch?v=CrTDzkF6... to be the best for putting these strips back on. Worked perfectly for me.
alanderson -
I had a little trouble with these tabs, but found coming at them from the other end was better. There was a little corner that hung over the edge that I was able to grab onto, and then could pull counter to the strip. I didn’t have any other trouble the rest of the way!
Kevin Rollins -
Looks like iFixit has fixed this issue by shipping the replacement battery with strips already attached. In this case, skip to step 7.
lkollar -
I would start with a preliminary test fit of the battery to be familiar with how the battery needs to exactly be placed before applying the adhesive strips.
Lou Fazio -