
Introduzione
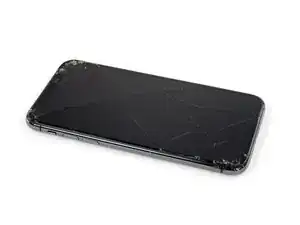
Se lo schermo del tuo iPhone 11 è rotto, non risponde al tocco o non riproduce immagini quando il telefono è acceso, usa questa guida per rimettere in funzione il tuo iPhone installando un nuovo schermo, ovvero il gruppo display.
***Se la faccia posteriore del tuo nuovo schermo comprende già una
lamina metallica di schermatura dell'LCD, segui questa guida più breve.*** Mentre, se questa piastra è assente, continua a leggere: questa guida ti mostra come sostituire lo schermo mantenendo la tua vecchia piastra di schermatura dell'LCD.
Il gruppo combinato altoparlante voce + sensori frontali collegato alla retro dello schermo è accoppiato in fabbrica al tuo esemplare di iPhone, quindi devi seguire le istruzioni sottostanti per poter trasferire il gruppo stesso dal vecchio display al nuovo. Il gruppo contiene l'illuminatore flood, che è parte integrante della funzionalità di sicurezza biometrica Face ID. Se viene danneggiato o sostituito, il Face ID smetterà di funzionare, quindi poni molta attenzione a non danneggiare alcun componente del gruppo nel corso di questa procedura. In caso di danni, soltanto tecnici "autorizzati" Apple potranno ripristinare la funzionalità Face ID.
Nota: la funzionalità True Tone viene disabilitata dopo la sostituzione dello schermo, perfino se è stato utilizzato uno schermo Apple originale.
-
-
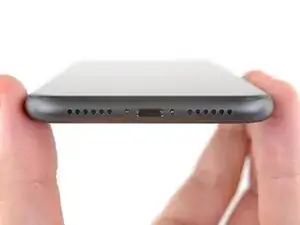
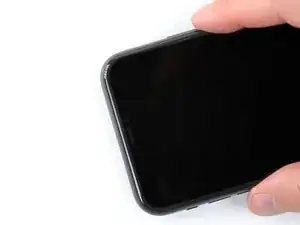
Spegni il tuo iPhone prima di cominciare a smontarlo.
-
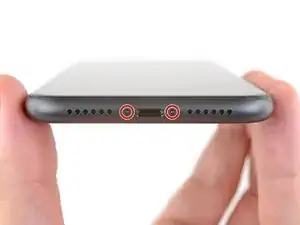
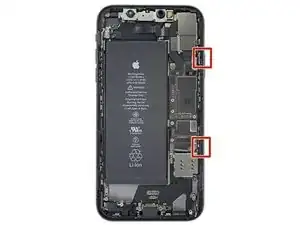
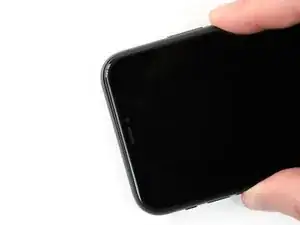
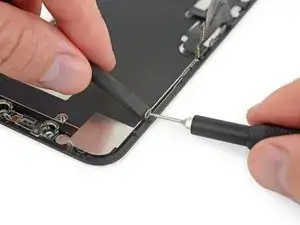
Rimuovi le due viti pentalobe da 6,7 mm nella parte inferiore del tuo iPhone.
-
-
-
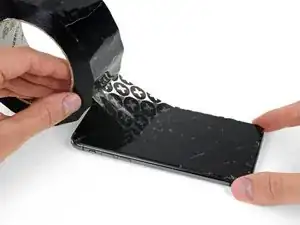
Se il tuo iPhone ha lo schermo in pezzi, applicando del nastro adesivo sulla superficie eviterai ulteriori rotture e la possibilità di farti male nel corso della riparazione.
-
Disponi strisce sovrapposte di nastro da pacchi sul display dell'iPhone fino a ricoprire tutta la superficie.
-
Se la rottura del vetro rende difficile far aderire una ventosa come indicato nei prossimi passi, prova a ripiegare un pezzo di nastro adesivo molto tenace (come il nastro americano) attorno a una maniglia e usalo al posto della ventosa per sollevare il display.
-
-
-
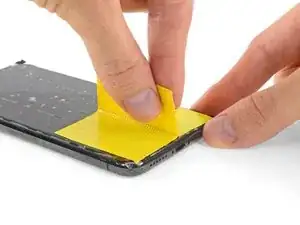
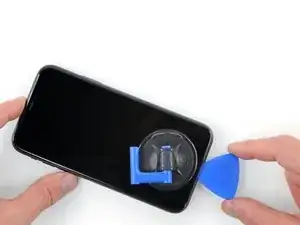
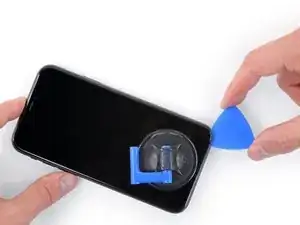
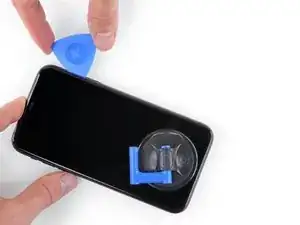
Appoggia strisce sovrapposte di nastro adesivo trasparente sullo schermo dell'iPhone fino a coprire l'intera superficie.
-
Se non riesci a far aderire la ventosa nei prossimi passaggi, piega un pezzo di nastro resistente (come il nastro adesivo americano) come una maniglia e solleva lo schermo con quello.
-
-
-
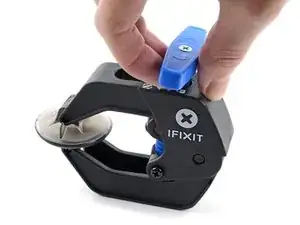
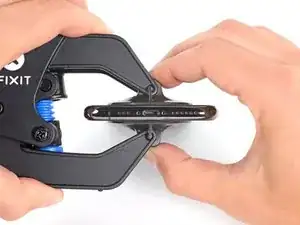
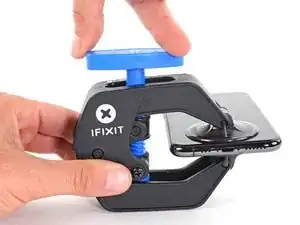
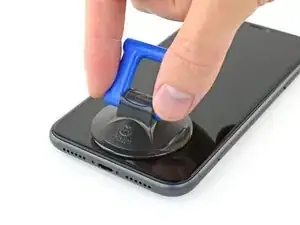
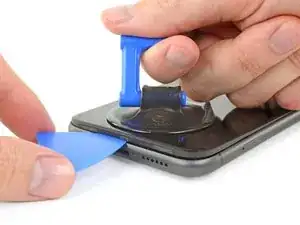
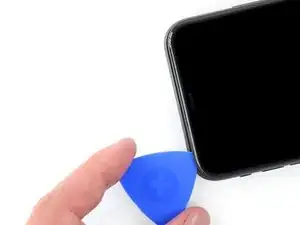
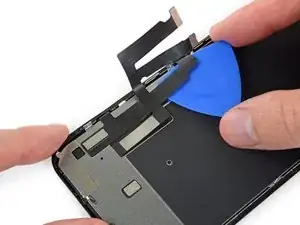
Tira indietro la maniglia blu per sbloccare i bracci dell'Anti-Clamp.
-
Fai scorrere i bracci sul bordo sinistro o destro del tuo iPhone.
-
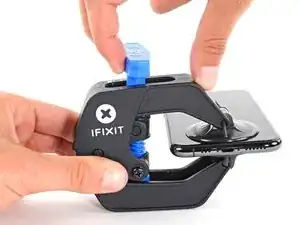
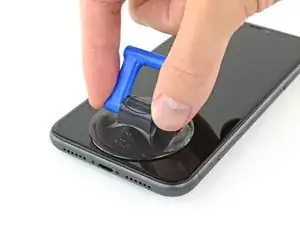
Posiziona le ventose vicino al bordo inferiore dell'iPhone, una in davanti e una dietro.
-
Premi le ventose insieme per applicare l'aspirazione all'area desiderata.
-
-
-
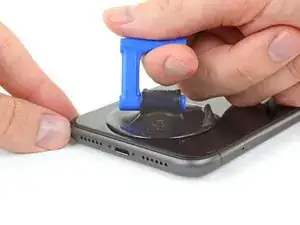
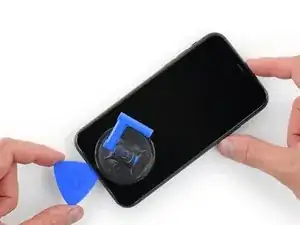
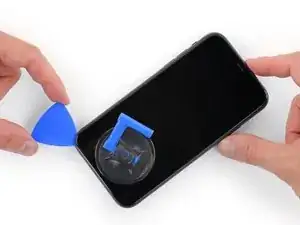
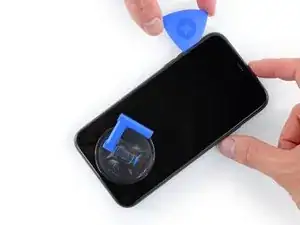
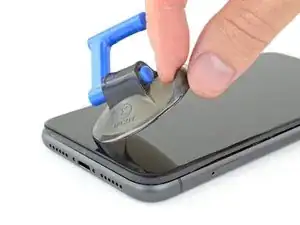
Tira in avanti la maniglia blu per bloccare i bracci.
-
Ruota la maniglia in senso orario di 360 gradi o fino a quando le ventose iniziano ad allungarsi.
-
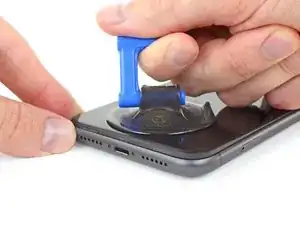
Assicurati che le ventose rimangano allineate l'una con l'altra. Se iniziano a scivolare fuori allineamento, allenta leggermente le ventose e riallinea i bracci.
-
-
-
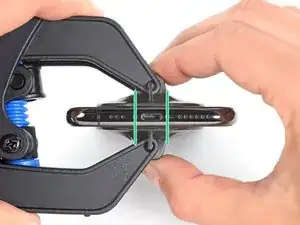
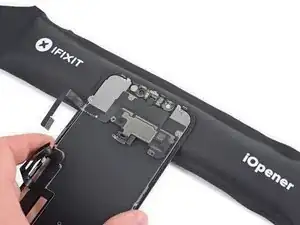
Scalda un iOpener e fallo passare attraverso i bracci dell'Anti-Clamp.
-
Piega l'iOpener in modo che poggi sul bordo inferiore dell'iPhone.
-
Attendi un minuto per dare all'adesivo la possibilità di staccarsi e presentare uno spazio di apertura.
-
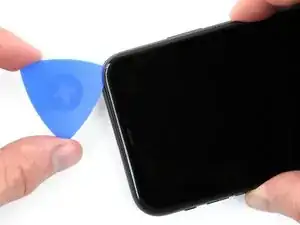
Inserisci un plettro di apertura nella fessura sotto lo schermo e la cornice di plastica, non lo schermo stesso.
-
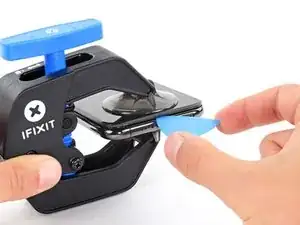
Salta i tre passaggi successivi.
-
-
-
Usa un asciugacapelli, una pistola termica oppure prepara un iOpener e applicalo per circa un minuto al bordo inferiore dell'iPhone.
-
-
-
Se utilizzi un'unica ventosa, applicala sul bordo inferiore del telefono, evitando la parte curva del vetro.
-
-
-
Tira la ventosa con una pressione decisa e costante per creare un leggero spazio tra il pannello anteriore e il case posteriore.
-
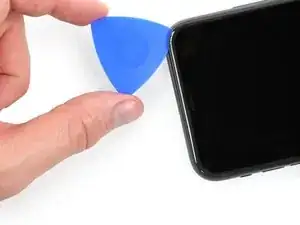
Inserisci un plettro di apertura nella fessura sotto lo schermo e la cornice di plastica, non lo schermo stesso.
-
-
-
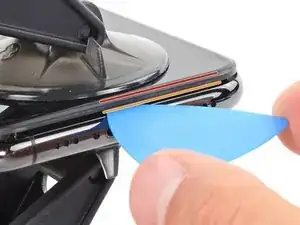
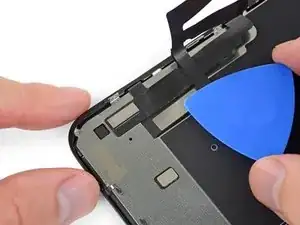
Fai scorrere il plettro di apertura attorno all'angolo in basso a sinistra e lungo il bordo sinistro dell'iPhone, tagliando l'adesivo che tiene in posizione il display.
-
-
-
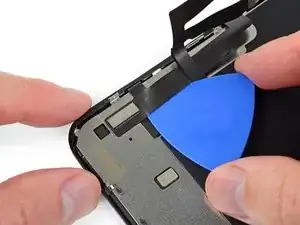
Reinserisci il plettro sul bordo inferiore dell'iPhone e fallo scorrere lungo il lato destro per continuare a separare l'adesivo.
-
-
-
Abbassa leggermente il bordo destro del display (in direzione della porta Lightning).
-
Inserisci il plettro nell'angolo in alto a destra del telefono.
-
-
-
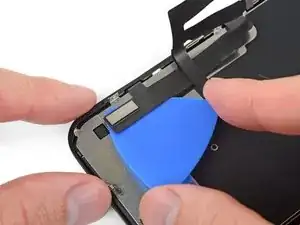
Continua a tirare lo schermo verso il basso (verso la porta Lightning) in modo da creare una fessura abbastanza grande per inserire il plettro di apertura.
-
Fai scorrere il plettro fino all'angolo superiore sinistro e taglia tutto l'adesivo rimanente dello schermo.
-
-
-
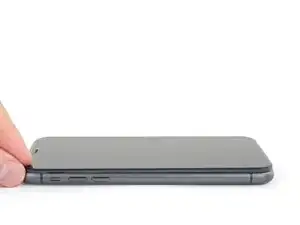
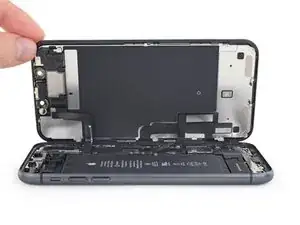
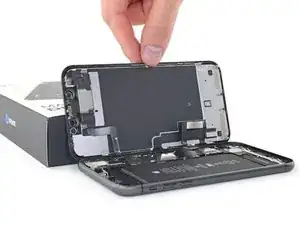
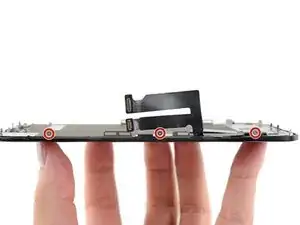
Apri l'iPhone sollevando il display dal lato sinistro, come la copertina posteriore di un libro.
-
Appoggia il display contro qualcosa di robusto.
-
-
-
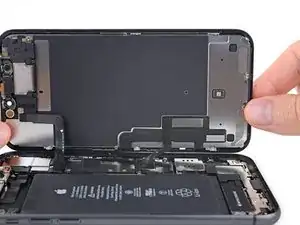
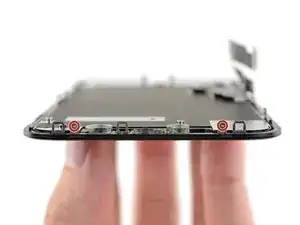
Per accedere alle viti nel passo successivo, gira lo schermo sollevandolo delicatamente dal suo bordo inferiore.
-
-
-
Usa un cacciavite Y000 per rimuovere le tre viti, lunghe 1,1 mm, che fissano la staffa sopra il connettore della batteria.
-
-
-
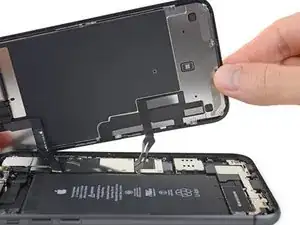
Usa la punta di uno spudger o un'unghia pulita per staccare il connettore della batteria sollevandolo dal suo zoccolo sulla scheda logica.
-
Piega lievemente il connettore per distanziarlo dalla scheda logica ed evitare che questo possa fare contatto con lo zoccolo.
-
-
-
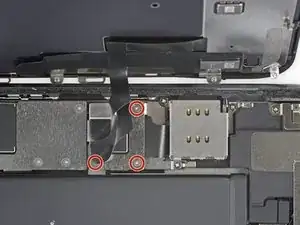
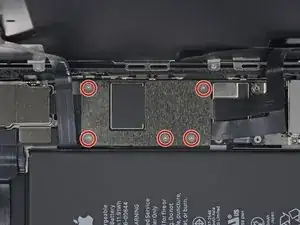
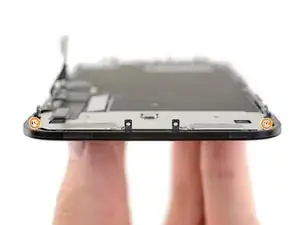
Usa un cacciavite Y000 per rimuovere le cinque viti da 1,1 mm che fissano la staffa della cover della scheda logica.
-
-
-
Usa uno spudger o un'unghia per staccare il connettore del cavo del pannello LCD.
-
Scollega il connettore del digitizer disposto accanto.
-
-
-
Usa la punta di uno spudger o un'unghia per scollegare il connettore del gruppo sensori del pannello frontale.
-
-
-
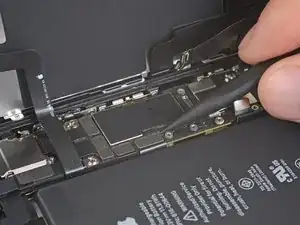
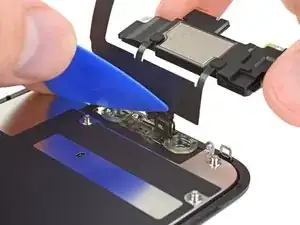
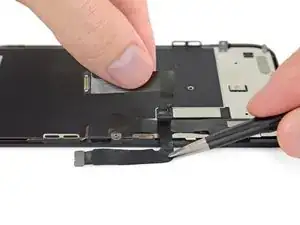
Rimuovi le quattro viti che fissano il gruppo altoparlante/sensori:
-
Tre viti a croce da 1,6 mm
-
Una vite tri-wing Y000 da 1,3 mm
-
-
-
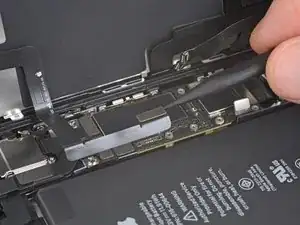
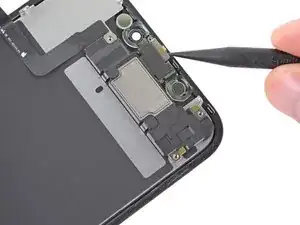
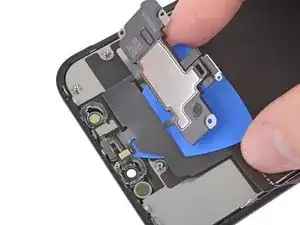
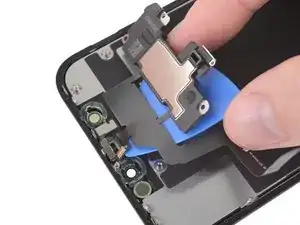
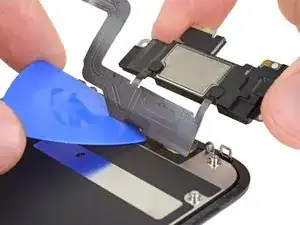
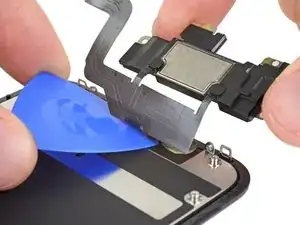
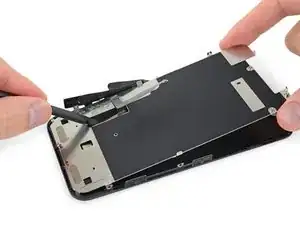
Usa la punta di uno spudger per far leva con delicatezza sul bordo superiore dell'altoparlante.
-
Ribalta il gruppo altoparlante, in direzione opposta al bordo superiore dello schermo.
-
-
-
Usa un asciugacapelli, una pistola termica oppure prepara un iOpener e applicalo sulla parte frontale e superiore del display per 1-2 minuti in modo da ammorbidire l'adesivo che fissa i sensori.
-
-
-
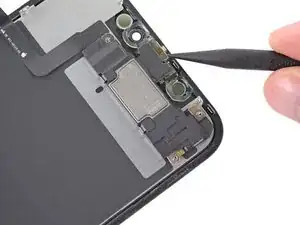
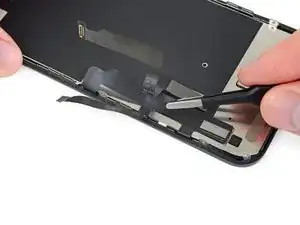
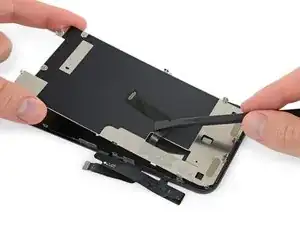
Fai scorrere con cautela il bordo del tuo plettro di apertura al di sotto del cavo flessibile sotto il microfono.
-
Torci delicatamente il plettro per separare il microfono, stando attento a non forzare o danneggiare il cavo flessibile.
-
Se necessario, usa la punta di uno spudger per finire di separare il microfono dal suo incavo nel pannello frontale.
-
-
-
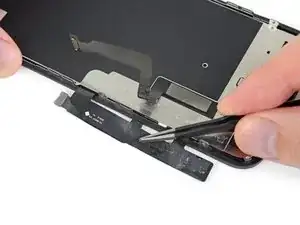
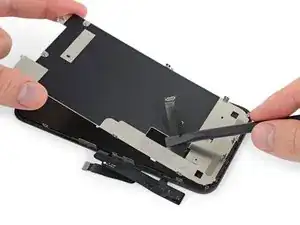
Usa delle pinzette per far scorrere la piccola staffa verso l'alto allontanandola dal sensore luce ambiente.
-
-
-
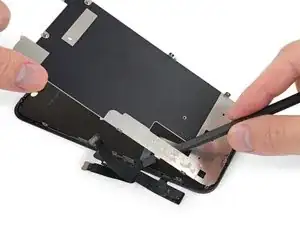
Usa delle pinzette per far oscillare il sensore luce ambiente e quindi per sollevarlo dal suo incavo nello schermo.
-
-
-
Con un'azione da sinistra verso destra, fai scorrere un plettro di apertura al di là del cavo flessibile e al di sotto del modulo sensore di prossimità + illuminatore flood.
-
Fai oscillare delicatamente e tira verso l'alto per separare il modulo dal suo incavo nel pannello frontale.
-
-
-
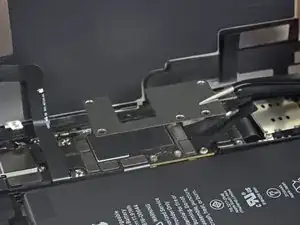
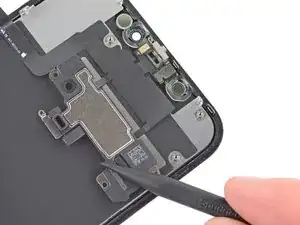
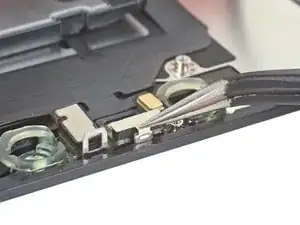
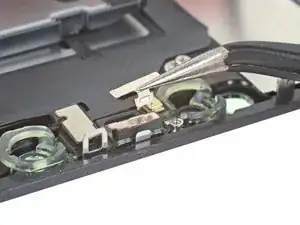
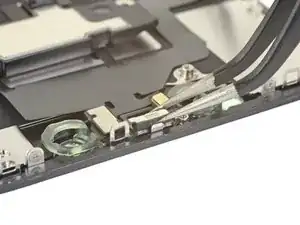
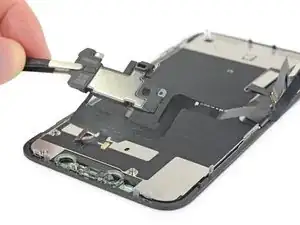
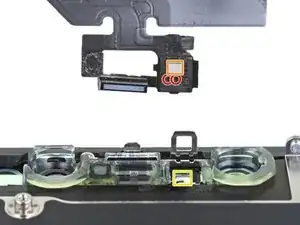
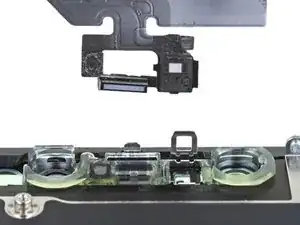
Rimuovi il gruppo altoparlante voce e sensori frontali.
-
Sensore di prossimità
-
Illuminatore flood
-
Il modulo deve essere posizionato in modo che questi componenti siano liberi da qualunque adesivo.
-
-
-
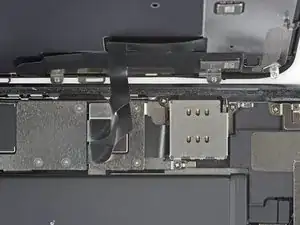
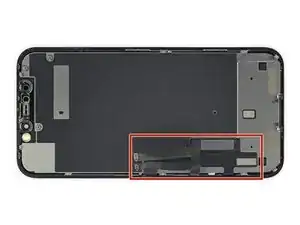
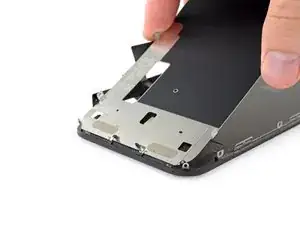
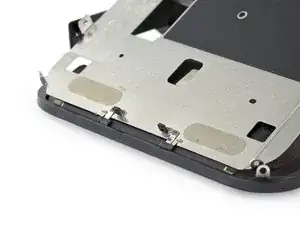
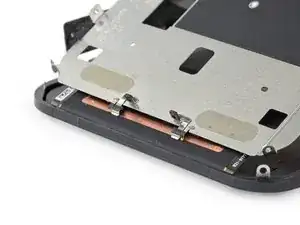
Usa un cacciavite Y000 per rimuovere le viti da 1,1 mm che tengono ferma la schermatura dell'LCD:
-
Tre viti sul lato più vicino ai cavi del display
-
Altre 2 viti sul lato opposto
-
-
-
Rimuovi le viti Y000 da 1,1 mm rimanenti dai bodi superiore e inferiore della piastra dell'LCD:
-
2 viti vicino agli intagli per la fotocamera
-
2 viti vicino agli angoli sul fondo.
-
-
-
Applica un po' di calore usando iOpener (o un asciugacapelli o una pistola termica) sul retro dello schermo, in modo da ammorbidire l'adesivo che tiene attaccati i cavi del display alla piastra di schermatura dell'LCD.
-
-
-
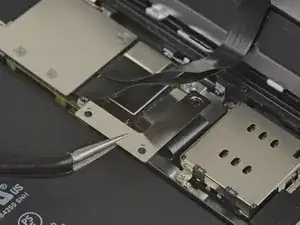
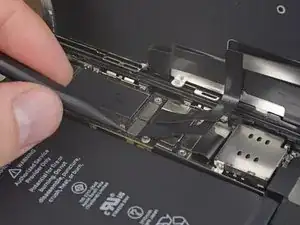
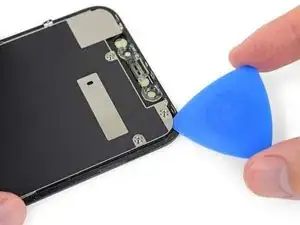
Inserisci il plettro tra i cavi del display e la schermatura dell'LCD.
-
Fallo scorrere verso il bordo inferiore del display in modo da separare i cavi.
-
Fermati quando raggiungi la fine del primo cavo.
-
-
-
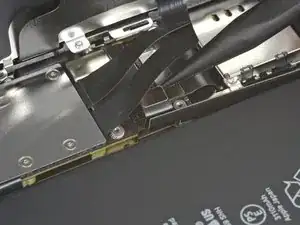
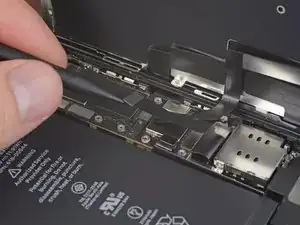
Inserisci di nuovo il plettro, questa volta in mezzo ai due cavi.
-
Fai scorrere il plettro fino in fondo al bordo inferiore dello schermo per staccare i cavi l'uno dall'altro.
-
-
-
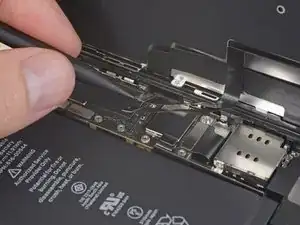
Rimuovi l'intero cavo del digitizer dalla piastra di schermatura e spostalo sul lato, piegandolo.
-
-
-
Inserisci il plettro sotto il bordo superiore della piastra ed esegui una torsione per staccarla dal display.
-
-
-
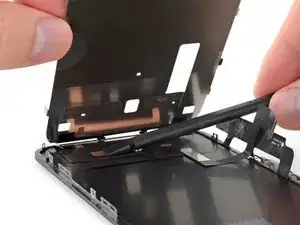
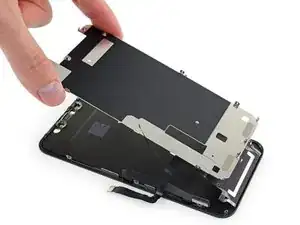
Afferra la piastra di schermatura dal bordo superiore e inclinala di qualche grado.
-
Usando uno spudger, premi delicatamente sulla parte inferiore del cavo display, spingendolo attraverso l'intaglio nella piastra.
-
-
-
Solleva ancora un po' il bordo superiore della schermatura dell'LCD e fai passare il resto del cavo dello schermo attraverso l'intaglio della piastra.
-
-
-
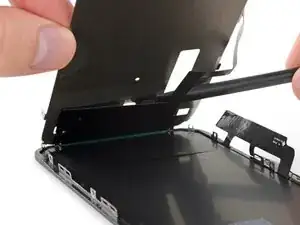
Angola maggiormente la schermatura dell'LCD, fino a vedere il resto del cavo dello schermo attaccato al retro.
-
Fai passare lo spudger tra la schermatura e il cavo del display e separa completamente questi due elementi.
-


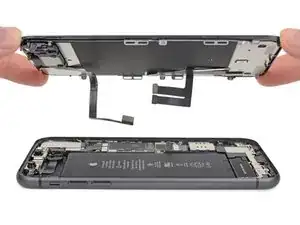


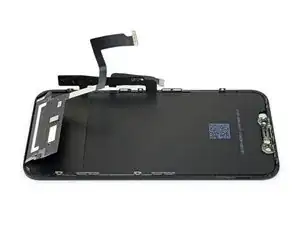
Confronta il pezzo sostituito con quello originale, potresti dover trasferire componenti rimasti sulla vecchia parte o rimuovere adesivi sul retro del componente nuovo prima di installarlo.
Per riassemblare il tuo dispositivo, segui i passi descritti in ordine inverso.
Porta i tuoi rifiuti elettronici a un riciclatore certificato R2 o e-Stewards.
La riparazione non è andata secondo i piani? Visita la nostra vasta libreria per la risoluzione problemi iPhone, o in particolare la nostra pagina iPhone 11 non si accende. Prova delle soluzioni di base ai problemi, oppure rivolgiti alla nostra comunità Risposte iPhone 11 per trovare aiuto nella risoluzione dei problemi.

23 commenti
I am a repair technician from California, and I use your company’s tools and I gotta say that I love them. Very sleek, and the powerful magnetic bits help me get the job done. I did 5 repairs yesterday and each one finished was a good feeling of satisfaction. In the future, if you guys decide to make some sort of in-depth manual for the newer iPhones, that would be great because diagrams are not only a great way for me to sharpen my own skills, but will help make training new techs a breeze.
Cheers all the way from Fresno!
Hi, I replaced the display independently, not in the Apple service, to my disappointment I found a message in the device that warned me that the part is not original, consequently the FaceID was disabled. Can you tell me about ear? Thank you
954kuki -
Getting a message saying not genuine is known issue. there is no workaround yet. as far as face ID not working, you need to check for tear on the flex as you probably damaged it during transfer. If it’s broken, there is no way to fix.
The Important Display Message can be removed, check here: https://www.youtube.com/watch?v=bLo0_p7O...
Ricky LV -
Great repair guide. My only issues:
1. There are no instructions for removing the metal panel from the back of the old screen (nor how to reinstall it).
2. There are no instructions for removing the old, black adhesive from around the edge of the old case (nor the much needed instructions for reinstalling the new adhesive without damaging it or compromising the purpose of replacing this adhesive). This info is also missing from the adhesive replacement page for the iPhone 11.
I was able to patiently work my way through both of these issues and complete the repair on an iPhone 11. Covering these issues as additional steps of the repair guide would be very helpful for future iFixers.
the right screws wouldn’t come off
Yusef San Inocencio -
ok one came of but my right wont come of either!!!!
Aisa Jawara -
Hello guys, I still haven't found away to power off the iphone without using the screen. Cheers!
danielaguirre93 -
You can try this.
Quickly Press and release the volume up button.
then Quickly Press and release the volume down button.
then press and hold the power button and wait until it turns off.
worked for me :D
Benóný Egilson -
Where does one get replacement seals? Is this the same as the display assembly adhesive?
Brian Baker -
not of the screwdrivers i have seem to be able to turn the screws
Aisa Jawara -