Introduzione
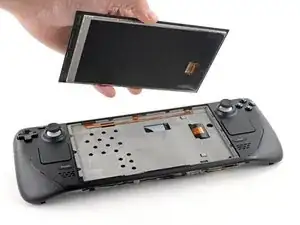
Usa questa guida per sostituire lo schermo (o display) sul tuo Steam Deck LCD. La procedura è la stessa sia per i vetri standard che per quelli antiriflesso.
Ricorda: segui le procedure di sicurezza generali relative alle scariche elettrostatiche (ESD) durante la riparazione del tuo dispositivo.
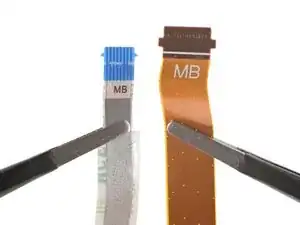
Nota: se stai installando un display del modello da 512 GB su un dispositivo da 64/256 GB o viceversa, dovrai assicurarti che sia installato anche un cavo flessibile del display corrispondente. Entrambi i tipi di display vengono forniti con i relativi cavi flessibili specifici.
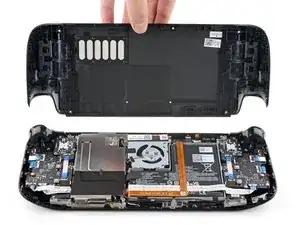
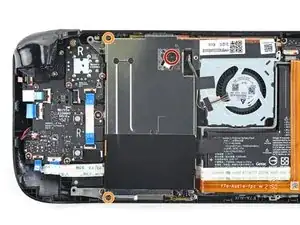
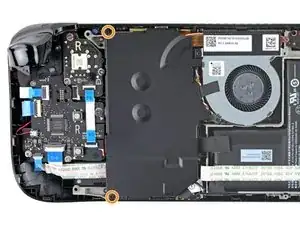
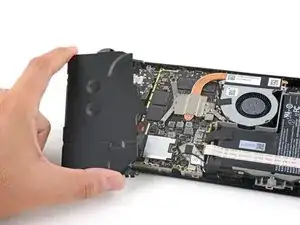
Nota: Valve ha cominciato a spedire Steam Deck con un nuovo design interno a inizio 2023. Il tuo Steam Deck potrebbe essere diverso da quello delle foto, ma le procedure sono molto simili. Rimuovi la cover posteriore per controllare che versione hai. L'originale avrà una protezione metallica per la scheda madre e una ventola con i lati dritti, come in foto. La nuova versione di Steam Deck avrà una protezione nera per la scheda madre e una ventola con i bordi curvi, come qui.
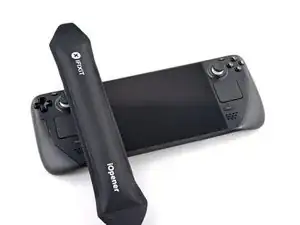
Strumenti
-
-
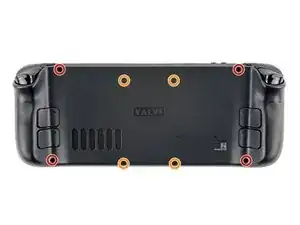
Usa un cacciavite a croce Phillips per rimuovere le otto viti che tengono fermo il pannello posteriore:
-
Quattro viti da 9,5 mm a filettatura grossa
-
Quattro viti da 5,8 mm a filettatura fine
-
-
-
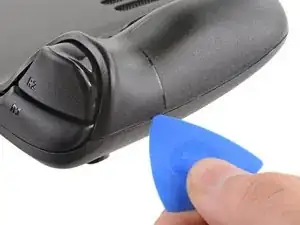
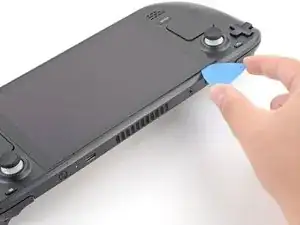
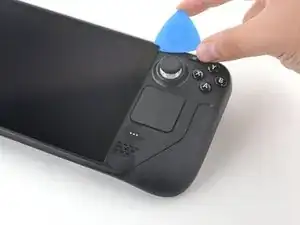
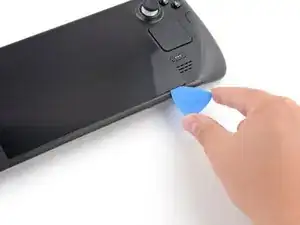
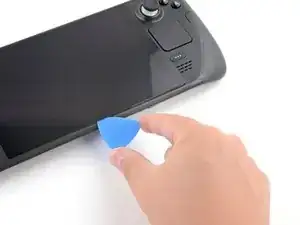
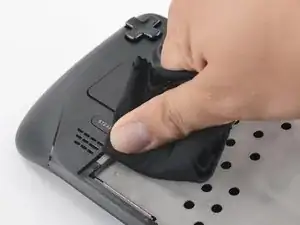
Inserisci un plettro di apertura nella fessura sottile tra la cover posteriore e il guscio frontale, lungo il bordo dell'impugnatura destra.
-
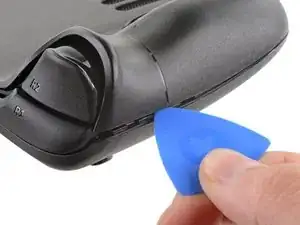
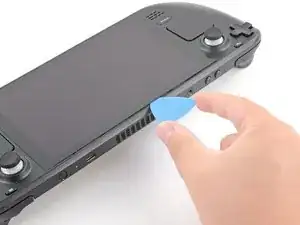
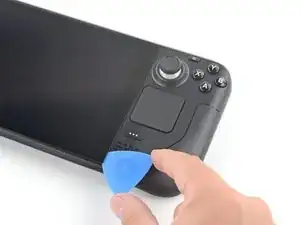
Fai leva sulla cover posteriore per sganciare le clip di bloccaggio.
-
-
-
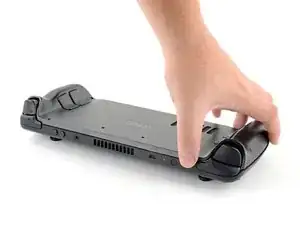
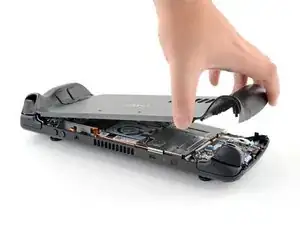
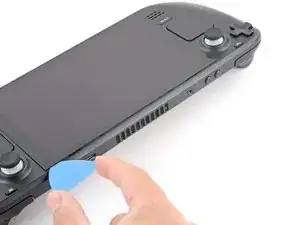
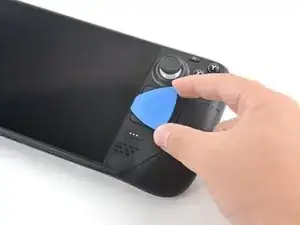
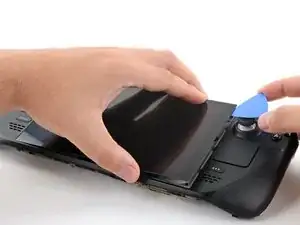
Afferra la cover posteriore dall'apertura che hai appena creato e sollevala e allontanala dal dispositivo per sganciare le clip sui lati lunghi.
-
Rimuovi la cover posteriore.
-
-
-
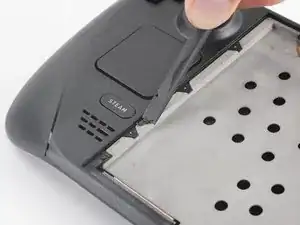
Se possiedi una versione aggiornata dello Steam Deck con la copertura nera della scheda madre, salta questo passaggio.
-
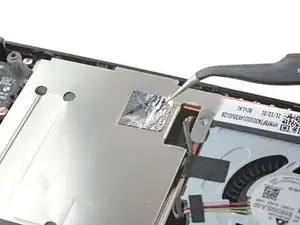
Usa un paio di pinzette per rimuovere il pezzo di foglio d'alluminio che copre la vite nascosta sulla protezione della scheda madre.
-
-
-
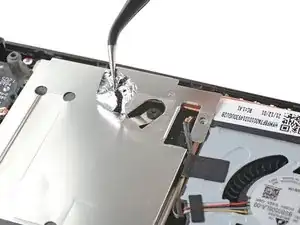
Usa un cacciavite a croce Phillips per rimuovere le tre viti che tengono ferma la protezione della scheda:
-
Una vite da 3,4 mm
-
Due viti da 3,7 mm
-
-
-
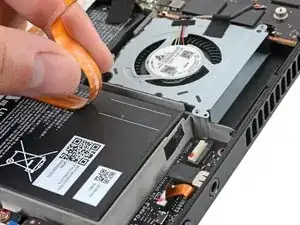
Prendi il cavo della batteria dalla sua linguetta e tiralo via dalla scheda madre per scollegarlo.
-
-
-
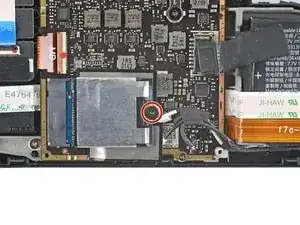
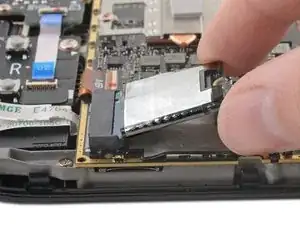
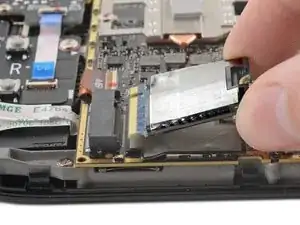
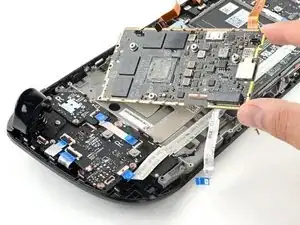
Afferra l'estremità dell'SSD e tiralo via dal suo connettore M.2 sulla scheda madre per rimuoverlo.
-
-
-
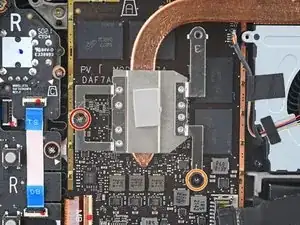
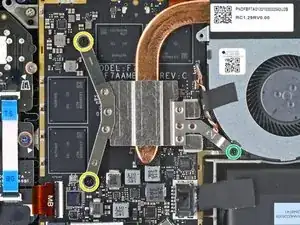
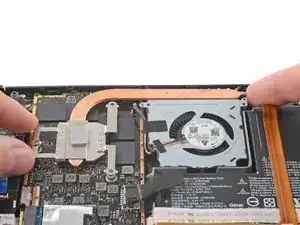
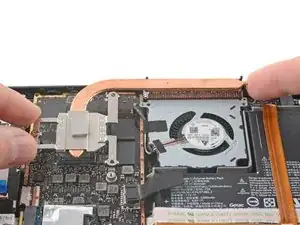
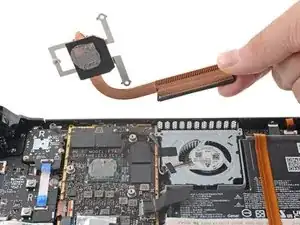
Per gli Steam Deck originali: Usa un cacciavite a croce Phillips per svitare e rimuovere le due viti che fissano il dissipatore alla scheda madre:
-
Una vite prigioniera da 3,5 mm
-
Una vite da 3,4 mm
-
Per gli Steam Deck aggiornati: Utilizza un cacciavite a croce Phillips per rimuovere le tre viti che fissano il dissipatore di calore alla scheda madre:
-
Due viti da 2,9 mm
-
Una da 3,7 mm
-
Durante il rimontaggio in entrambe le versioni, stringi queste viti nell'ordine (1, 2, 3) come indicato sulla superficie del dissipatore di calore.
-
-
-
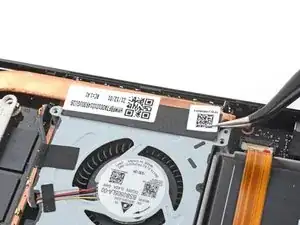
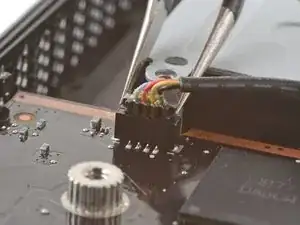
Usa un paio di pinzette per afferrare i bordi del connettore della ventola e tira verso l'alto per scollegarlo dalla scheda madre.
-
-
-
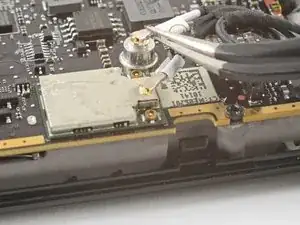
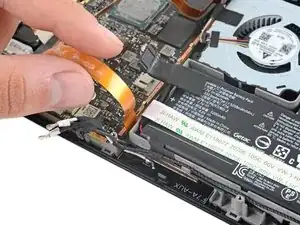
Usa un paio di pinzette per sollevare e rimuovere il nastro adesivo di protezione del Wi-Fi.
-
-
-
Usa un paio di pinzette per afferrare i bordi del connettore dell'altoparlante e sollevalo per scollegarlo dalla scheda madre.
-
-
-
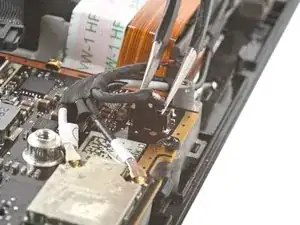
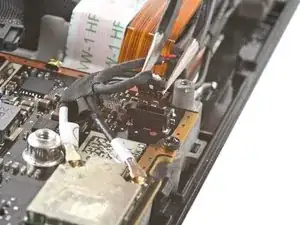
Usa un paio di pinzette per prendere il connettore dell'antenna vicino alla base.
-
Tira verso l'alto per scollegare il cavo.
-
Ripeti per il secondo cavo dell'antenna.
-
-
-
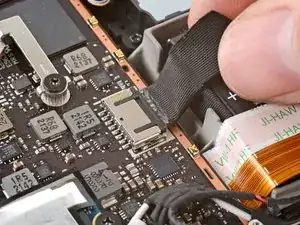
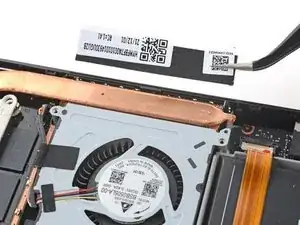
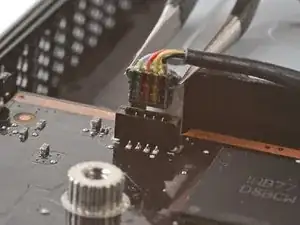
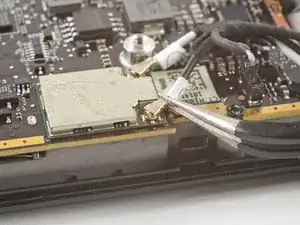
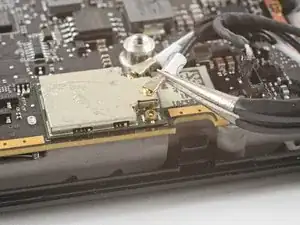
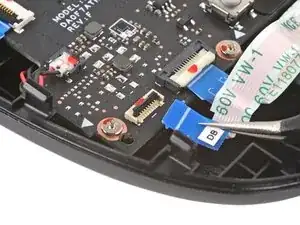
Usa la punta di uno spudger per sollevare l'aletta di bloccaggio sul connettore ZIF del cavo dello schermo.
-
Usa un paio di pinzette per far scorrere il cavo via dal suo connettore.
-
-
-
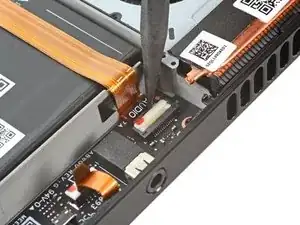
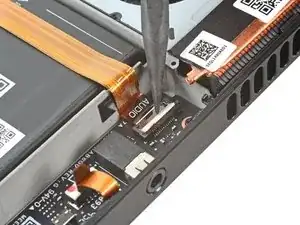
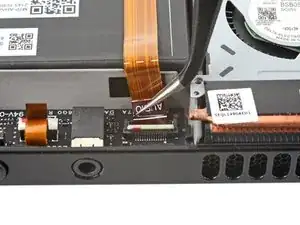
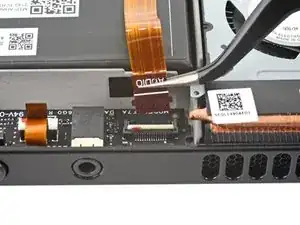
Usa la punta di uno spudger per sollevare l'aletta di bloccaggio sul connettore ZIF del cavo audio.
-
-
-
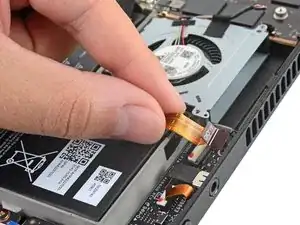
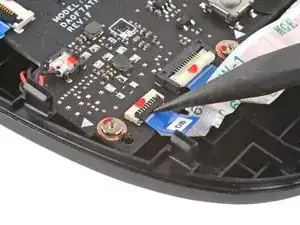
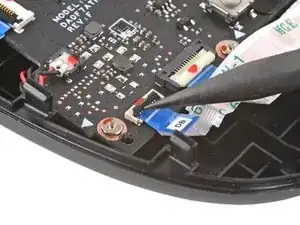
Usa la punta di uno spudger per sollevare l'aletta di bloccaggio del connettore ZIF del cavo della scheda dei pulsanti .
-
Usa un paio di pinzette per far scorrere il cavo via dal suo connettore.
-
-
-
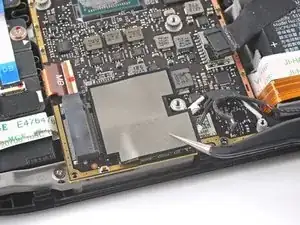
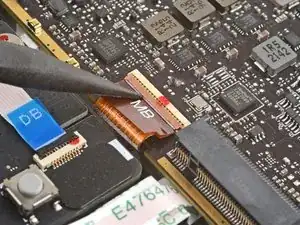
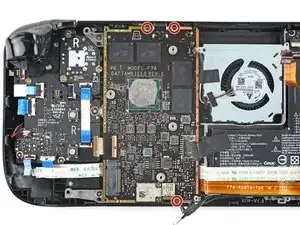
Usa un cacciavite a croce Phillips per rimuovere le tre viti da 3,7 mm che tengono ferma la scheda madre.
-
-
-
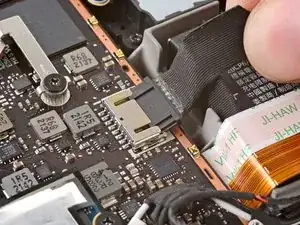
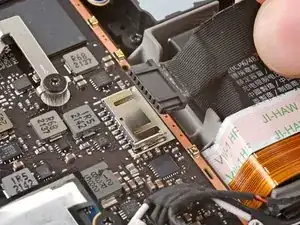
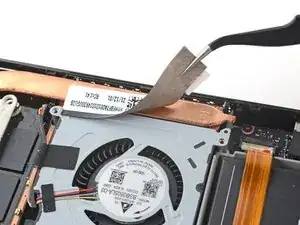
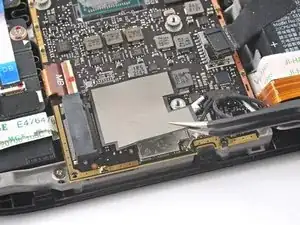
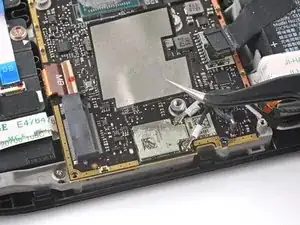
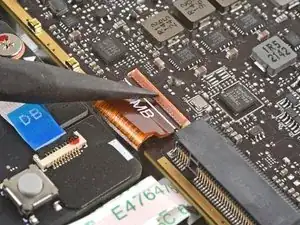
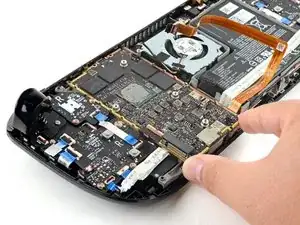
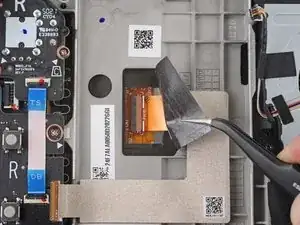
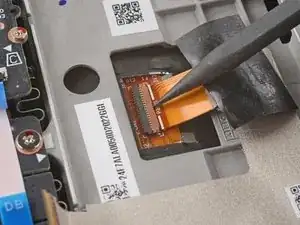
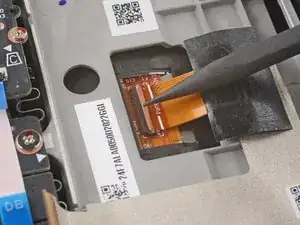
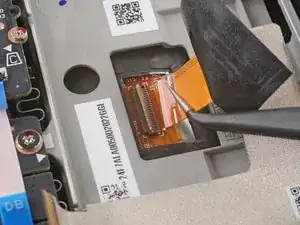
Usa la punta di uno spudger per sollevare l'aletta di bloccaggio sul connettore ZIF del cavo dello schermo.
-
Usa un paio di pinzette per far scorrere il cavo via dal suo connettore.
-
-
-
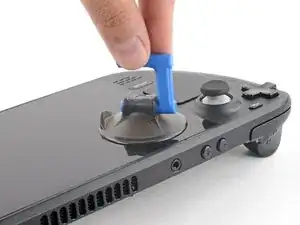
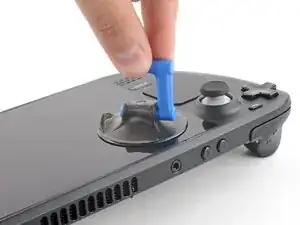
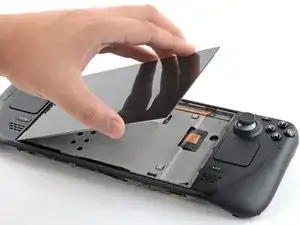
Applica una ventosa all'angolo in alto a sinistra dello schermo premendola per farle fare presa il più vicino possibile al bordo.
-
-
-
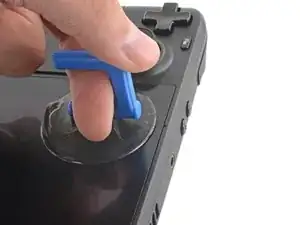
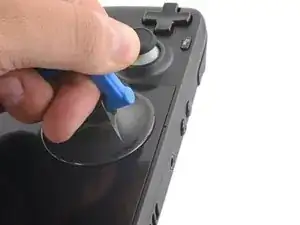
Tira la ventosa con una forza costante per creare una fessura tra lo schermo e la cornice.
-
Inserisci la punta di un plettro di apertura nella fessura.
-
-
-
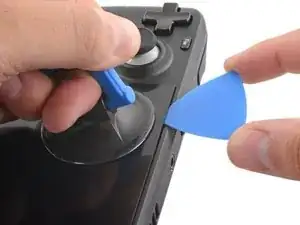
Scalda il bordo sinistro dello schermo per un minuto.
-
Fai scorrere il plettro di apertura lungo il bordo sinistro per tagliare l'adesivo.
-
-
-
Una volta che hai tagliato intorno al perimetro dello schermo, solleva con attenzione il bordo destro, aprendolo come un libro.
-
Rimuovi lo schermo.
-
-
-
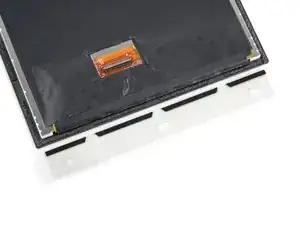
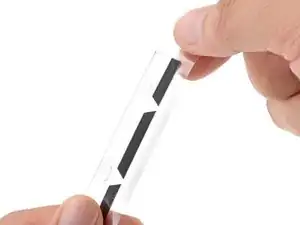
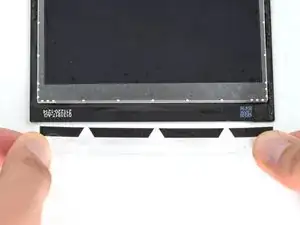
Guarda l'adesivo del nuovo schermo e abbina ogni striscia al rispettivo lato dello schermo.
-
-
-
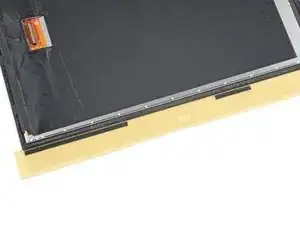
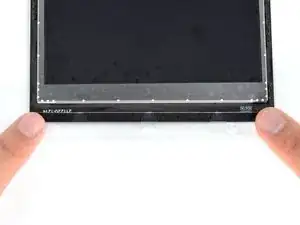
Rimuovi i grandi pezzi di adesivo con la parte piatta di uno spudger o di uno strumento di apertura in plastica.
-
-
-
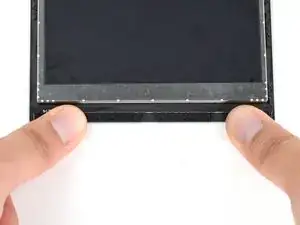
Usa del solvente per adesivo o alcool isopropilico (>90%) per rimuovere tutti i residui rimasti. Strofina in una sola direzione con un panno senza lanugine o un filtro del caffè finché non avrai rimosso tutti i residui di adesivo.
-
Lascia evaporare tutti i residui di alcool isopropilico prima di iniziare il rimontaggio.
-
-
-
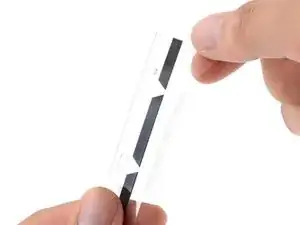
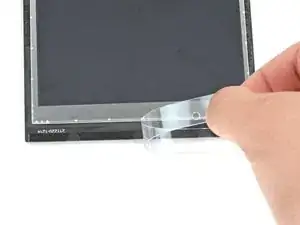
Una volta che hai una buona idea di dove ogni striscia andrà posizionata, rimuovi e getta via la pellicola, scoprendo l'adesivo sottostante.
-
-
-
Posiziona l'adesivo sulla superficie e premi fermamente con le dita per fissarlo al suo posto.
-
Ripeti i due passi precedenti per le altre tre strisce adesive dello schermo.
-
-
-
Rimuovi e getta via le pellicole di plastica rimaste su tutte e quattro le strisce, scoprendo l'adesivo sottostante.
-
Ripeti per tutte e quattro le strisce adesive, facendo attenzione a non toccare nessun adesivo.
-
-
-
Posiziona il nuovo schermo sul telaio intermedio e premi saldamente lungo i bordi per 20/30 secondi per assicurarti che l'adesivo faccia presa bene.
-


Per rimontare il dispositivo, segui queste istruzioni in ordine inverso.
Porta i tuoi rifiuti elettronici a un riciclatore certificato R2 o e-Stewards.
La riparazione non è andata secondo i piani? Prova delle soluzioni ai problemi di base o chiedi alla nostra comunità Risposte Steam Deck per trovare aiuto.

22 commenti
Attempted this tonight after smashing the screen on my deck. Easy to follow and worked flawlessly first time. Thank you
On peut mettre un autre ecran OLED ou autre ?
Non. Le matériel ne prend en charge qu'un écran très similaire ou identique à l'original.
Forge -
This guide is gold standard. Not once did I think “why didn’t they mention this?”