
Introduzione
Questa guida di riparazione è stata redatta dallo staff di iFixit ma non è stata approvata da Google. Leggi di più sulle nostre guide qui.
Usa questa guida per sostituire uno schermo rotto o guasto, incluso il digitizer, del tuo Google Pixel 2 XL. Se la parte sostitutiva non comprende l'adesivo, ti servirà della nuova colla per poter sigillare il telefono. Inoltre possono esserci delle piccole parti da trasferire dal display originale a quello di ricambio. Ispeziona con cura entrambi gli schermi per accertarti che tutti i componenti siano trasferiti dal vecchio al nuovo display.
-
-
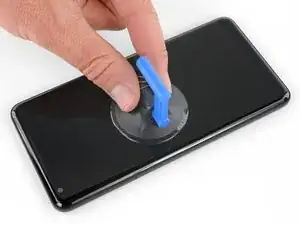
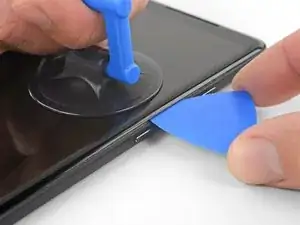
Applica una ventosa il più vicino possibile al lato SIM del telefono, appena prima della curva del bordo.
-
-
-
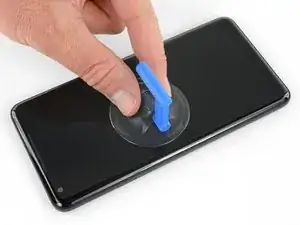
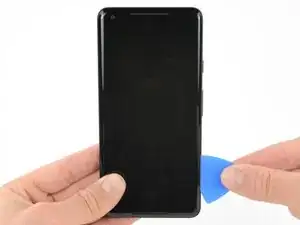
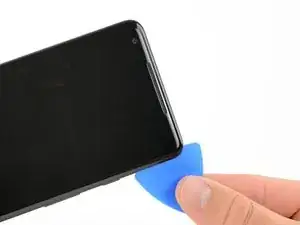
Tira la ventosa con una trazione decisa e costante e inserisci un plettro di apertura tra il pannello frontale e la cover posteriore.
-
-
-
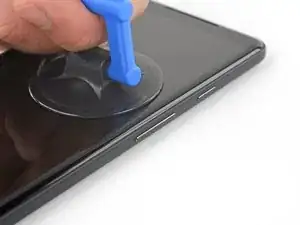
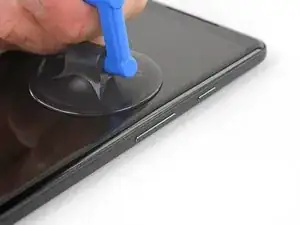
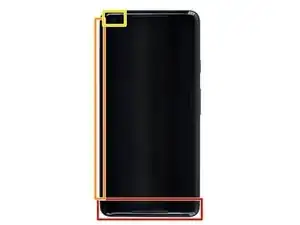
Non inserire il plettro per più di 6 mm nel bordo inferiore del telefono. Se il plettro entrasse in contatto con la parte curvata del pannello OLED, lo schermo potrebbe danneggiarsi.
-
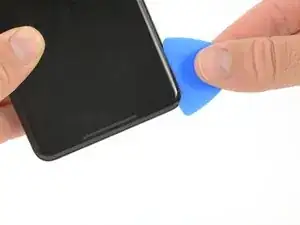
Non tagliare lungo il bordo sinistro: ci sono dei delicati cavi del display che potrebbero danneggiarsi.
-
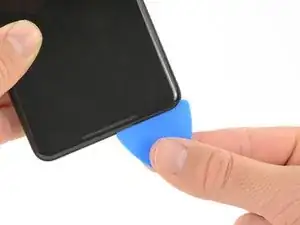
Nell'angolo superiore sinistro, limitati a dei tagli molto superficiali: infilando l'attrezzo molto all'interno potresti danneggiare la fotocamera anteriore.
-
-
-
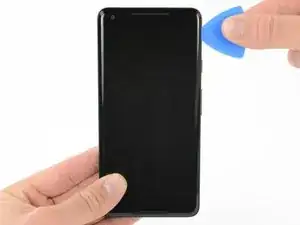
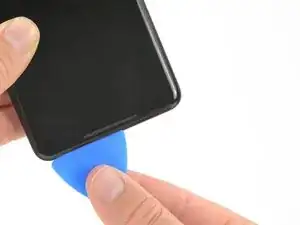
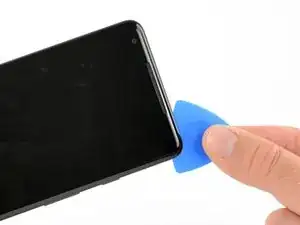
Fai scorrere il plettro di apertura verso il basso lungo il lato destro del telefono per staccare la colla dello schermo.
-
-
-
Fai scorrere il plettro di apertura attorno all'angolo inferiore destro e lungo il bordo inferiore del telefono.
-
-
-
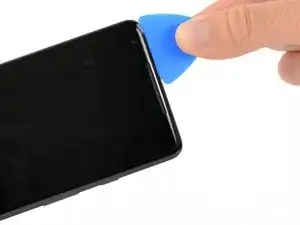
Inserisci di nuovo il bordo piatto del plettro nell'angolo superiore destro del telefono e fallo scorrere attorno all'angolo e al bordo superiore.
-
-
-
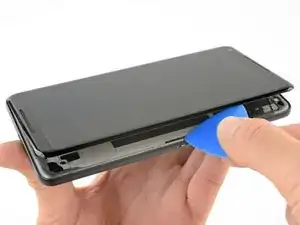
Solleva delicatamente lo schermo dal lato destro del telefono, aprendolo come se fosse un libro.
-
Disponi delicatamente il display di piatto sul tavolo vicino alla parte rimanente del telefono, tenendolo vicino per evitare di forzare i cavi del digitizer e dello schermo.
-
-
-
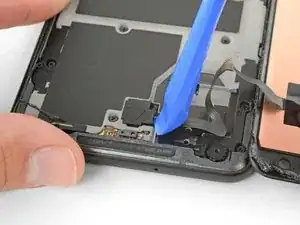
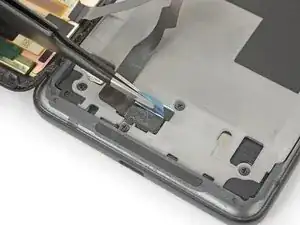
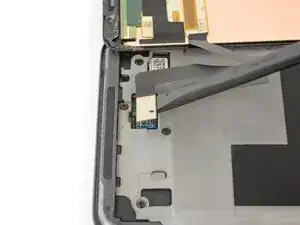
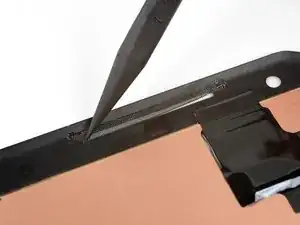
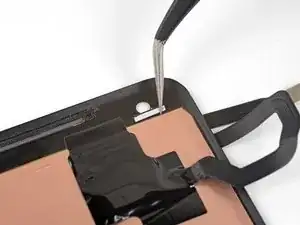
Usa l'angolo di uno strumento di apertura per sollevare la cover del connettore del cavo del digitizer.
-
Rimuovi la cover del connettore.
-
-
-
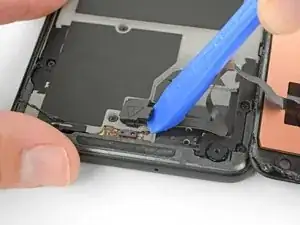
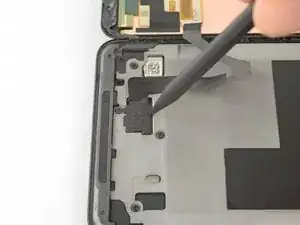
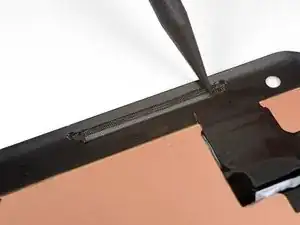
Usa l'estremità a punta di uno spudger per sollevare il connettore del cavo del digitizer e staccarlo dal suo zoccolo sulla scheda madre.
-
-
-
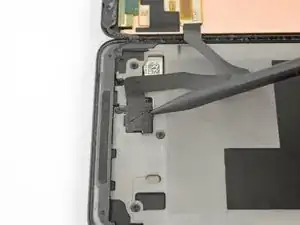
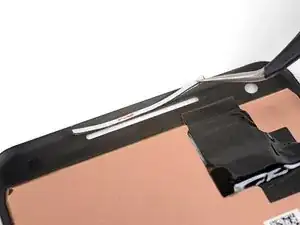
Usa delle pinzette per rimuovere eventuali nastri adesivi sulla cover del connettore dello schermo.
-
-
-
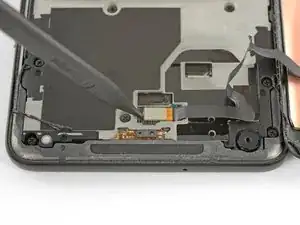
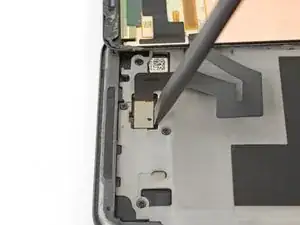
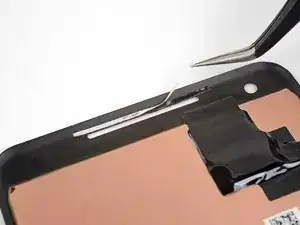
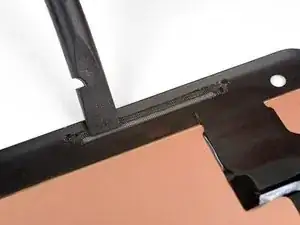
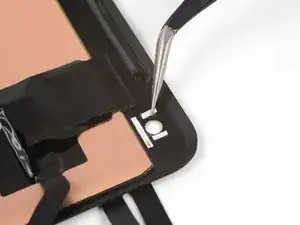
Inserisci l'estremità a punta di uno spudger nel piccolo foro sul bordo della cover del connettore dello schermo.
-
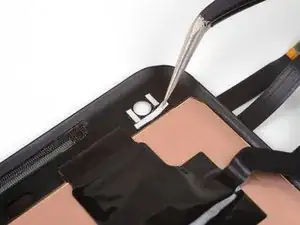
Usa lo spudger per estrarre la cover dal suo alloggiamento.
-
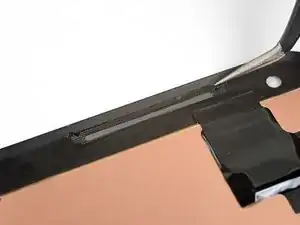
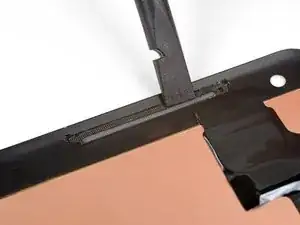
Rimuovi la cover del connettore.
-
-
-
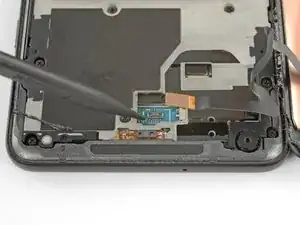
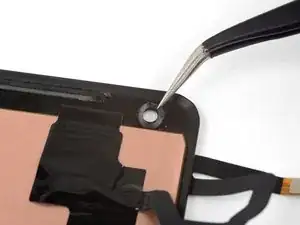
Usa l'estremità piatta di uno spudger per sollevare il connettore del cavo del display dal suo zoccolo.
-
Rimuovi lo schermo.
-
-
-
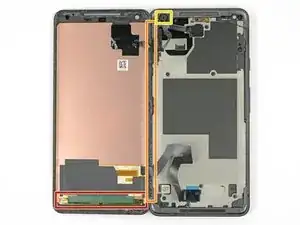
Il tuo schermo di ricambio potrebbe non integrare le griglie dell'altoparlante o la guarnizione della fotocamera anteriore. In questo caso, usa delle pinzette per rimuovere delicatamente questi componenti dal tuo vecchio display e segui il resto della guida per installarle su quello nuovo.
-
Rimuovi qualsiasi traccia di adesivo dalle componenti prima di re-installarle.
-
Taglia una striscia di nastro biadesivo larga 1 mm e lunga circa 3 cm.
-
Disponi la striscia adesiva lungo il bordo superiore della fessura dell'altoparlante voce del nuovo display in modo che sia centrata sopra la fessura e che tocchi il bordo superiore.
-
Premi delicatamente in posizione sul display la striscia adesiva con il dito oppure uno spudger.
-
Stacca dalla striscia adesiva la protezione di plastica.
-
-
-
Disponi, ma senza premere, la griglia dell'altoparlante nella sua fessura in modo che la metà della griglia che rientra alle due estremità resti all'interno della cavità e la parte più larga stia verso l'esterno e sopra l'adesivo. Aspetta a premere.
-
Usa l'estremità a punta di uno spudger per spingere delicatamente i bordi della griglia contro i bordi della fessura, centrando la griglia nella cavità.
-
-
-
Usa l'estremità piatta di uno spudger per premere la parte superiore della griglia sulla striscia adesiva.
-
Ripeti gli ultimi tre passi per installare la griglia dell'altoparlante inferiore.
-
Quando monti la griglia dell'altoparlante inferiore, applica la striscia adesiva al bordo inferiore della fessura dell'altoparlante e posiziona la griglia con la parte piatta sotto la fessura.
-
-
-
Taglia una striscia di biadesivo larga 1 mm e lunga 6 mm.
-
Disponi l'adesivo sotto il foro della fotocamera anteriore, parallelamente al bordo superiore dello schermo.
-
Taglia due strisce di adesivo larghe 1 mm e lunghe 3 mm.
-
Sistema le strisce adesive a sinistra a destra del foro della fotocamera, perpendicolarmente alla striscia adesiva più lunga.
-
Premi con delicatezza le strisce adesive nella loro posizione sullo schermo usando un dito o uno spudger.
-
-
-
Posiziona con cura la guarnizione della fotocamera anteriore sull'adesivo.
-
Accertati che la guarnizione sia centrata attorno al foro della fotocamera. Se coprisse anche parzialmente il foro, comprometterebbe il buon funzionamento della fotocamera.
-
Premi la guarnizione, con un dito o uno spudger, sull'adesivo.
-


Confronta il pezzo sostituito con quello originale, potresti dover trasferire componenti rimasti sulla vecchia parte o rimuovere adesivi sul retro del componente nuovo prima di installarlo.
Per rimontare il dispositivo, segui queste istruzioni in ordine inverso.
Porta i tuoi rifiuti elettronici a un riciclatore certificato R2 o e-Stewards.
La riparazione non è andata secondo i piani? Vai sulla nostra comunità Risposte per trovare aiuto nella risoluzione dei problemi.

37 commenti
Be very careful on the bottom connection, if done incorrectly, 2 small components controlling bottom speaker are easily damaged, this will result in a motherboard replacement or replacing someones phone. Take it from me and a few others on the site…go at this slow and careful. Besides that risk, the phone is pretty simple to repair.
Tom Gray -
Hi Tom, what component are you talking about? I'm about to dive into this and it might be wise for me to doublecheck this prior to repairing it!
Showing where to place the new tape would be helpful.
Agreed. And also which one we need, is it the 1mm or others? Putting off my repair until I get this tape, going with the 1mm for now…
Shouldn’t this be “As close as possible to the volume rocker”?
Mihai Turdean -
Forget about the tiny toy suction cup they provide to battery replacement kits. I used a dent puller from an automotive shop. The smallest they had was just small enough for the Pixel's screen. I still needed to heat the edges with a heat gun.
Tamás Polgár -
I wish someone tell me in advance that if I doing this replacement after using phone for a few years it better to have spare "display adhesive" and be ready to follow Google Pixel 2 XL Display Adhesive Replacement
Original adhesive become dirty with time and fat chances it will be damaged during opening phase. In my case I replaced battery but can't use the phone, as still waiting for adhesive to be delivered
Maxim Vorontsov -