
Introduzione
-
-
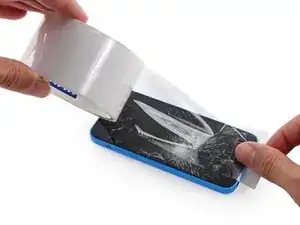
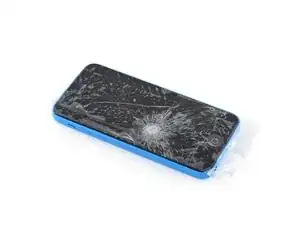
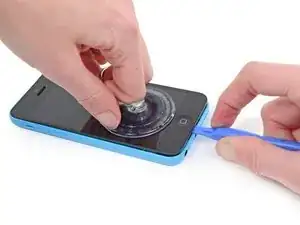
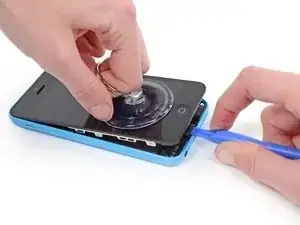
Se il vetro del tuo display è crepato, l'applicazione di nastro adesivo sullo schermo blocca ulteriori rotture e previene possibili infortuni.
-
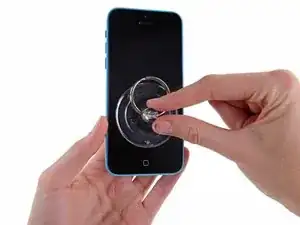
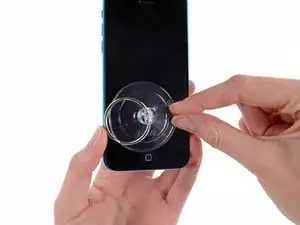
Disponi strisce sovrapposte di nastro adesivo trasparente sul display dell'iPhone fino a coprire l'intera superficie.
-
-
-
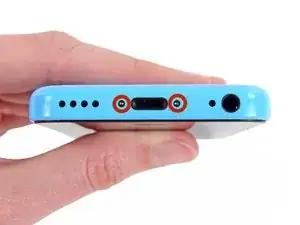
Spegni il tuo iPhone prima di iniziare a smontarlo.
-
Rimuovi le due viti pentalobe P2 da 3,8 mm da ciascun lato del connettore Lightning.
-
-
-
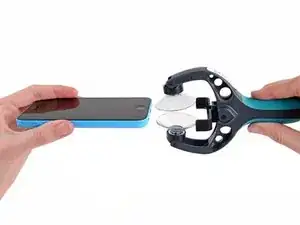
Chiudi l'impugnatura dell'iSclack per aprire le ganasce a ventosa.
-
Disponi la parte inferiore dell'iPhone tra le ventose, contro il sensore di profondità in plastica.
-
La ventosa superiore deve trovarsi appena sopra il pulsante home.
-
Apri l'impugnatura per chiudere le ganasce dell'iSclack. Centra bene le ventose e premile con decisione sulle due facce dell'iPhone.
-
-
-
Impugnando saldamente l'iPhone, chiudi le maniglie dell'iSclack per allontanare tra loro le ventose e tirare via il pannello frontale dal case posteriore.
-
L'iSclack è progettato per aprire in sicurezza il tuo iPhone giusto quanto basta a separare le parti senza danneggiare alcun cavo.
-
Salta i prossimi tre passi e continua con il passo 8.
-
-
-
Mentre tieni giù il telefono con una mano, tira la ventosa per separare lievemente il gruppo del pannello anteriore dal case posteriore.
-
Con uno strumento di apertura in plastica, inizia a spingere delicatamente verso il basso il case posteriore, separandolo dal gruppo display, mentre continui a tirare con la ventosa.
-
-
-
Tira la sporgenza in plastica per staccare la ventosa.
-
Rimuovi la ventosa dal gruppo display.
-
-
-
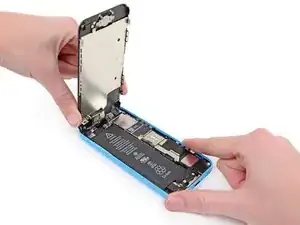
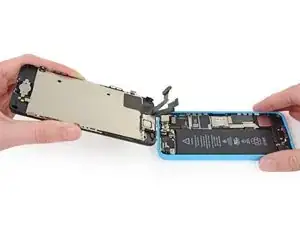
Solleva il lato del pulsante home del gruppo display per accedere ai connettori vicino alla parte alta del telefono.
-
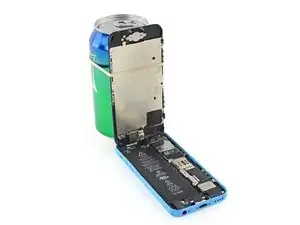
Apri il display a un angolo di circa 90° e appoggialo a qualche cosa di adatto a tenerlo aperto mentre lavori sull'iPhone.
-
Se non hai altro, puoi usare una lattina chiusa per tenere su il display.
-
Aggiungi un elastico per tenere saldamente il display mentre lavori sul telefono. In questo modo eviterai di sforzare involontariamente i cavi del display.
-
-
-
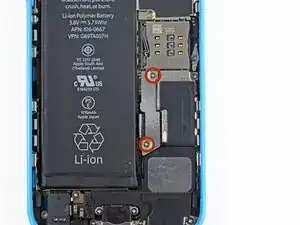
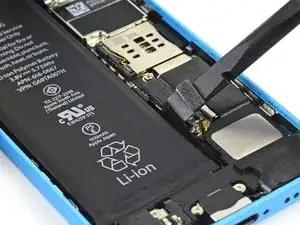
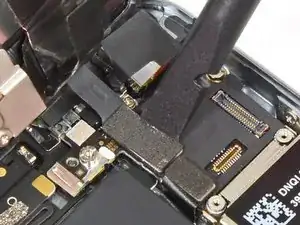
Rimuovi le due viti Phillips #000 da 1,6 mm che fissano il connettore metallico della batteria alla scheda logica.
-
-
-
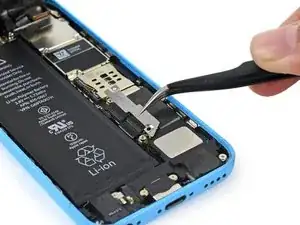
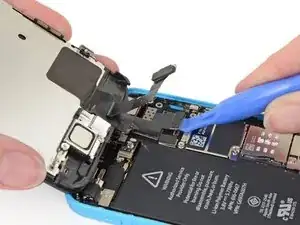
Usa uno spudger oppure un'unghia per staccare delicatamente il connettore della batteria dal suo zoccolino sulla scheda logica.
-
-
-
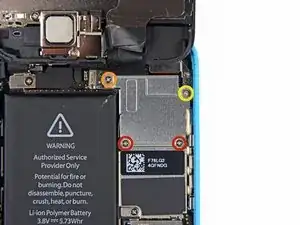
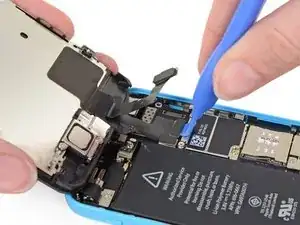
Rimuovi le seguenti viti Phillips #000 che fissano la staffa del cavo del gruppo pannello frontale alla scheda logica:
-
Due viti da 1,3 mm
-
Una vite da 1,7 mm
-
Una vite da 3,25 mm
-
-
-
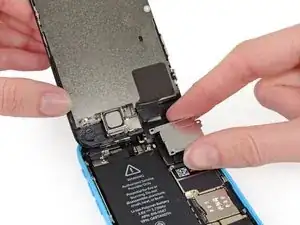
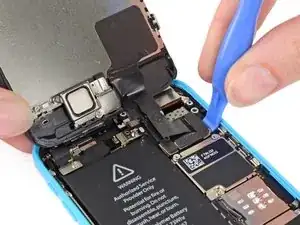
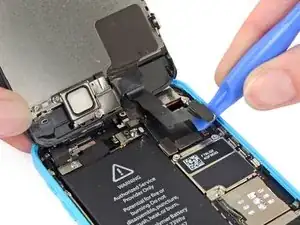
Usa uno strumento di apertura in plastica oppure un'unghia per staccare il connettore della fotocamera anteriore e del cavo sensore.
-
-
-
Usa uno strumento di apertura in plastica oppure un'unghia per staccare il connettore del cavo dell'LCD.
-


Per rimontare il tuo dispositivo, segui queste istruzioni in ordine inverso.

29 commenti
don't forget the 3 smaller of the 4 screws are different sizes on the silver panel!
djranoia -
Yeah, I learned that one the hard way when I dropped the 1.6 mm screw onto my carpet. But, thank God, I found the screw after several minutes of searching for it. The entire display replacement from a cracked screen went nice and smooth. It actually tool me less than 20-minutes to complete the process. Thanks iFixit!!!
ebibbs -
How do I know if I'm ordering a white or black front screen? Also what's the difference between the 35$ from amazon or the 95$ from here?
Nicholas -
The top and bottom on the back of the white iPhone 5 is made out of ceramic glass. The top and bottom on the back of the black iPhone 5 is made out of pigmented glass. Hope that helps! I use ReVampWholesales for parts, decently priced, just bought a black 5C full assembly (buttons and everything) for $44.50 with $8 shipping (pretty quick too). Amazon is very good too.
Andrew -
This guide misses a few things: after removing the old display, you will need to remove the silver backing/shield, the home button and the camera (be very careful when pulling the copper tape from the silver panel so not to tear it.) You will then need to place these in the new display. This is another 9? screws or so. I think the iPhone 5 page has this guide (it's pretty much the same thing.)
-
I always order the cheapest displays from Amazon (about $30 right now with free shipping for Prime members.) They always work just fine for me -- none of these parts is "officially from Apple" (they're all Chinese knockoffs.)
-
On a further note, be VERY careful when plugging the new screen to the mainboard - the FPC connector pins can BEND and BREAK if you force the connector. Broken pins require very careful hot air/reflow soldering of the mainboard and a new FPC connector: not recommended for novices!
Joshua -
It depends on where you buy the replacement part. The display assembly iFixit sells for the 5c comes pre-assembled with the home button, front camera, earpiece speaker, and the LCD shield plate already in place, which makes for an easier repair. You're absolutely correct in that if your main concern is getting the cheapest price on the part, you'll need to spend some additional time transferring those bits from the old display to the new one. And—ta-da!—we've got a guide for that.