Introduzione

Questa guida è stata scritta dallo staff di iFixit e non è stata approvata da Google. Scopri di più sulle nostre guide di riparazione qui.

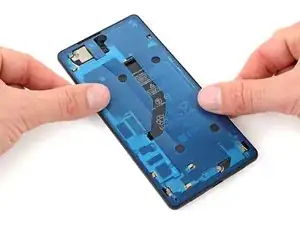
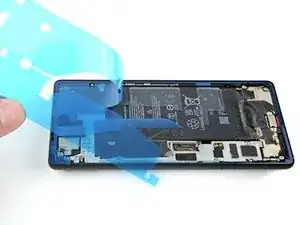
Usa questa guida per applicare del nuovo adesivo nel tuo Google Pixel 6 dopo una riparazione. Lo schermo del tuo Pixel dovrebbe essere rimosso prima di seguire questa procedura. Segui questa guida per rimuovere lo schermo, se non l'hai già fatto.

  1. FMMmDS4NHPcCEGXX
    FMMmDS4NHPcCEGXX
    nFSaENRYloNc4iHd
    IUliStATsQWJIuQq
    • Residui di adesivo o sporcizia impediranno al tuo schermo di sigillarsi correttamente.

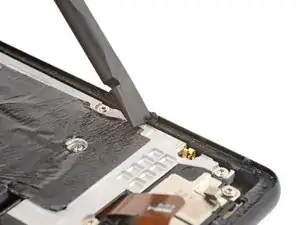
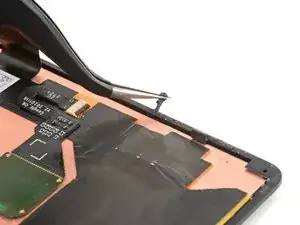
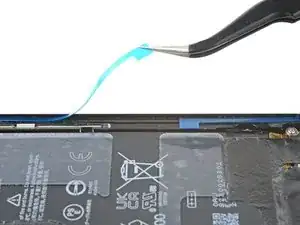
    • Usa la parte piatta di uno spudger per grattare via più adesivo che puoi.

    • Fa' attenzione a non danneggiare i connettori a molla vicino al perimetro della cornice.

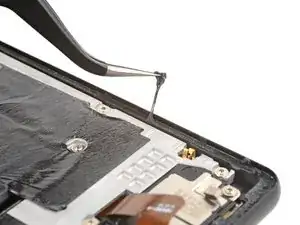
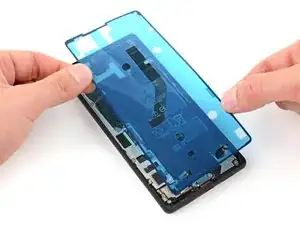
    • Usa le pinzette o le dita per rimuovere tutto l'adesivo rimasto.

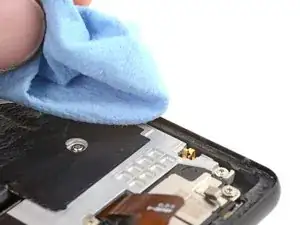
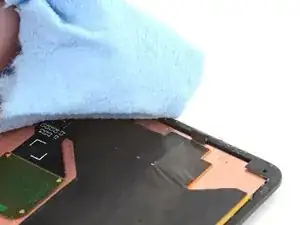
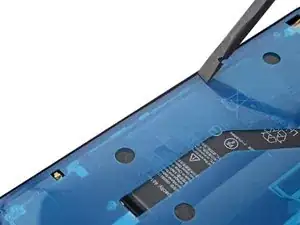
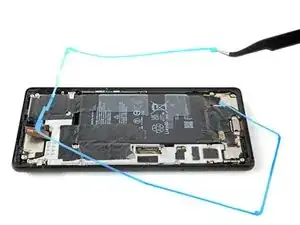
    • Pulisci il perimetro della cornice con una piccola quantità di alcool isopropilico ad alta concentrazione (>90%) e un panno senza lanugine o in microfibra.

  2. D15AeZfLxoVLV5PP
    D15AeZfLxoVLV5PP
    DIrKwqUbWdslDbbH
    4gtZbBSWZyGQaE6H
    • Se stai riutilizzando lo schermo, puliscilo come hai fatto per la cornice.

  3. wbWQ1WYIoqAHHASP
    wbWQ1WYIoqAHHASP
    OtToUXWCcX1MfkwA
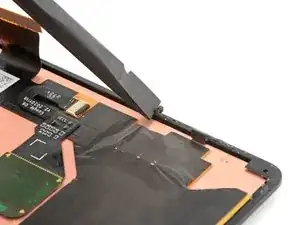
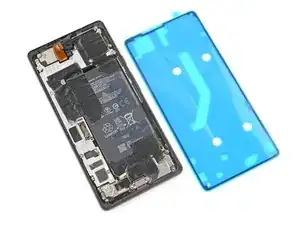
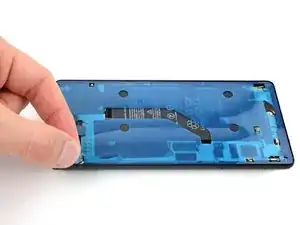
    • Prima di applicare il nuovo adesivo, appoggialo sulla cornice per trovare il giusto orientamento.

    • Per orientarlo correttamente, aiutati con i particolari come il ritaglio per l'altoparlante superiore, il foro in basso a sinistra e quello in alto a destra.

  4. SRVbG2u2lnSM6ZE6
    • Usa la linguetta sulla parte superiore dell'adesivo per rimuovere la pellicola protettiva.

    • Questo lascerà scoperto l'adesivo che va incollato alla cornice.

  5. EqVBPhJRsPOS2rYx
    EqVBPhJRsPOS2rYx
    n3JGbjmfgFoPhbX5
    D2lPi1vk4XJXFTwG
    • Fai molta attenzione durante questo passo! L'adesivo è molto appiccicoso e non può essere riposizionato dopo che si è incollato. Un adesivo non allineato può causare una tenuta non corretta.

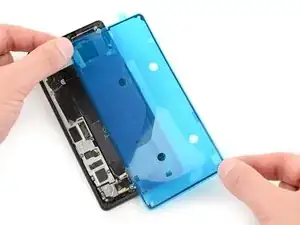
    • Appoggio l'adesivo sulla cornice a partire dal bordo inferiore o superiore. Fai piccole correzioni mentre procedi a incollare.

    • Ci sono dei fori negli angoli in basso a sinistra in alto a destra per aiutarti ad allineare l'adesivo.

  6. JIssKlOsKVaUXYbG
    JIssKlOsKVaUXYbG
    b2EcjNiejPrC1THR
    QZWmnK3We1HxXhjq
    • Usa uno spudger o le dita per premere lungo il perimetro dell'adesivo e incollarlo alla cornice.

    • Fa' attenzione a non danneggiare i connettori a molla vicino al perimetro della cornice.

  7. p6g4f2aoXmohTL3D
    p6g4f2aoXmohTL3D
    YCTnyydoSQdgID14
    vVlCP2ulLi5TkbwW
    • Afferra la linguetta in alto a sinistra sulla cornice e rimuovi la pellicola principale.

  8. H2CqVG2UNhwye1hM
    • Torna alla guida del tuo telefono e continua il rimontaggio.

    • Finisci questa guida quando il tuo schermo è installato e sei pronto a sigillare il telefono.

    My new screen came with a tab on the selfie camera opening. Remove before sealing!

    Alex Thengvall -

    Guide fails to add step or note to reinstall the metal bracket and screw sitting on top of the display cable connector. I followed guide and resealed my phone only to realize this was not mentioned and now my phone is sealed without the bracket..

    Derek -

    Hi Derek, we're sorry that an instruction was missed! In this case, which guide did you follow to continue reassembly?

    Clay Eickemeyer -

    Would be good to add some tips on re connecting the display cable connector - took a bit of fiddling.

    bogdan dobrin -

  9. VJbNash5eiqUZ2nA
    VJbNash5eiqUZ2nA
    kH4ewXTUg4ut5Uqr
    lKv6OushZQpTIKKX
    • Fai attenzione a non forare la batteria con le pinzette, poiché una batteria forata potrebbe far fuoriuscire sostanze chimiche pericolose o causare un incendio.

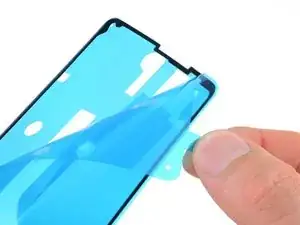
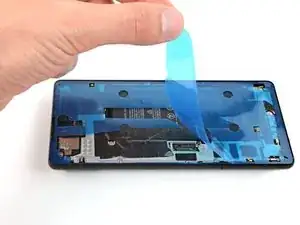
    • Afferra la linguetta in basso a destra della cornice e rimuovi la pellicola che copre l'adesivo intorno al perimetro.

    • Accertati di non sollevare anche l'adesivo insieme alla pellicola.

    Add an image of the screen already connected with the display cable. It should eliminate any confusions (it's way easier to fiddle connecting the display cable when you don't have to worry about touching the adhesive (like I did).

    bogdan dobrin -

  10. TkAkRLEQkKbKhBsk
    TkAkRLEQkKbKhBsk
    p2TE4fwBsRQVfLBH
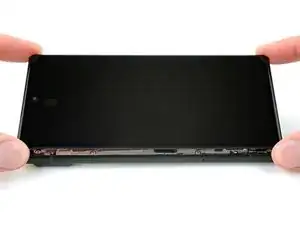
    • Capovolgi lo schermo e appoggialo sulla cornice.

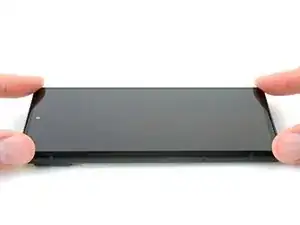
    • Premi lungo il perimetro dello schermo per fissarlo.

  11. NwAtTv6AriWRfDrA
    NwAtTv6AriWRfDrA
    3ZgBh3qGSwjGnKJZ
    c5oA2BK5vIbKFHo6
    • Per comprimere uniformemente il Pixel e rafforzare il legame dello schermo con la cornice, devi tenere conto della barra della fotocamera.

    • Se hai dei morsetti per lo schermo, puoi lavorare intorno alla barra della fotocamera. Fissa i morsetti al perimetro del dispositivo.

    • Incolla del nastro adesivo al perimetro del tuo schermo posteriore per proteggerne la rifinitura.

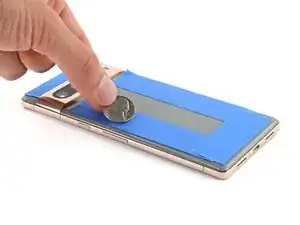
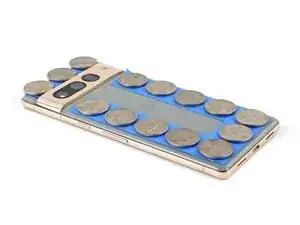
    • Posizione delle monete o altri oggetti dello stesso spessore lungo i bordi del vetro posteriore. Accertati che siano dello stesso spessore o più spessi della barra della fotocamera.

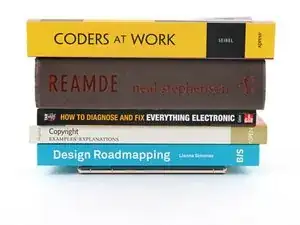
    • Impila diversi libri o altri oggetti pesanti sul tuo telefono. Lascialo in posizione per mezz'ora o più a lungo. Idealmente, lasciali appoggiati per tutta la notte.

    Would be useful to list these coins (spacers) as a requirement for the installation. Not everyone has coins or similar spacers around.

    bogdan dobrin -

Clay Eickemeyer

Membro da: 19/09/22

64925 Reputazione

13 commenti

Clear and to the point guide, which worked perfectly from the first go, kudos!

Ken Lammrtyn -

Why not align the adhesive with the liner covers on?

-Remove the display side of the adhesive then attach display to phone. Then adhesive should be lined up on the display and you should only need to remove the phone body adhesive cover and press the phone and display together.

Beau Ellerson -

Hi Beau! This is a clever idea. We've taken this approach with some simpler adhesives before. While I can't say exactly why it wouldn't work, I can assume that applying the adhesive the screen-side-first will make it more difficult to visually check that the adhesive lined up properly on the screen. It doesn't seem impossible for any reason, though.

Clay Eickemeyer -

where is the guide for reassembly?

Caspar Redgrave -

The exact guide depends on which phone you have. Click here for the list of Google Pixel 6 guides, pick the guide you were working on, and find where you left off!

Clay Eickemeyer -

This is an excellent guide, thanks for the effort.

For others who attempt this; getting rid of the old adhesive is really time consuming, it took me a good hour or so to get it all off the body and screen.

Oli -

Hello, i have purchased a screen repair kit for a pixel 6, after reassembly I noticed the proximity sensor is not working, any help would be appreciated.

Alexandru Mitrea -

I'm sorry to hear that your proximity sensor isn't working! This might be best handled by our customer service. Check out https://help.ifixit.com/ to get in contact with us, or see some troubleshooting steps.

Clay Eickemeyer -

Hi guys, just bought a kit after my screen came loose after a few knocks. What are the spring connectors on the Pixel 6, and what is their purpose? My screen works as of right now, but has no sensitivity on the upper third of the screen, and typing only picks up half the letters. I imagine it has to do with a broken digitalizer and not with these connectors, right?

Dani Cornes -

It could be due to an improper calibration. Try running your fingerprint calibration software again and, after making sure nothing has touched the screen during the process, reboot the phone manually after the process is all done. Problems with the calibration or not allowing the phone to reboot this additional time can cause touch issues with your new part.

Clay Eickemeyer -

When do you Plug the screen in and replace the little metal holder?

Melissa M. Miko -

Hi Melissa!

In this guide, this step is the point in which you'll return to your original replacement guide and continue reassembling your phone. This is where you'll reconnect the screen and install the metal bracket. Then, follow the rest of the steps to finish sealing up the screen.

Clay Eickemeyer -

Hi. The phone is now 2mm thicker than it was with the genuine screen, is that a normal thing?

Cyril -