Introduzione
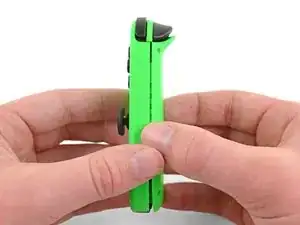
Il Nintendo Switch è equipaggiato di due controller Joy-Con. Questa guida ti mostrerà come sostituire il joystick del Joy-Con destro. La procedura per riparare il Joy-Con sinistro è diversa, quindi assicurati di seguire il set di istruzioni corretto per il tuo controller.
Nota che questa guida non prevede gli stessi passi rispetto all'intervento sul Joy-Con sinistro. Se stai cercando istruzioni per sostituire il Joy-Con sinistro, fai riferimento alla mia altra guida per maggiori dettagli.
-
-
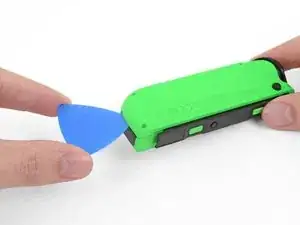
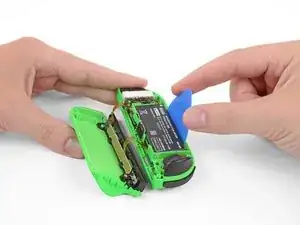
Inserisci uno strumento di apertura sotto il lato inferiore del pannello posteriore (lato opposto dei pulsanti R e ZR).
-
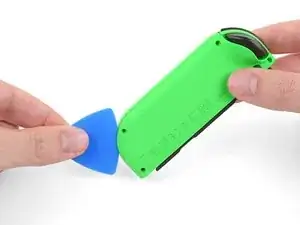
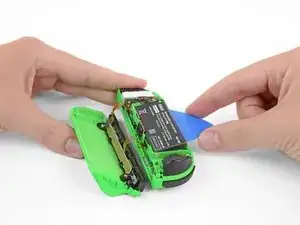
Fai scorrere l'estremità piatta dello strumento di apertura lungo il lato del Joy-Con.
-
-
-
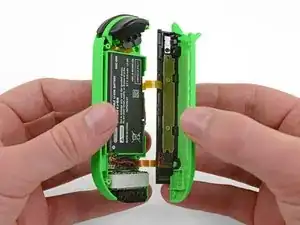
Apri il Joy-Con come se fosse un libro, con il binario della ricarica rivolto lontano da te.
-
-
-
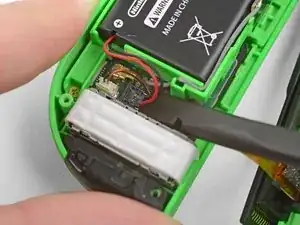
Usa uno spudger per staccare con delicatezza il connettore della batteria dal suo zoccolo sulla scheda madre. Questo impedirà che il Joy-Con possa accendersi nel corso della riparazione.
-
-
-
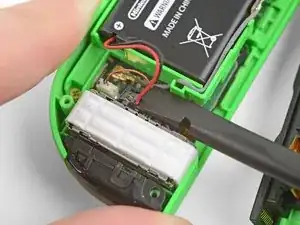
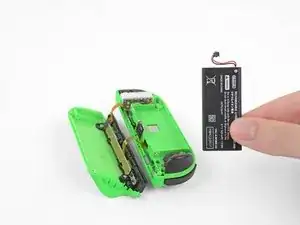
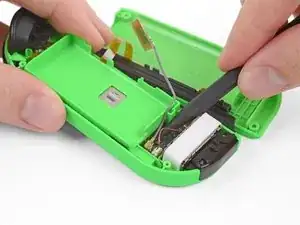
Inserisci lo strumento di apertura tra la batteria e l'allogiamento del Joy-Con. Con delicatezza rimuovi la batteria, che è tenuta ferma da un adesivo poco tenace.
-
-
-
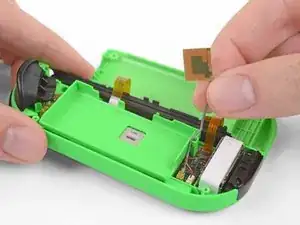
Con cautela sfila la metà superiore del cavo grigio di antenna dall'alloggiamento della batteria.
-
-
-
Con l'estremità a punta di un spudger disconnetti dalla scheda madre il cavo del connettore coassiale del cavo di antenna.
-
Rimuovi il cavo grigio dell'antenna.
-
-
-
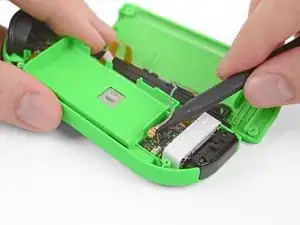
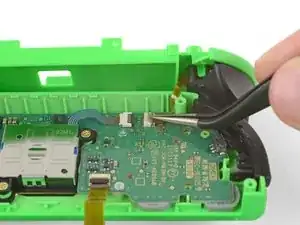
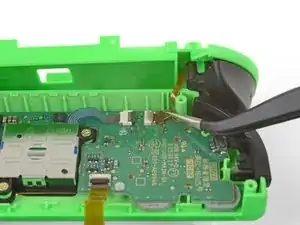
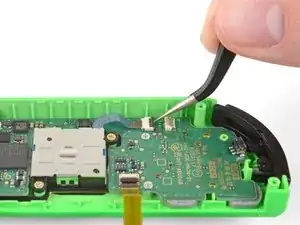
Il cavo del pulsante ZR è tenuto in posizione da un connettore ZIF sulla scheda madre. Usa delle pinzette o uno spudger per sollevare l'aletta di bloccaggio.
-
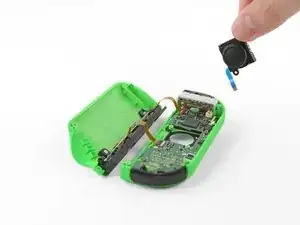
Usa delle pinzette per rimuovere delicatamente il cavo flessibile del pulsante ZR dall'alloggiamento nel socket ZIF. Ora il midframe è scollegato e può essere rimosso.
-
Se decidi di lasciare il cavo collegato, procedi con molta attenzione. Lavora lentamente e fai del tuo meglio per assicurarti che la scocca principale non si muova troppo durante l'esecuzione degli ultimi passi per evitare di danneggiare il cavo.
-
-
-
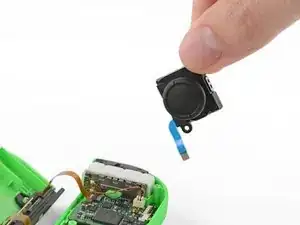
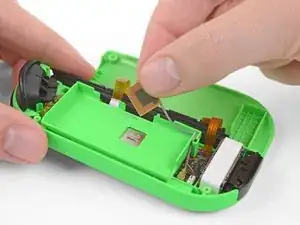
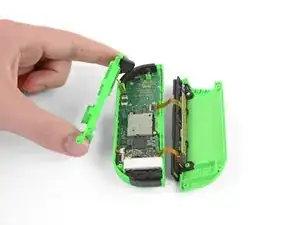
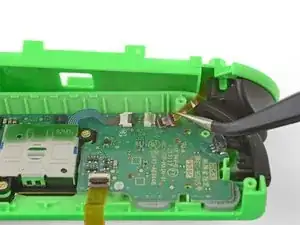
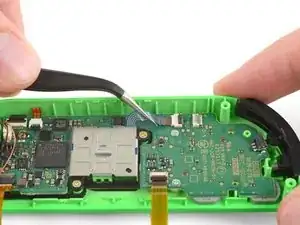
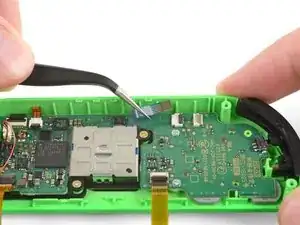
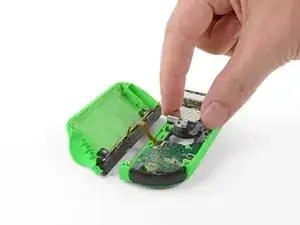
Il cavo del joystick è anch'esso tenuto fermo da un connettore ZIF. Usa delle pinzette o uno spudger per alzare l'aletta di bloccaggio e stacca con cautela il cavo.
-


Per riassemblare il dispositivo, segui i vari passaggi nell'ordine inverso.
Porta i tuoi rifiuti elettronici a un riciclatore certificato R2 o e-Stewards.
La riparazione non è andata come previsto? Dai un'occhiata alla nostra comunità Risposte per avere aiuto nel risolvere i tuoi problemi.

59 commenti
A good guide though for the antenna instead of disconnecting the cable it would be easier to simply slide out the plate and wire from the side of the battery tray
Agree with Tyler - no need to disconnect the antenna.
Thanks for the guide!
David K -
The antenna and battery don’t need to be disconnected, you can easily move them out of the way.
When reassembling, reconnecting the ribbon cable for the RL button is fiddly, easier if you can avoid disconnecting it as well. Just rotate the plastic battery plate a quarter turn counterclockwise to get it out of the way and access the analog stick.
You can test the controller immediately after seating the joystick to make sure the ribbon cable is properly connected.
I found it easier to remove the rubber cover over the joystick before changing it, and to remove it on the replacement before installing it. So that would be step 1 for me next time.
kmcrawford111 -
Si tienes cuidado no hay que desconectar nada. Sólo el cable del joystick, evidentemente, todos los demás se pueden dejar conectados, sobre todo el de la batería para que te ayude a probar si todo funciona antes de cerrar y atornillar todo de nuevo.
Te ahorras 15 minutos y muchas posibilidades de romper cosas.
Víctor SLB -