Introduzione
Il Nintendo Switch è dotato di due controller Joy-Con. Questa guida ti illustrerà come sostituire la levetta del Joy-Con di sinistra . La procedura per la riparazione della levetta del Joy-Con di destra è diversa, quindi assicurati di seguire la procedura corretta per il tuo controller.
-
-
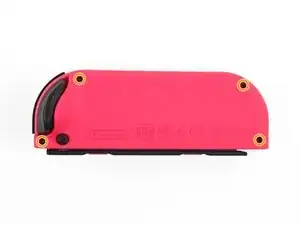
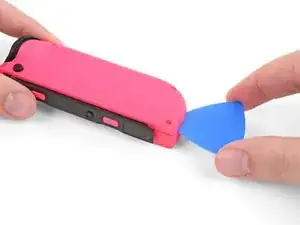
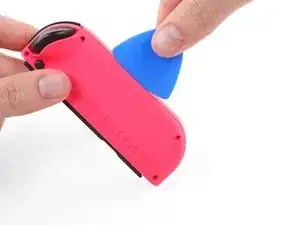
Inserisci uno strumento di apertura nella fenditura dell'angolo in basso del controller (opposto ai bottoni L e ZL).
-
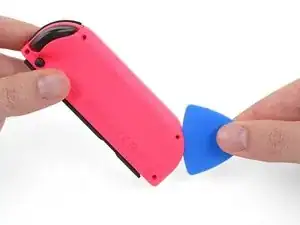
Lentamente fai scivolare il lato piatto del tuo attrezzo lungo il lato del Joy-Con.
-
-
-
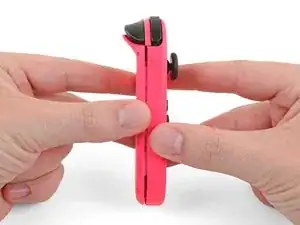
Con il binario per la ricarica girato nel verso opposto rispetto a te, apri il Joy-Con come se fosse un libro.
-
-
-
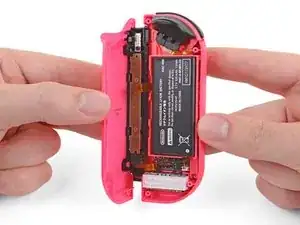
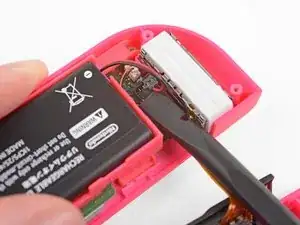
Usa uno spudger per sollevare delicatamente il connettore della batteria dal suo zoccolo sulla scheda madre. Questo eviterà che il Joy-Con si possa accendere durante la riparazione.
-
Durante il rimontaggio, premi il connettore direttamente nella sua presa sulla scheda per ricollegare la batteria.
-
-
-
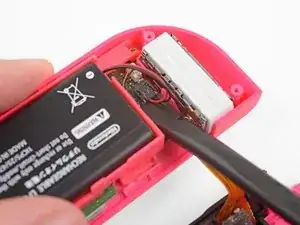
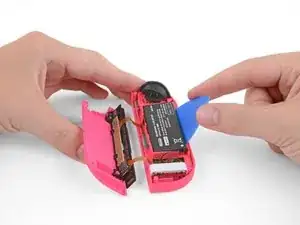
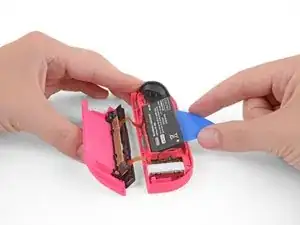
Inserisci uno strumento di appertura tra la batteria e la scocca del Joy-Con.
-
Delicatamente solleva la batteria, che è leggermente incollata.
-
-
-
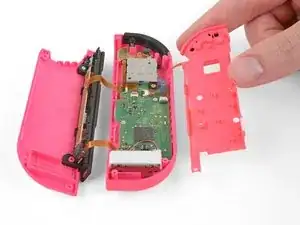
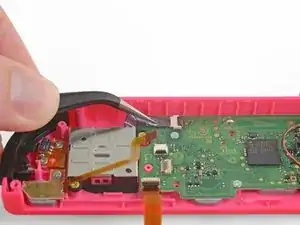
Capovolgi delicatamente la scocca, staccandola dalla scheda madre, come se stessi girando la pagina di un libro.
-
-
-
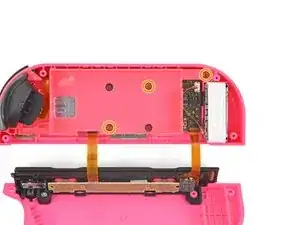
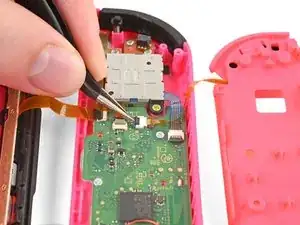
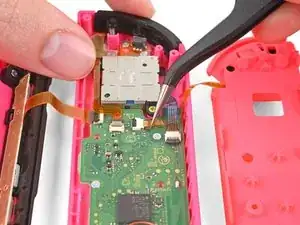
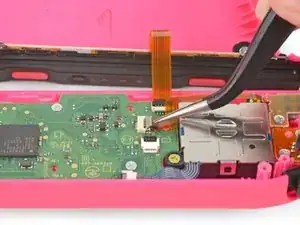
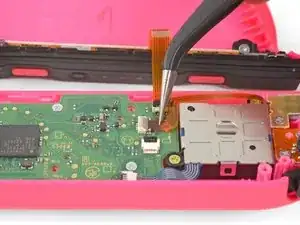
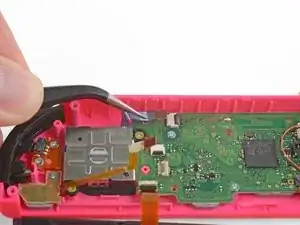
Il connettore del pulsante ZL è tenuto in sede da un piccolo connettore ZIF sulla scheda madre. Usa un paio di pinzette o uno spudger per aprire il connettore ZIF dalla parte opposta del cavo.
-
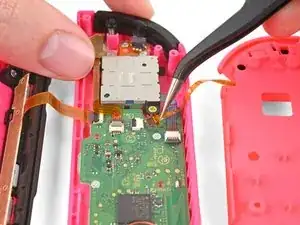
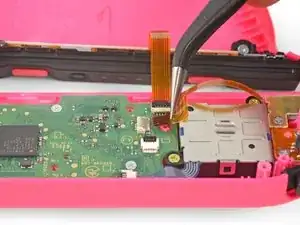
Usa le pinzette per tirare fuori delicatamente dalla sede del connettore il cavo flessibile del pulsante ZL. Ora il midframe è scollegato e può essere rimosso.
-
-
-
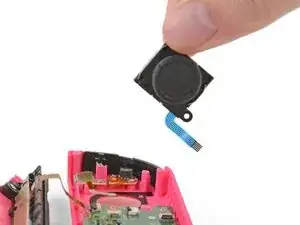
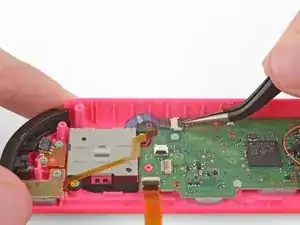
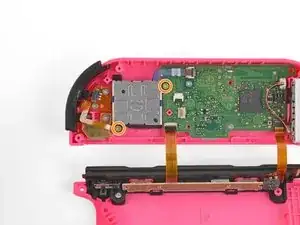
La levetta è tenuta in sede da un ultimo connettore ZIF. Delicatamente solleva il blocco del connettore ZIF e scollega il cavo.
-

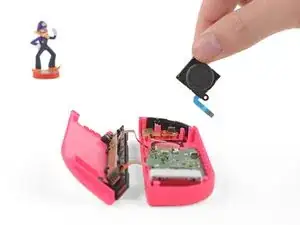
Per riassemblare il tuo dispositivo, segui le istruzioni precedenti nell'ordine inverso.
Porta i tuoi rifiuti elettronici a un riciclatore certificato R2 o e-Stewards.
La riparazione non è andata come pianificato? Dai un'occhiata alla nostra comunità Risposte per trovare aiuto nella risoluzione dei problemi.

149 commenti
Thx This really helped
Thanks Kyler - I just replaced 4 joysticks and they’re all working perfectly.
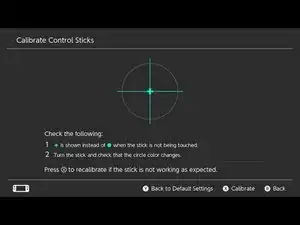
One final step to remember to go in and calibrate the controller.
David K -
You're welcome I'm glad I could assist you in your repairs!
Thanks. This was just the right amount of info and now my left stick drift is gone….for now.
I would recommend at least once a month take a can of compressed air and spray the joystick internals to clear it of any dust or debris.
Try-Point screws are not magnetic
Ramon Sanchez -
Si vous avez des difficultés à dévisser les 4 vis, vous pouvez chauffer les 4 vis avec un sèche-cheveux pendant 1 à 2 minutes.
olivier pepito -
une des vis me résiste, et le sèche cheveux n’y change rien. avez vous une autre solution ?
quentin.roehn -
These tri-point screws are very easy to strip—be careful!
Jared Cook -
Si tienes cuidado no hay que desconectar nada. Sólo el cable del joystick, evidentemente, todos los demás se pueden dejar conectados, sobre todo el de la batería para que te ayude a probar si todo funciona antes de cerrar y atornillar todo de nuevo.
Te ahorras 15 minutos y muchas posibilidades de romper cosas.
Víctor SLB -
No es recomendable trabajar en electrónicos que tengan corriente/voltaje através de los componentes. Como mínimo deben desconectar la batería.
John Penaranda -
Die 4. Schraube lässt sich nicht rausdrehen. Den Föhntipp hab ich versucht. Gibt‘s weitere Lösungsvorschläge bitte?
gudrun_oberleitner -
I can't get the last screw out either, stripped it...
Valentine Briese -